
A Tudor Suit - The Doublet
/Recently, I completed a full suit of clothes for a Tudor apprentice. That is to say, I made the doublet, hose and pourpoint for Sam, a young man portraying an apprentice to a sword school in 1588 at Kentwell Hall in Long Melford, Suffolk, which you can see more about on my Tudor page.
This is the second post in a series about the suit and mainly describes making the doublet, although also the reasons for and making of the pourpoint used by many men at Kentwell Hall.
A Simple Doublet
In making a doublet for a working man in 1588 there are many traps to fall into, some of which are contradictory.
It is often thought, by those who have not sat and thought about it, that people in the past only wore drab, old and torn clothing, especially if they were not “rich”. By rich they often mean not royalty or gentry. Similar to our own time, then those who are not “rich” would include at least 90% of the population and encompass merchants, farmers with large farms, tradesmen in well paid industries as well as farm labourers, construction workers and vagrants. I propose that human nature has not substantially changed in 400 years, or 4,000 for that matter, and that the sons, daughters and wives of the more wealthy men (that bit of social arrangement has changed I am glad to say!) would not consider wearing the same style and quality of clothing as the labourers and vagrants. Today, even those who are officially in poverty strive to look clean, smart and “well turned out” within their means. So Sam the Apprentice was not going to be wearing a baggy, raggy jacket with no sign of the structure and stiffening so beloved by the Elizabethan age.
Another pitfall to avoid is over ornamentation. In looking at portraits, we often only see the very best suit of the very wealthy who could afford luxuries like silk, brocade, jewellery, and ribbons or braid woven with precious metals. They would invest in the most ornate embroidery in dense designs and wear it for the portrait. An apprentice is a young man just setting out in life. He has some hard work to do to learn whatever trade has been chosen for him, so is not likely to be wearing the most ornate clothing he will ever own in the future, regardless of the potential wealth to come. No “bling” is required in this outfit then.
So a balance was required between satisfying the human tendency towards attractive colour and texture combinations, looking good in well made clothes and not overly ornamenting the clothing. Based on this, I decided a simple doublet shape, with a moderately high waist, no front peak and no peascod front would work well. This looked suitably workman-like but could be structured to give a “well-made simplicity” look. To achieve the attractive colour combinations, I made cloth buttons using the red fabric from the hose (described in the previous post) and a soft, creamy chamois leather edge binding at the front closure. Shoulder wings increase the apparent width of the shoulders - again a favourite aspect of Tudor and Elizabethan men’s clothing.
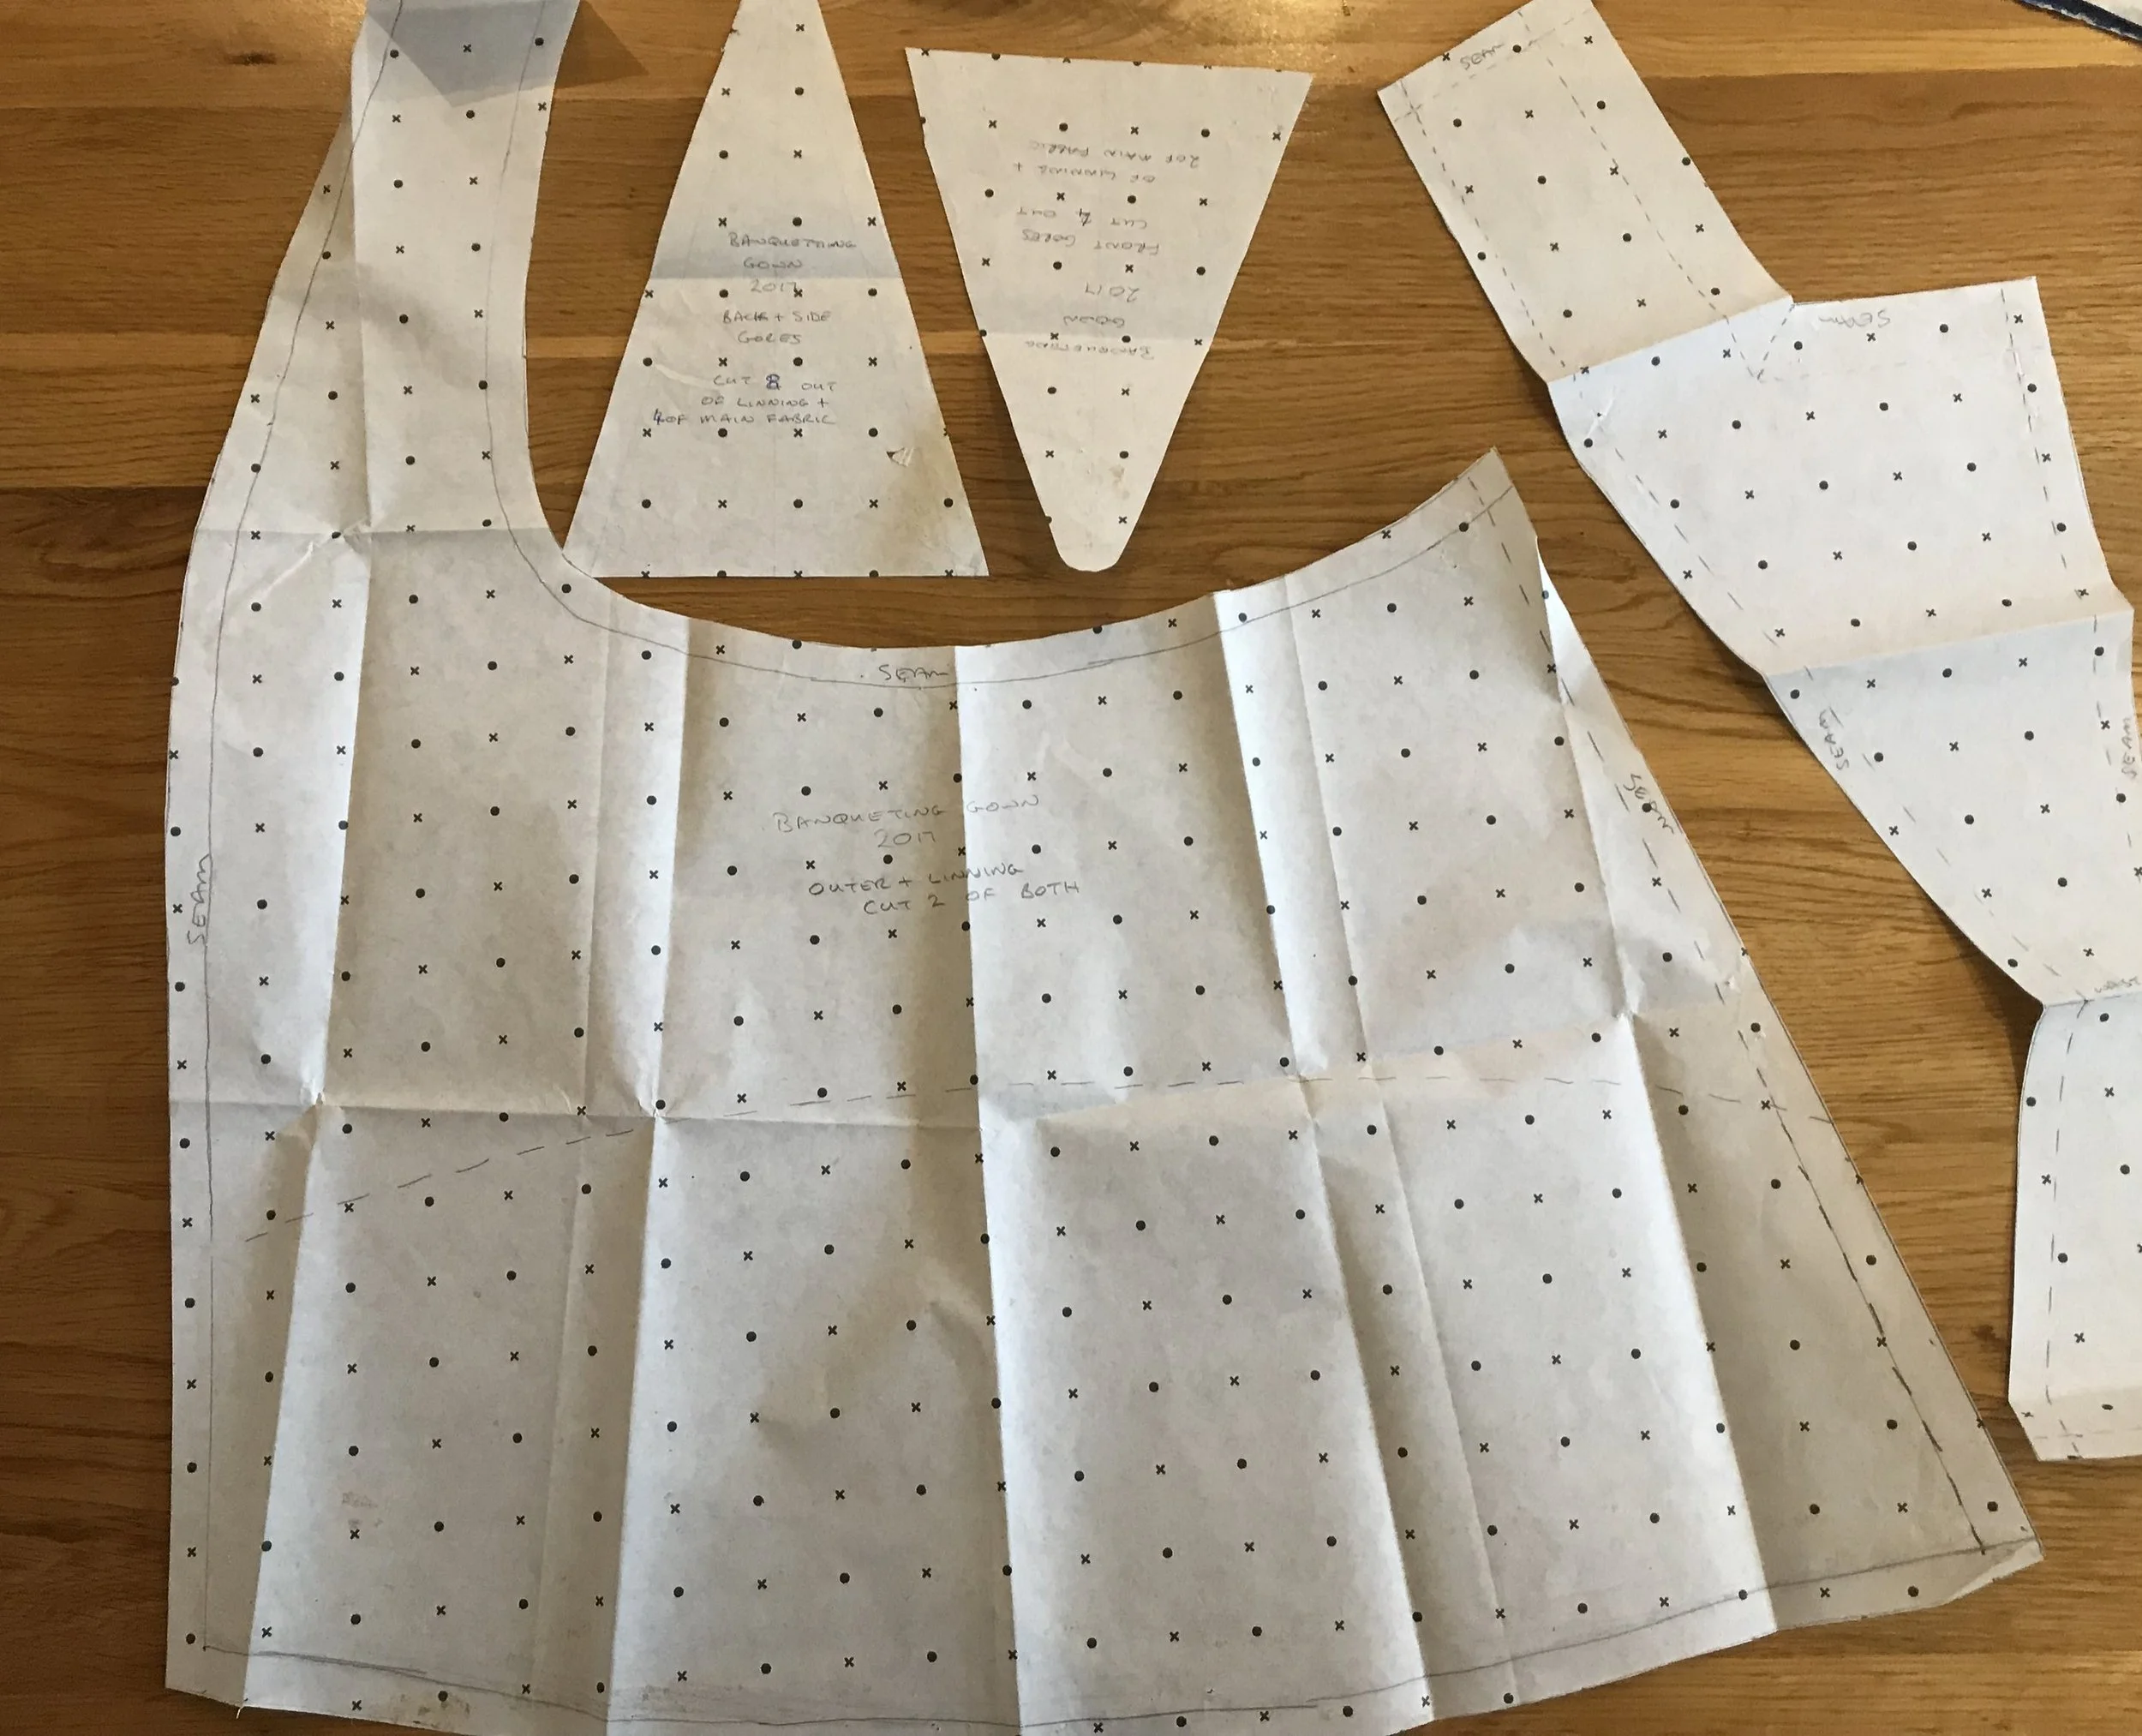
The Pattern
To provide a pattern, I looked through the ones that I have used from several books, including “Men’s 17th Century Dress Patterns”, “The Tudor Tailor”, and “Clothes of the Common People in Elizabethan and Early Stuart England”. In the end I chose a basic body and sleeve pattern from “The Modern Maker 2”, the book of patterns. This I adjusted to have a separate collar and no front peak and no peascod shaping.
Since a doublet is such a fitted garment, sitting close to the body and often shaping the body, it was essential to have a fitting. Unfortunately I was only going to be possible to have one face to face fitting for the doublet, mainly due to the distance between Sam’s home town and mine (450 miles) but also due to the limited time between confirming that Sam had been accepted for Kentwell and the actual event. So I made a toile (a mock-up) in some nice stiff curtain fabric that my mum gave me - please forgive me the lurid colours, although Sam’s reaction was “Ooo, can I have that fabric”!!!
The fitting went well - it is in a tent at an event halfway between each home town, so the colour balance is poor - and there are some things that you can see in the photos and some that you can’t.
Firstly, the collar and shoulders are squint because I only put one sleeve on and it dragged the toile in that direction - a decision for speed that I regretted as it would have hidden a true bias to one side. Secondly the sleeve has a gap at the back seam - this was due to a last minute decision to increase the side seams based on a comment from the a previous fitting of the pourpoint. I did not take the time to alter the sleeve pattern which takes longer than adding 1/2” to the side seams.
Putting these aside, the back fitted very well and I was happy with that. The slight bulge at the bottom of the back looks larger in the photo than it was really. The sleeve was massively too long and is folded back here twice. It was also too narrow down its whole length, but that would be fixed by the extra width in the armhole. The front was mostly fine but Sam felt it was far too tight when pulled across to pin.
There were too faults that are hard to see in the photos but that I have now found several times with Matthew Gnagy’s doublet patterns - they seem to be style choices or specific fittings choices. The collar sits too high at the front to comfortably close under the chin if you follow the neck hole instructions. One of my clients has suggested that this is to support a ruff or ruffled shirt collar when left slightly open and that may indeed be the case. In this instance, a lower front neckline was needed. The second common fault is that the front of the armhole, even when fully clipped and turned, is too tight for easy movement forward of the arms - a disaster in a sword school apprentice!

The doublet toile front

The doublet toile back
Making up the doublet body
As shown in book 1 of “The Modern Maker”, the inner structure of the shoulders in the doublet came from pad stitching wool sections to the canvas interlining. In this case, scrap wool from the “cabbage” left over from previous projects and tailor’s canvas from William Gee and Co. The tailor’s canvas has a rough, grippy surface the really secures wool and silk outer fabrics and I like working with it as a support layer for the outer fashion fabric.

Shoulder pads before shoulder pads were invented
The interlining is tacked to the outer wool before the seams are stitched to hold all the layers still during stitching. Also, the doublet skirt and lacing strip are installed when the side seams are done, leaving a rough looking and bulky seam along the bottom. This worried me until I had trimmed and hand stitched the seam flat to the body of the doublet - being careful not to stitch through to the outside of the wool - and this made the skirt lie straight and the seam flatten out.
The skirt was made from segments drafted using the pattern in “The Modern Maker”. Although drafting the patterns was tricky, it worked quite well. To save time in the construction, I machine stitched the lower hem and turned the skirt through before attaching the open edges to the doublet body, In the photo you can see the top stitching done as pick stitch on the outside to make the lower hem lie flat, to look like a hand stitched lining and to add some detailing. I am glad I did it this way, as attaching the curved lining to the curved outer by hand would have been very tricky indeed. Something to try on a different project maybe.

Side seam, skirt and lacing strip
The Collar
To provide the look of an Elizabethan tailored doublet, the collar needs to be stiff and self supporting but soft enough to wear comfortably. In this case I chose to pad stitch a wool lining to a piece of buckram that already had a curve. The buckram on its own would not survive the kind of wear and tear a jacket collar gets, could form a crease or might have a sharp feel to the wearer. Stitching the wool to it softens the feeling on the neck but also provides the long lasting shape needed to keep it looking good several months in. To save time, I tried machine pad stitching this one - on the photos below you can see vertical lines of stitching. To do this, I held the two collar sections together by hand and, starting at one end, stitched across the collar, moved to the next row but keeping the curve firmly in place and repeated the stitching. Towards the end, with nearly the whole collar length curled up under the machine arm, this was quite tricky. However, I have received the doublet back, to add extra button holes to the turn back cuff, after a full week of daily wearing in VERY hot weather and the collar still looks stiff and smart, so I declare that a success.
Next time I would make the lines of stitching closer together but otherwise I will do exactly the same again.
To attache the collar, I stitched the wool outer to the doublet neck hole and then turned and tacked the outer over the inter-lining I just made.

Machine pad stitched collar

Attaching the collar
Of Buttons and Buttonholes
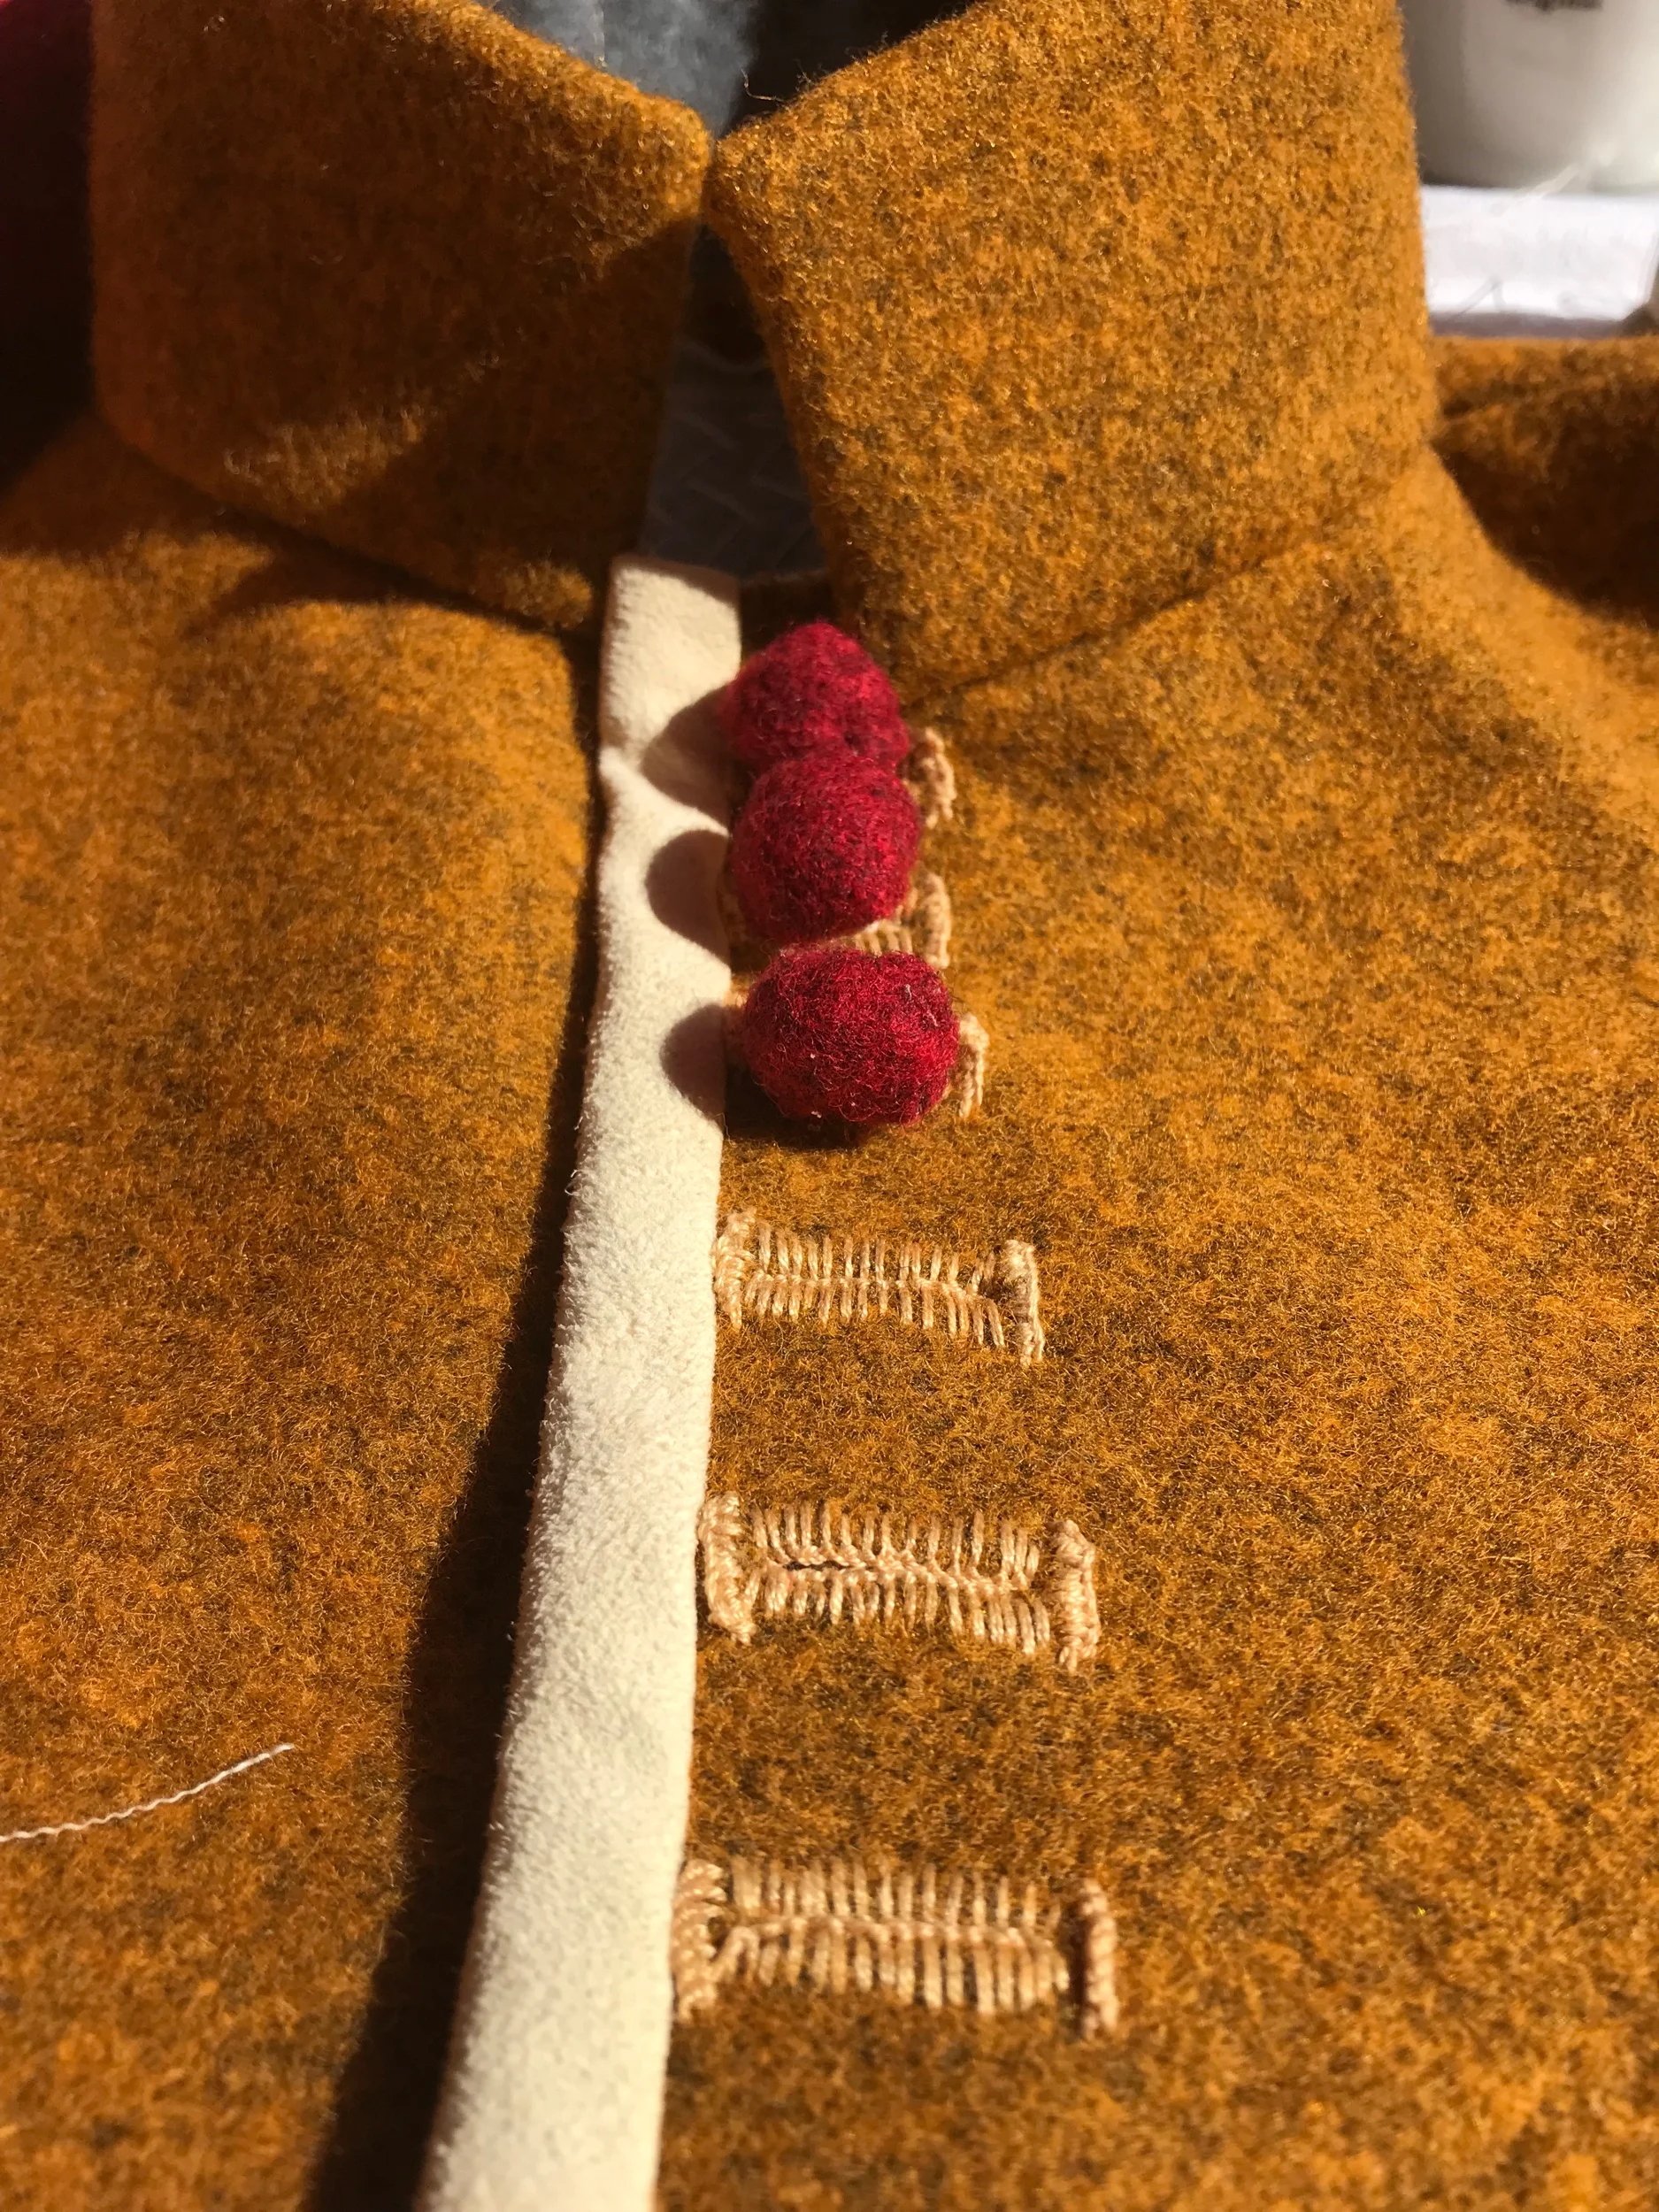
The next part was to edge the front of the doublet. The white strip visible is chamois leather. This seems like an odd choice until you know some things. (1) the edging is not simply decorative - it forms the smooth, firm lining inside the doublet front that will take the buttonholes. That area needs to be lined in something that will not fray or become weak with lots of needle holes (tear along the dotted lines is not a good way to lose a buttonhole!), so chamois leather seemed like a good choice; (2) it was the best material for the job that I had to hand and I had some off-cuts from breeches pockets that were the perfect shape and; (3) I loved the colour contrast. Leather was much more common in clothing in the past. We think of it as a luxury material now but previously it was just one more material as easily available as woven fabric.

The chamois leather edging

Stitching down the inner buttonhole strip
Then on with the sleeves.

Tudor doublet back view
And the button holes and buttons. I made cloth buttons for this doublet, mainly due to the appeal from Kentwell for more cloth buttons - anyone who has read the maker notes will understand what I mean! They look good made in the fabric that the hose were made from. The thread for the button holes is actually a cotton but processed to look like embroidery silk. It is thicker than standard embroidery thread, which is important for how the buttonholes look - if the thread is too thin they can look spidery or very dense. With a thicker, glossy thread, you can get an even spacing about the same width as the thread and then it looks like original buttonholes on surviving garments. There are several good Youtube videos on making buttonholes but not many start by telling you about the thread thickness and spacing.
Buttons and buttonholes
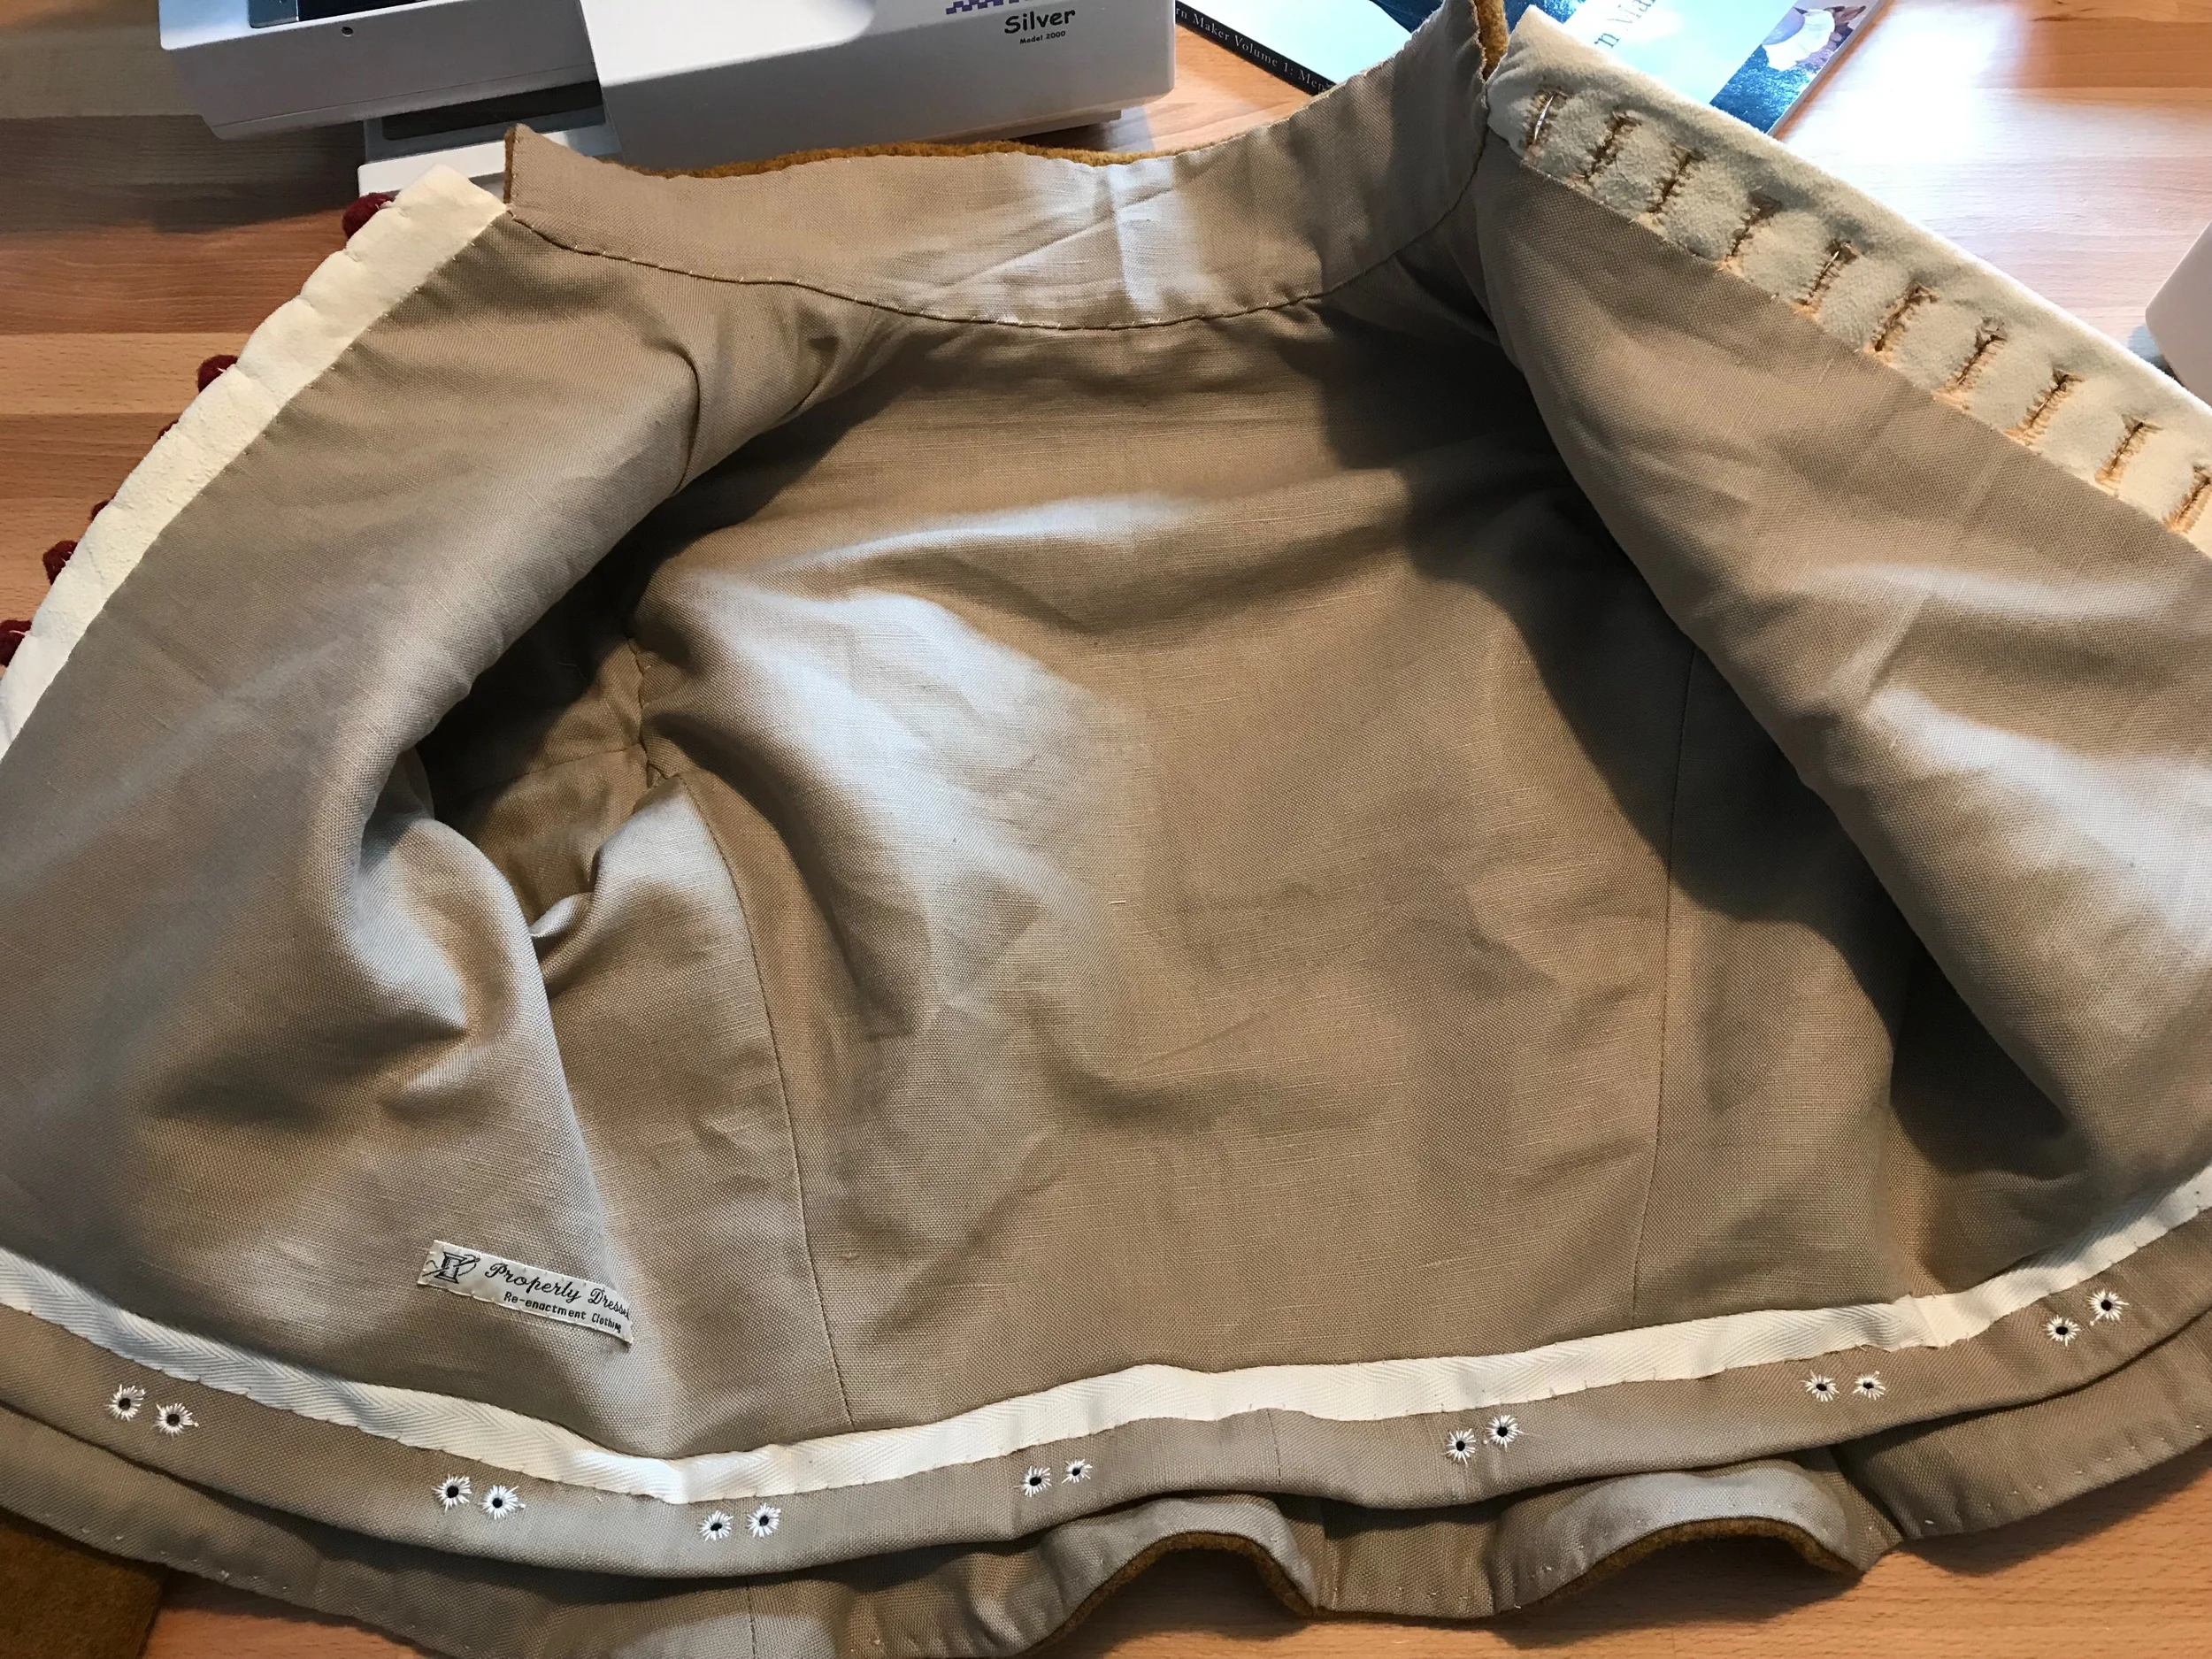
Finally the lining
The last thing to go in is the lining, all stitched in by hand. The sleeves were made with the lining already in, as was the skirt area. So the last things are the collar and the body lining. Notice that the lining does not go near the buttonholes. That was so that the lining (the weakest layer and the one nearest to the sweaty body) could be easily changed without ripping out the buttonholes. The pairs of eyelets around the lacing strip are matched by eyelets in the waistband of the hose and the two are laced together with ribbon or woven laces, called points.
Fully lined Tudor doublet

The finished Tudor Doublet
The doublet was now ready to go to its new owner, who wore it in 28 degree heat - remember that in the UK that is freakishly hot and we all melt like ice-creams - and claimed that he had great fun doing so. Interestingly the pourpoint, although he never worn it on its own, seems to have helped.
The Pourpoint
I have mentioned the pourpoint several times without really indicating what it is. In effect, it is like a modern waistcoat, made of two layers of linen, worn over the shirt and under the doublet and is used to lace the hose to instead of the doublet lacing strip. Its forefather was the medieval garment for the upper body that the tight, full length hose were laced to. Since the laces were called “points” this was “for points” or, in cod French “pour points” or pourpoint. Sometimes the earlier garment was called a petticoat - as in the French term for a “little coat” or “under coat”.
There seems limited evidence of this garment on display in Elizabethan paintings or woodcuts, with farm labourers working in singlets or doublets but never just a shirt. To work in just a shirt was uncouth, uncivilised and - probably - far too cold since there were several cold spells in the late 1500’s and early 1600’s.
Wind forward to modern men taking part in a living history event in full summer heat in the 2000’s - men not used to formal clothes and certainly not the numbers of layers worn in earlier times. The Kentwell insistence on a pourpoint looks like an attempt to provide decent coverage with minimal heat retention. However, the report from this suit was that Sam could wear all the layers (shirt, pourpoint holding up hose and then doublet) and then “flap the doublet bottom to get air around the body” which the other men on the sword school could not do since their doublets hold up their hose. So who knows, maybe all the paintings show only the outer layer and there are pourpoints hiding under them too!

The poupoint and hose

Sam looking splendid