Creating a Banqueting Gown Part II
/
“Seventeenth Century Women’s Dress Patterns” showing the original bodice
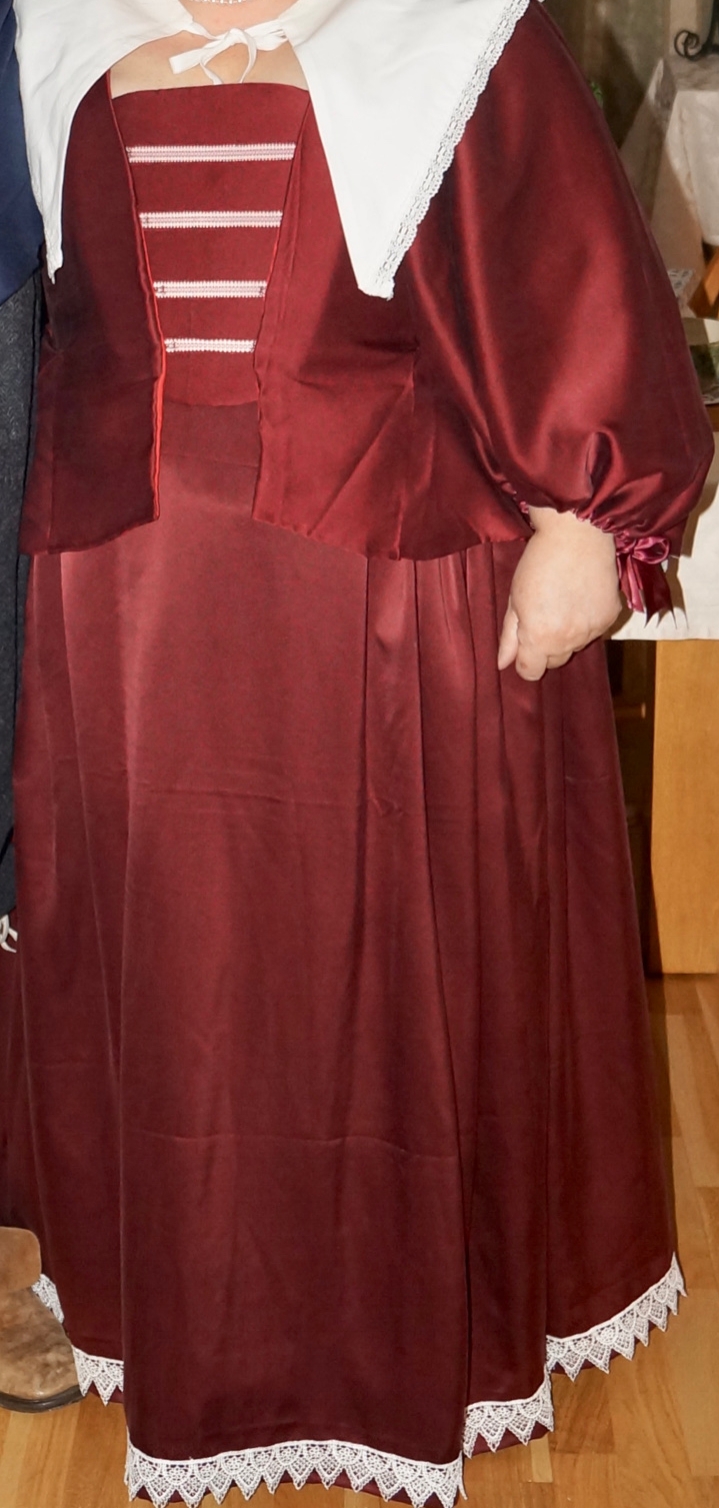
Gown showing the skirt
In my last blog post, I talked about starting the process of making the gown pictured here. In this one, I will continue the story.
Scaling up the pattern
In any project, there comes a stage when you have to get down to the serious work. In turning the gift of a length of fabulous garnet coloured silk into a banqueting gown, this stage is turning a pattern from a book into a full-sized pattern. The fun part of choosing a style was over, now for some serious arithmetic and engineering. Fortunately, engineering was my training, so scaling things up holds no fear for me.
Know your numbers
The first key to turning a small-scale drawing in a book into a full-scale pattern is to understand that you are not the same size as the original full scale person. You may be taller (I am almost certainly shorter!), or slimmer (I am definitely fatter!) or more ample in the bust (well maybe!). So you need two sets of key statistics: your size and the equivalent size of the original person.
Finding the stats of the original person can seem impossible; we can’t ask their tailor or measure them as they lived over 300 years ago. However, the original garment holds the clues.
The first, the bust measurement, is usually easy to find as it is the sum of all the parts measured just under the armhole. This gives you one of the key stats that you can measure on yourself too. Remember that this is measured with your corset on not “au naturale”.
The second, the waist, can be harder to locate on each separate pattern piece. However, it is important to understand the relative ratio of bust to waist on you and the original person. Otherwise your scaled up pattern will be too loose or too tight in one or other location. This is with your corset on too.
Finally, you need some height indicator. Was the original lady longer in the back compared to you or shorter? This is the hardest to infer because much of it relies on the style of the bodice. In the 1630’s, when this bodice was created, high waist lines were popular so both the waist measurement and the nape to waist measurement were at what felt like an unnaturally high location when I did this scaling.

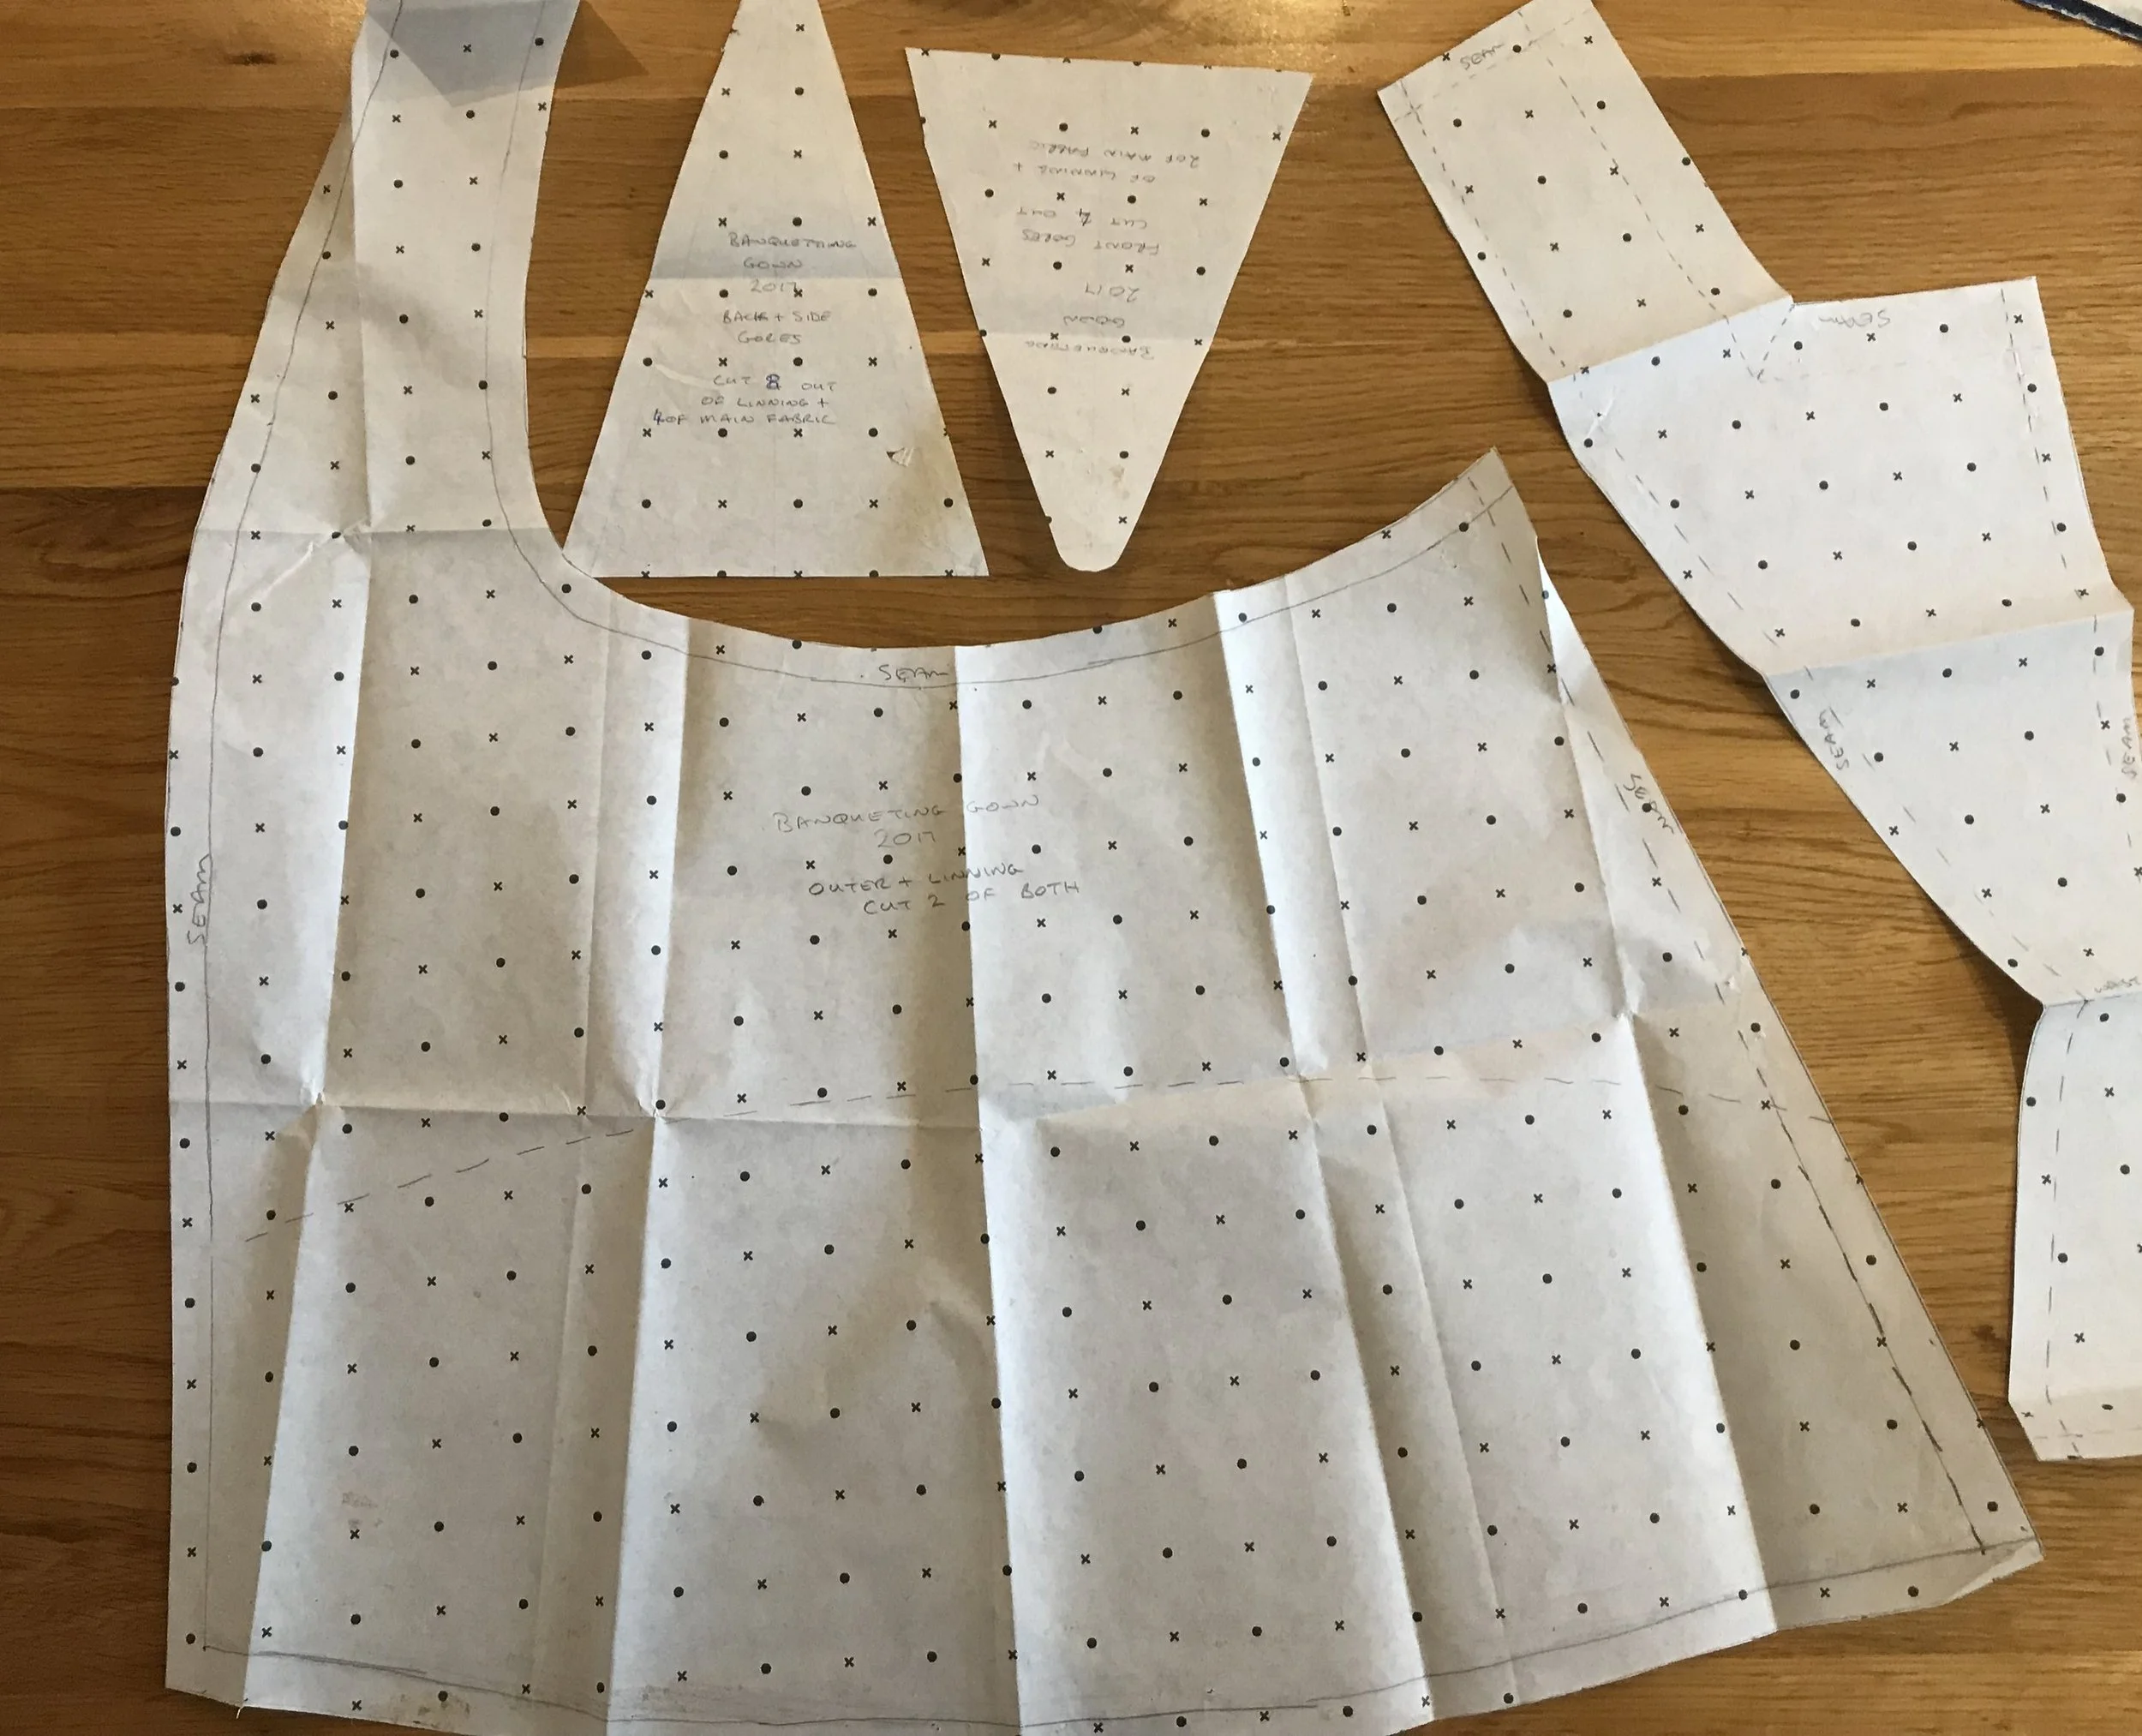
Pattern pieces for the canvas inter-lining
Scaling each piece
So now you have 6 key statistics. They form three pairs that are a ratio - her : me (you).
In my case, the book patterns were drawn carefully to scale on a squared background. That made identifying the other measurements easy - one square = 1/2” (1:4)
I chose the back panel to start with because it has a straight, vertical line from which to measure outwards. I identified the critical measurements on that piece - the length of the straight edge, the width at the base, the width at the neck line. the width from the back line to the top of the angled section, and so on. Each critical measurement has to be scaled by the pattern scale and the relevant key ratio. For example, the base width as measured in the book must be multiplied by 4 for the book scale but also by the ratio her : me (you).
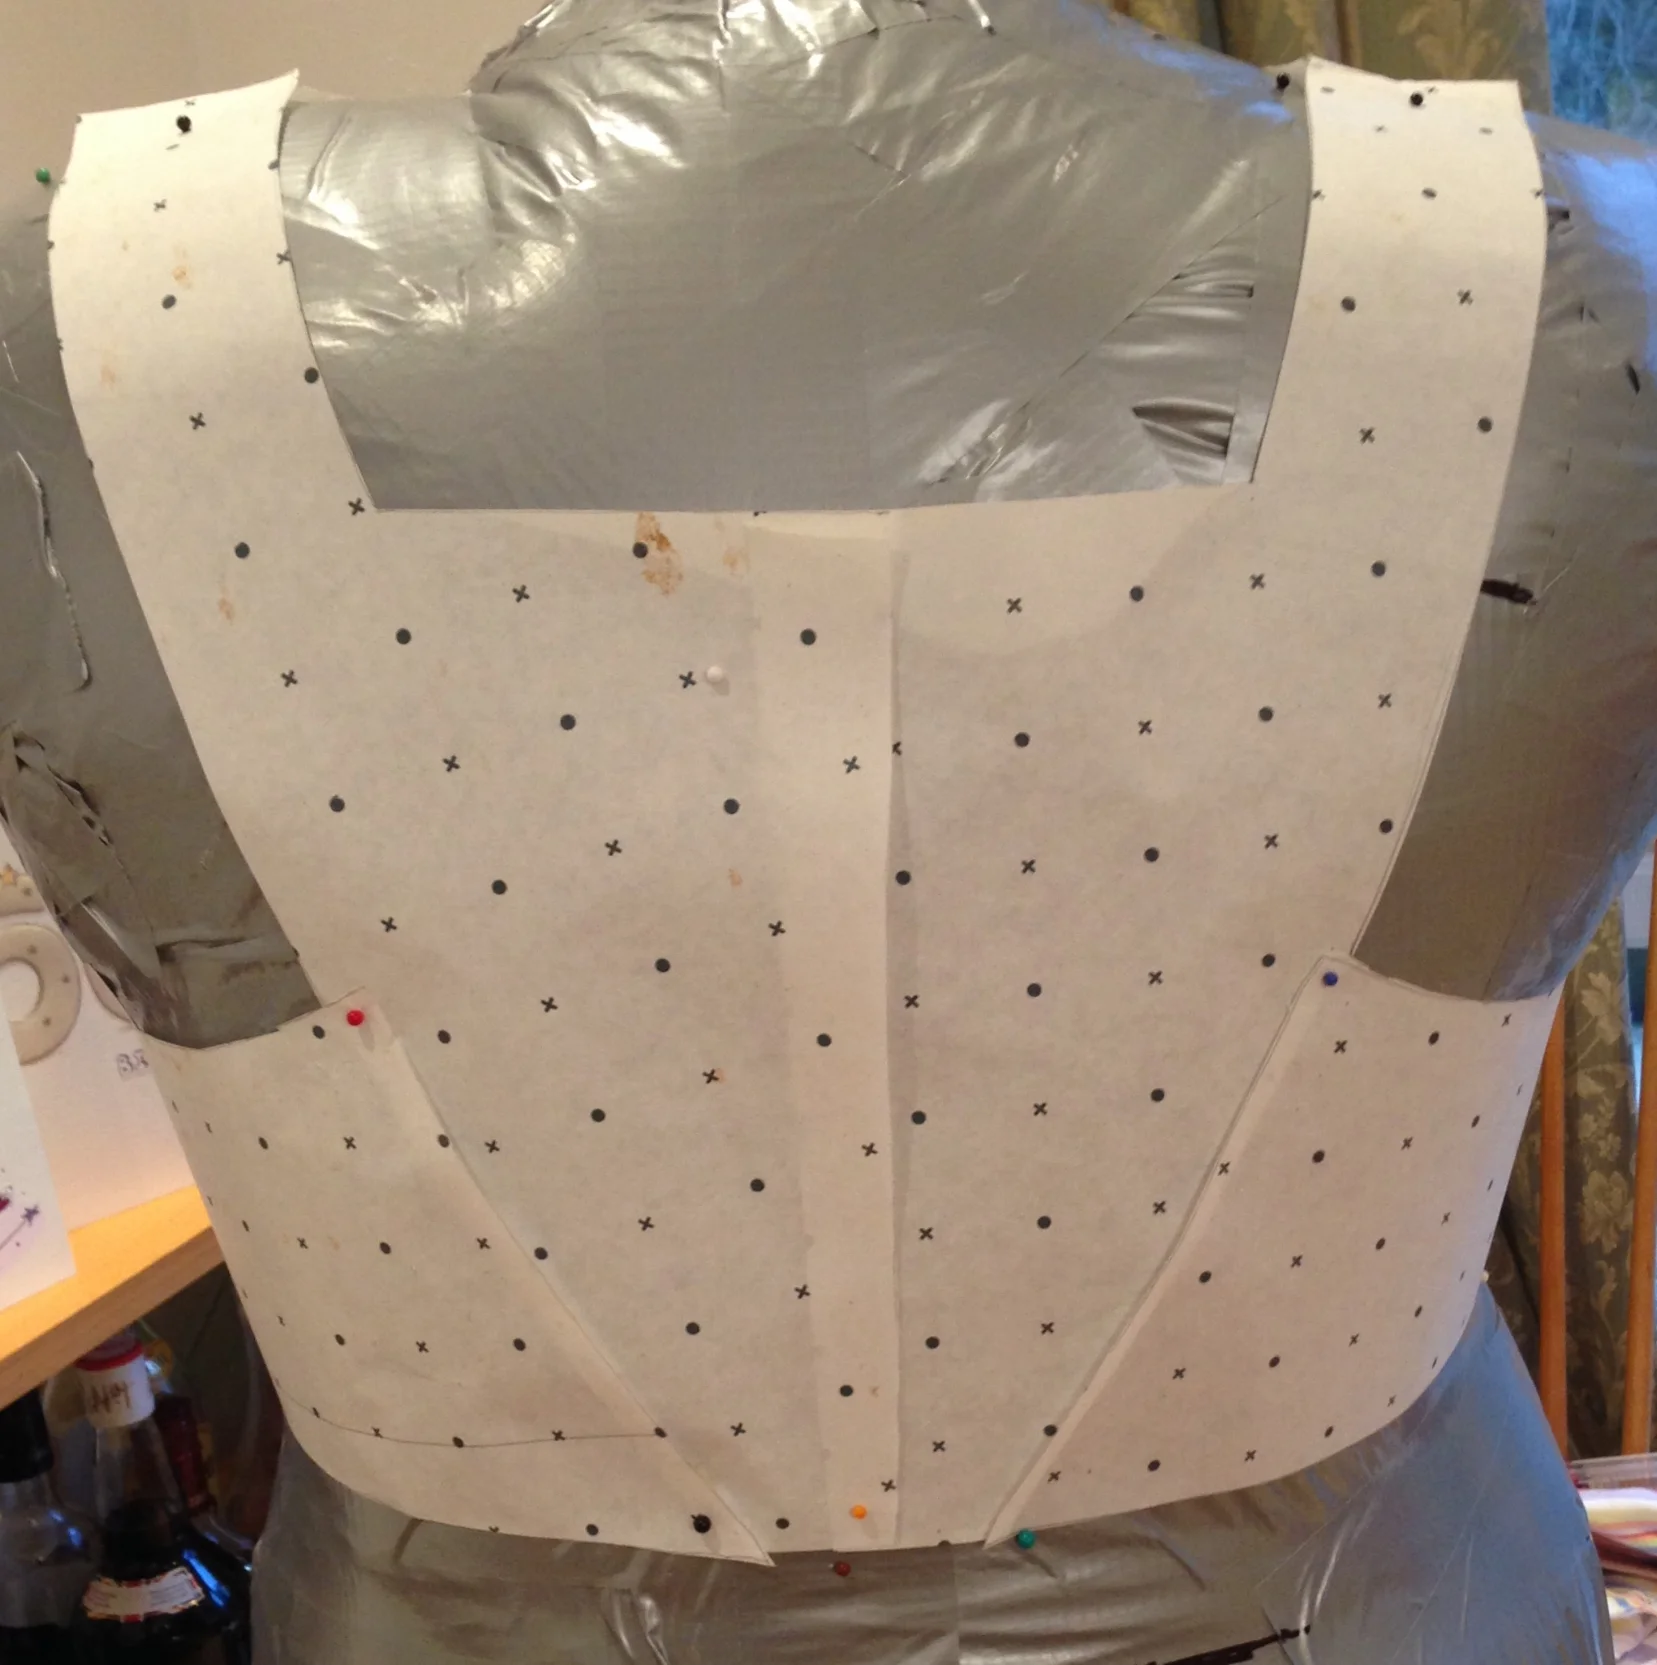
Now comes the first use of the tailor’s dummy that I described last week. Instead of making one pattern piece for each half of the bodice, I cut out all the pieces required to make the body of the bodice and pinned them to the dummy. This allowed me to check that the total waist and bust measurement were right, the length was right and to adjust the shoulder strap length. I was pleased to find that few modifications were required. I did add a little more seam allowance on the side panels but in essence this check confirmed the effectiveness of my arithmetic.
The next step was cut these pieces out of the canvas interlining, lining and padding shown in the book.
The revolutionary thing about the “Seventeenth Century Women’s Dress Patterns” is that the editors have tried to work out how the original items were constructed as well as the pattern.
In the next post I will show how this process worked for my dress.