
Creating a Banqueting Gown Part III
/This blog follows the making of a 1630’s styled dress out of a gift of beautiful garnet coloured silk. The previous posts discussed finding the style and pattern, making a cheap tailor’s dummy or dress form and then scaling up the pattern from the book size.
At this point I want to define some terms. Why do I keep saying a “banqueting” gown? It is not a word that would have been used in the 16th or 17th centuries and does not define a style of dress. In fact, it defines the modern use that I will put the dress to and its claim to authenticity. In modern re-enacting, your costume can be:
“theatrical” - looks good from a distance but is made of modern fabrics and has zips or velcro or other modern conveniences
“battle” - has the right look, is made from exactly the right materials (100% wool has a fire suppressing quality that makes it essential around black powder weapons and camp fires) but can be mass produced
“authentic” - the real deal, so to speak. Often hand sewn, made-to-measure from natural fabrics and sometimes dyed using original dyes as well. These are made from the currently accepted “correct” pattern for an item and are often essential in living history when in close contact with audiences
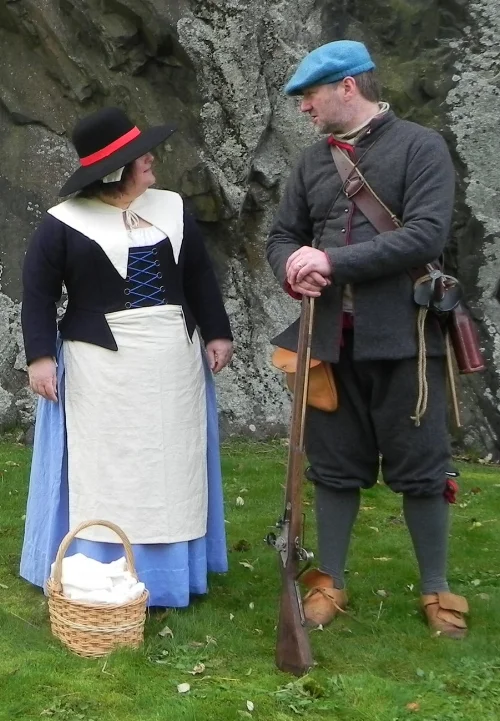
“banqueting” - purely for fun! These items are for attending regimental or multi-period feasts, banquets or other entertainments with other re-enactors. Usually more authentic than “theatrical” but you can allow both your imagination and your budget to control the tendency towards “authentic”.
Between Battle and Authentic

Banqueting Wear
Banqueting wear often looks more sumptuous and high class than you would be allowed to wear in a re-enactment setting. It can have some of the cheats and conveniences of theatrical and you can choose how authentic the pattern and fabrication methods are to suit your personal taste.
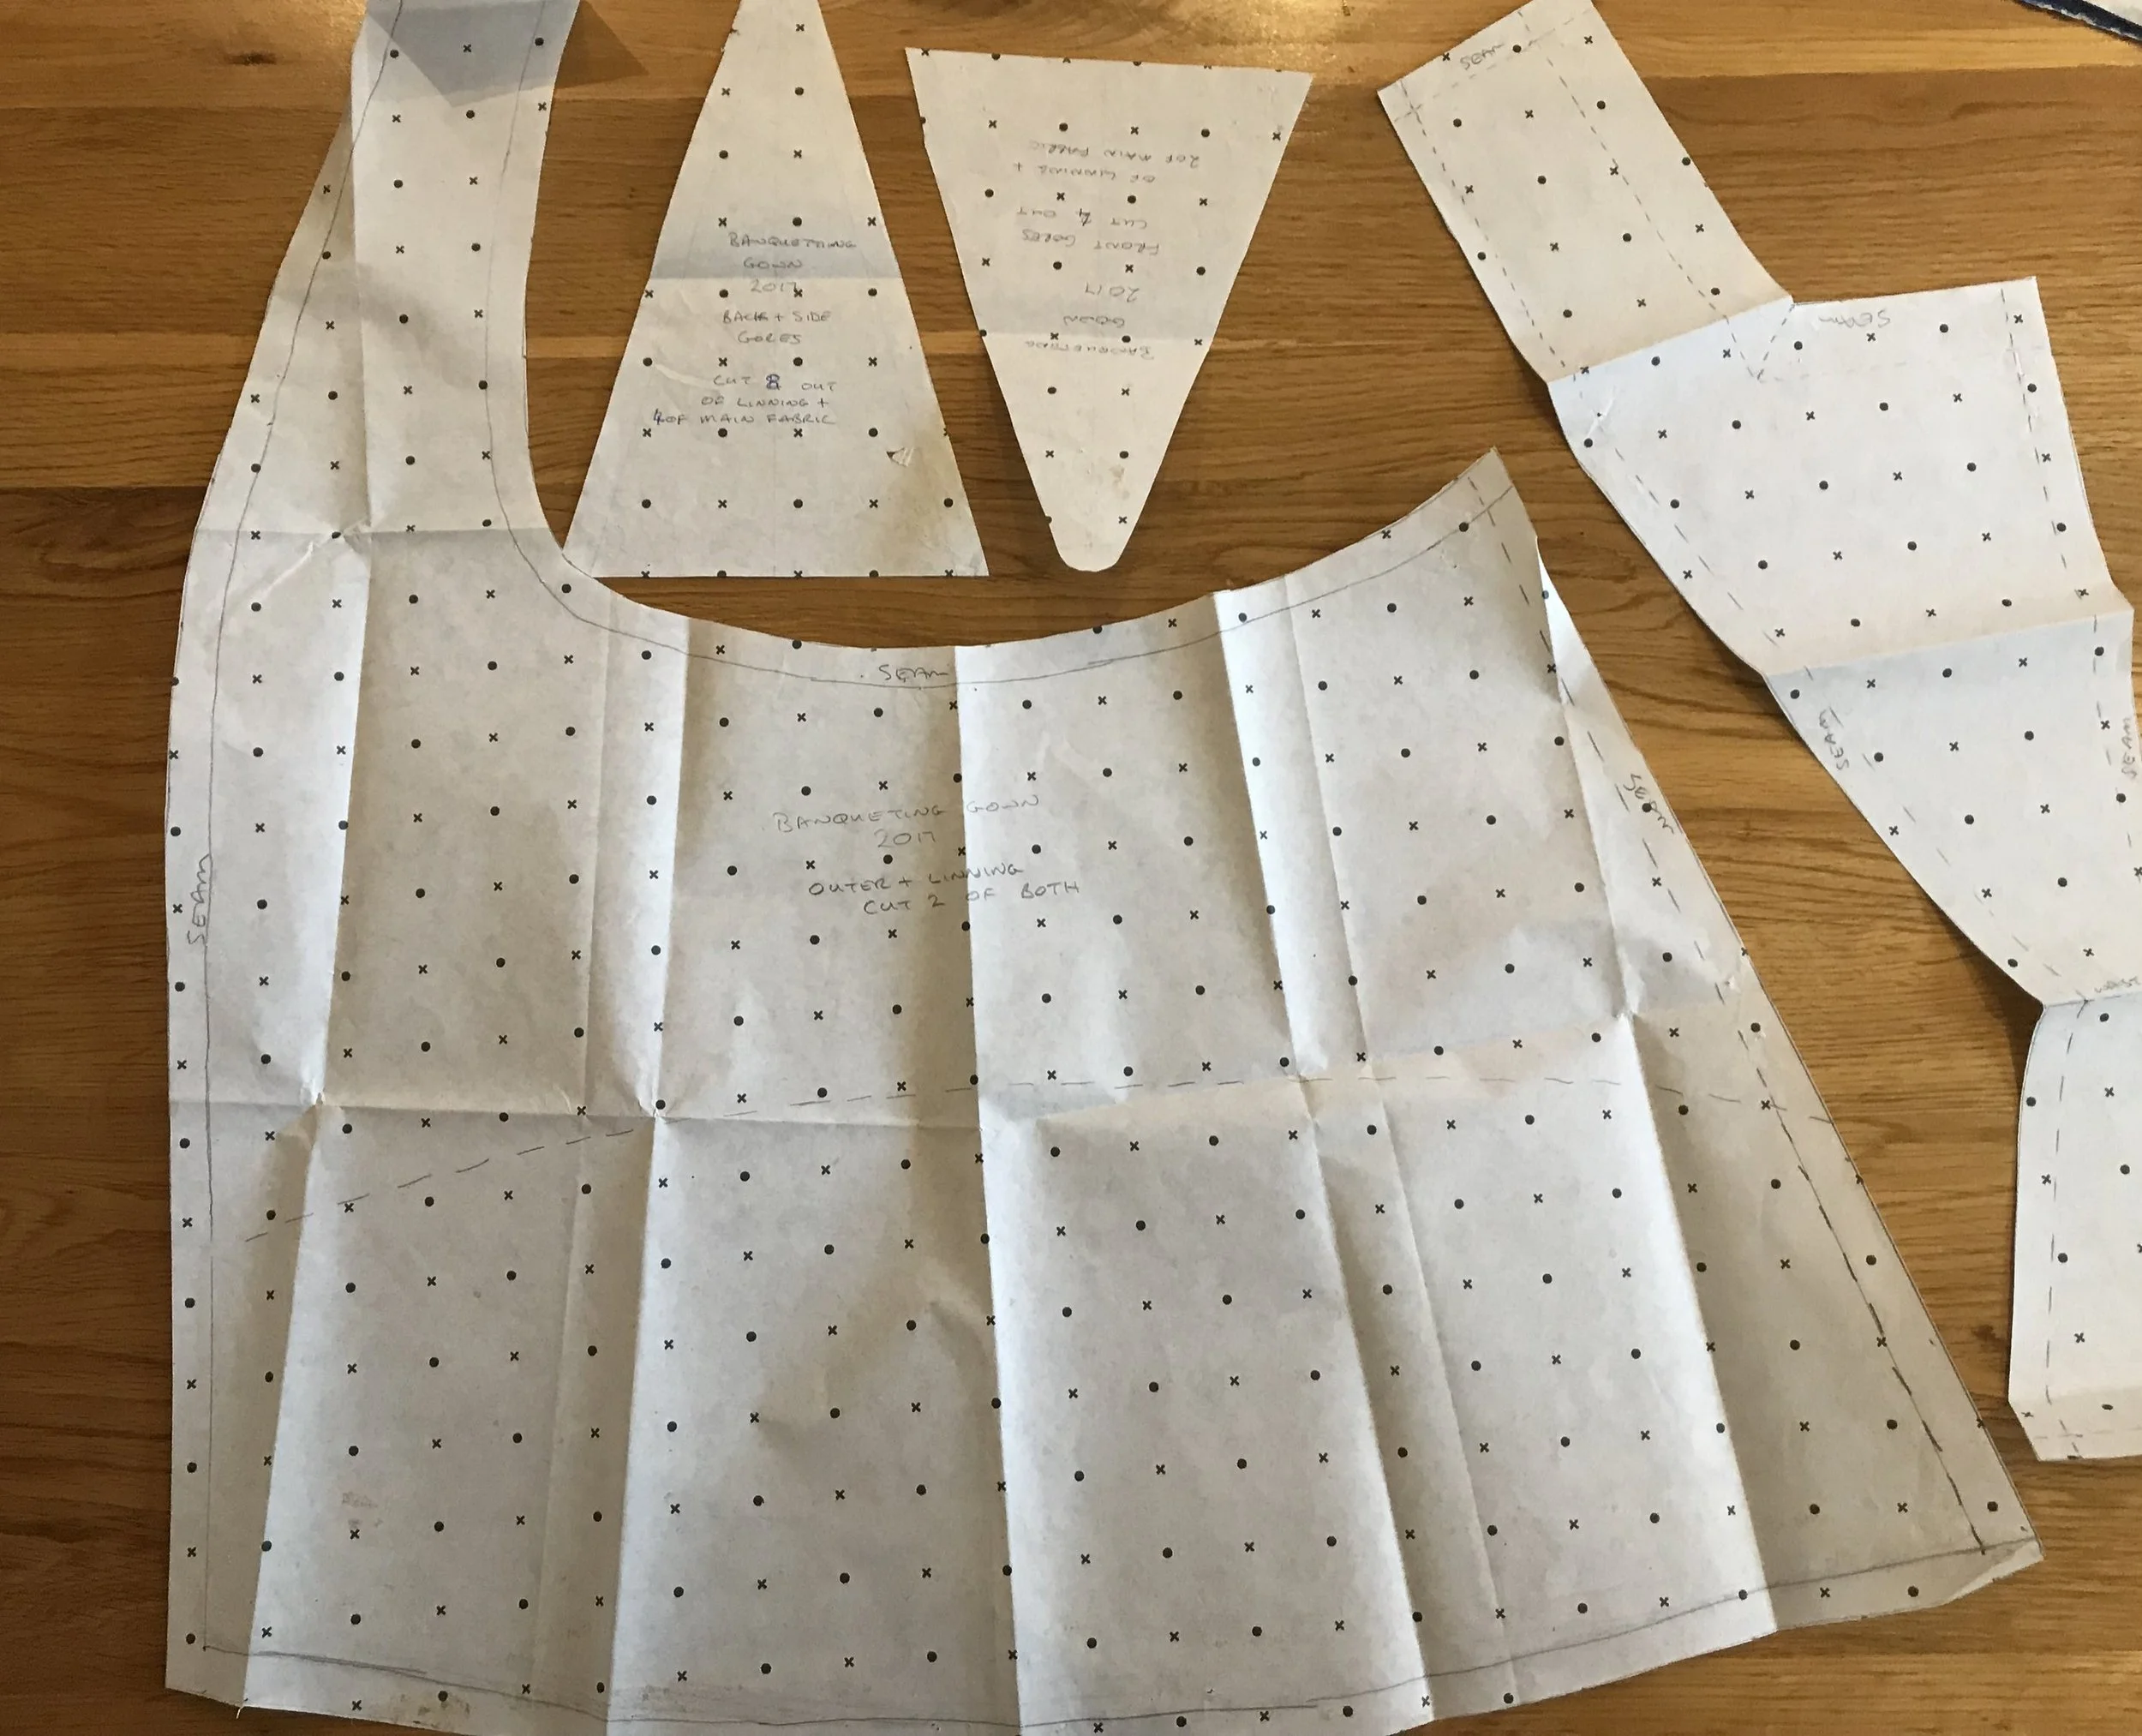
Making the Pieces
As an interesting experiment, I tried to follow the construction technique given in “Seventeenth Century Women’s Dress Patterns Book I” when making the panels up. There has been a recent re-discovery of the work-order used by 16th and 17th century tailors that made best use of hand sewing techniques and provided the strongest clothing - remembering that clothing at that time held the body into the fashionable shape rather than sitting on the natural form the way clothes do now. Unfortunately my stock of photos is blank for the early construction period of the bodice.
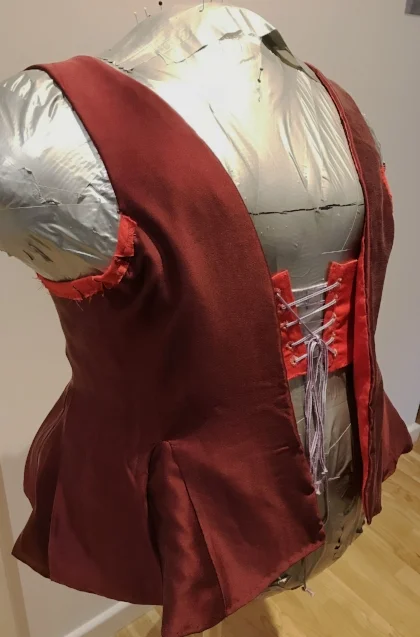
Normally, I would cut out each layer of the bodice separately - silk outer, canvas interlining and linen lining - make each layer up into its final shape and then fit one inside the other. Instead, I followed the findings about how the original cream silk bodice was made, which the School of Historical Dress team had found using X-rays and extremely close examination. I cut out each piece in all three layers. Then I attached the outer silk to the canvas inter-lining around the outer edge - for example along the front edge shown here, the silk was wrapped around the canvas and whip stitched to it before laying the lining linen along the same edge and slip stitching the lining on the inside to hide the edge of the silk. The impact of this is very smooth edges that are not bulky since the canvas is not doubled over a machine stitched seam.
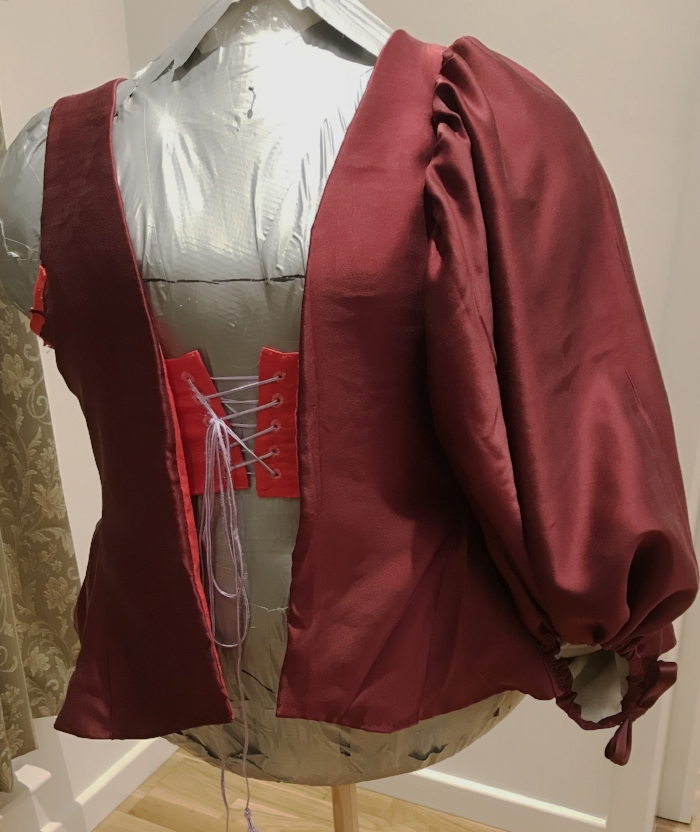
Each combined panel piece was laid out flat and the side seams stitched in the silk, then the canvas leaving the lining open - at this point the sewing machine won out. No-one could tell whether I sat and hand-stitched the inner hidden seams or whizzed them up on the machine so it was an obvious choice. The armhole looks really messy and so did the original! The original tailors knew that the large sleeve construction was going to hide that part of the armhole, so why spend time making it look good? Next I lay the lining edges in the right place and slip stitch them down - easy to do as the panels were still flat on the table.
Now came finishing the edges off all round except the shoulder strap, which was still not joined. It took a lot of trust to leave the shoulders till last but it worked incredibly well. When virtually everything else was finished, the rough edges of the shoulder were like an affront to my previous training. However, it meant that at the final fitting for the bodice, done on me not the dummy, I could get them to exactly the right angle and size after the bodice was fully formed. Whip stitching the canvas together to make a strong but flat seam was a real eye opener and made sense of some of the instructions you used to get in old dress making patterns about layering the folded edges of a seam.
The lacing panels that you can see are attached after the lining is complete, which was quite tricky. They are stitched into the canvas through the lining but without catching the silk. I left some of the bottom hem open to make sure I could keep the silk clear. The panel is what holds the bodice shut. A stomacher is then attached between the front faces of the bodice to hide the lacing panel and give a mock “laced up” look - don’t ask, fashion has no rhyme or reason in the 21st century either!
At about this point, I had to start thinking about what the stomacher should look like and what kind of collars and cuffs I should have. So it was back to the books because the original dress in the pattern book had survived with neither. Below are some images taken from various books and on-line sources. What I was looking for were the optional extra details that were fashionable in the 1630’s.
In the next post I will show you the extras that I chose to use and how I made them, including weaving the ribbon for the stomacher because I could not find exactly the shade of ribbon I wanted.
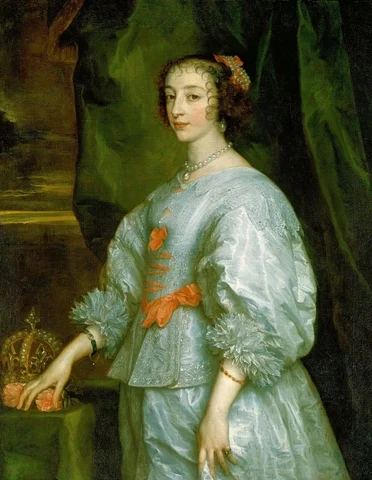
Henrietta Maria, by Van Dyck, taken from a wikipedia image of the Royal Collection, Buckingham palace
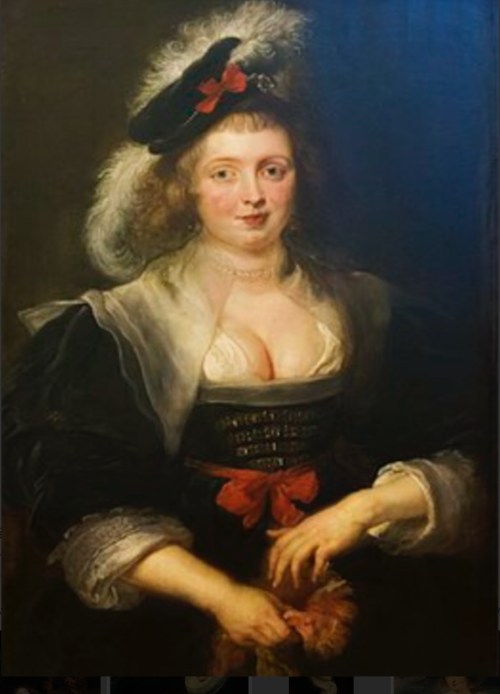
Helene Fourment, by Rubens (her husband) taken from a wikipedia image
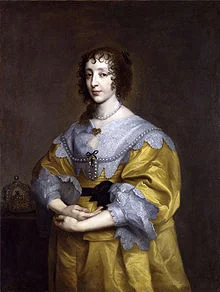
Henrietta Maria, by Van Dyck, taken form a wikipedia image of the national portrait gallery
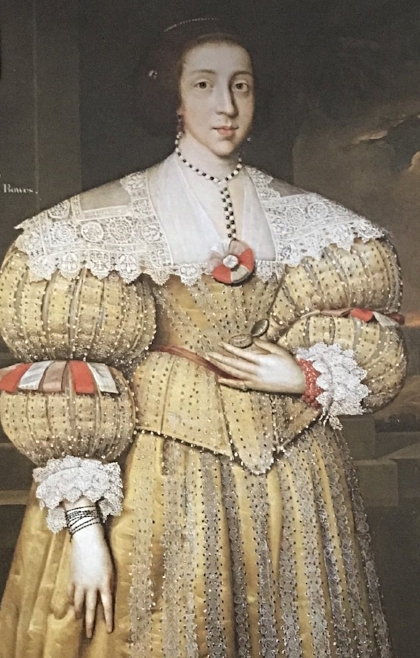
Lady Bowes, British School, image taken from “In Fine Style, The Art of Tudor and Stewart Fashion”, the Royal Collection