
Creating a Banqueting Gown
/How many people, when asked what they would like for their 50th birthday, respond with “enough real silk to make a seventeenth century banqueting dress”? Well OK, lots of the people I know would but that is because I am part of the re-enacting community in the UK!
Here is the story of how I set about the process of turning 5m of beautiful, garnet coloured silk into the dress shown here.
The pattern
All I had to start with was the glorious garnet coloured silk and my small library of books on seventeenth century clothing. Now I had to find a style and a pattern to make up. I knew what time period it should be - English Civil War. But that covers a range of fashion periods.
The first book I went to was the glorious exhibition catalogue from The Royal Collection Trust called “In Fine Style, The Art of Tudor and Stewart Fashion”. It shows detailed sections of famous portraits and paintings that illustrate how the gentry and nobles dressed in the 16th and 17th centuries. From this I decided on the wide sleeves, high waist and triangular front panel of the 1630’s.
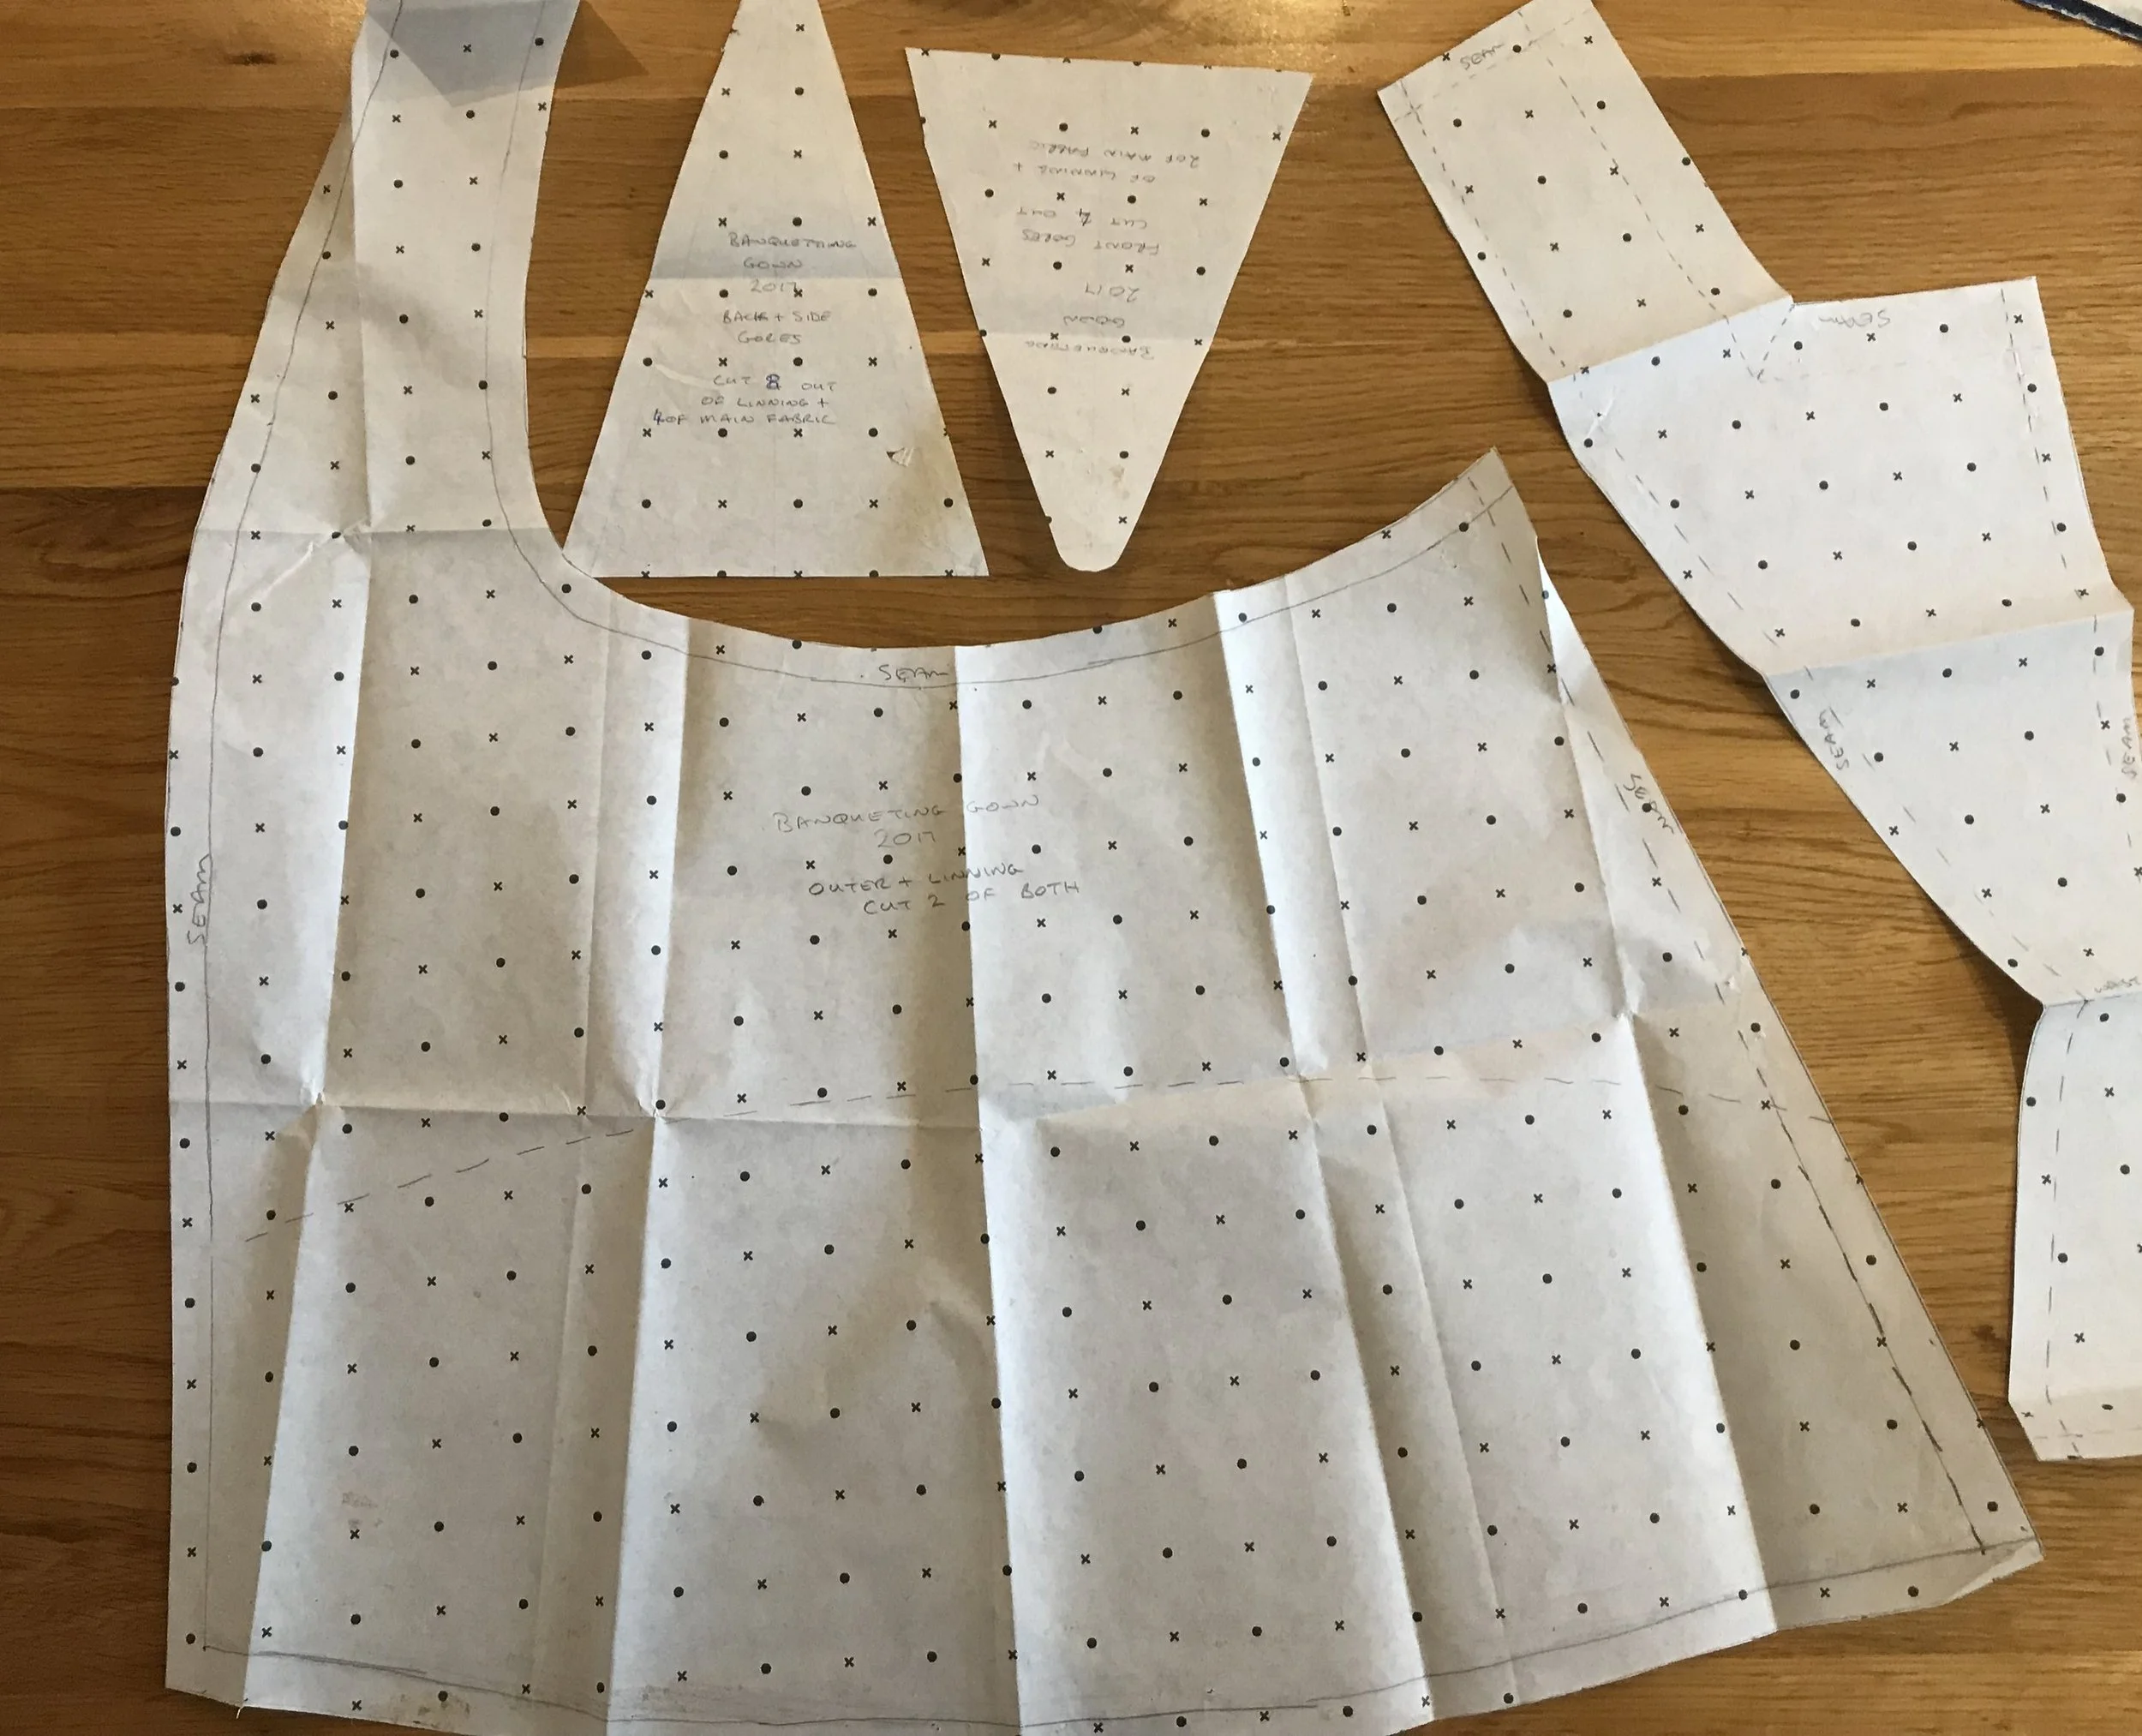
Fortunately, a few years ago, I had bought “Seventeenth Century Women’s Dress Patterns: Book 1” edited by Susan North and Jenny Tiramani (and then Book 2 and then Seventeenth Century Men’s Dress Patterns … !). This book had the derived pattern taken from an existing bodice. The original was made of cream silk with pinking in the fabric (small slashes made with a shaped blade like a chisel) and unfinished edges cut in a wavvy shape. I was not brave enough for the pinking and the raw edge, both done to show conspicuous consumption of wealth, but the bodice design and shape was perfect. So now I had my pattern.

The Tailor’s Dummy
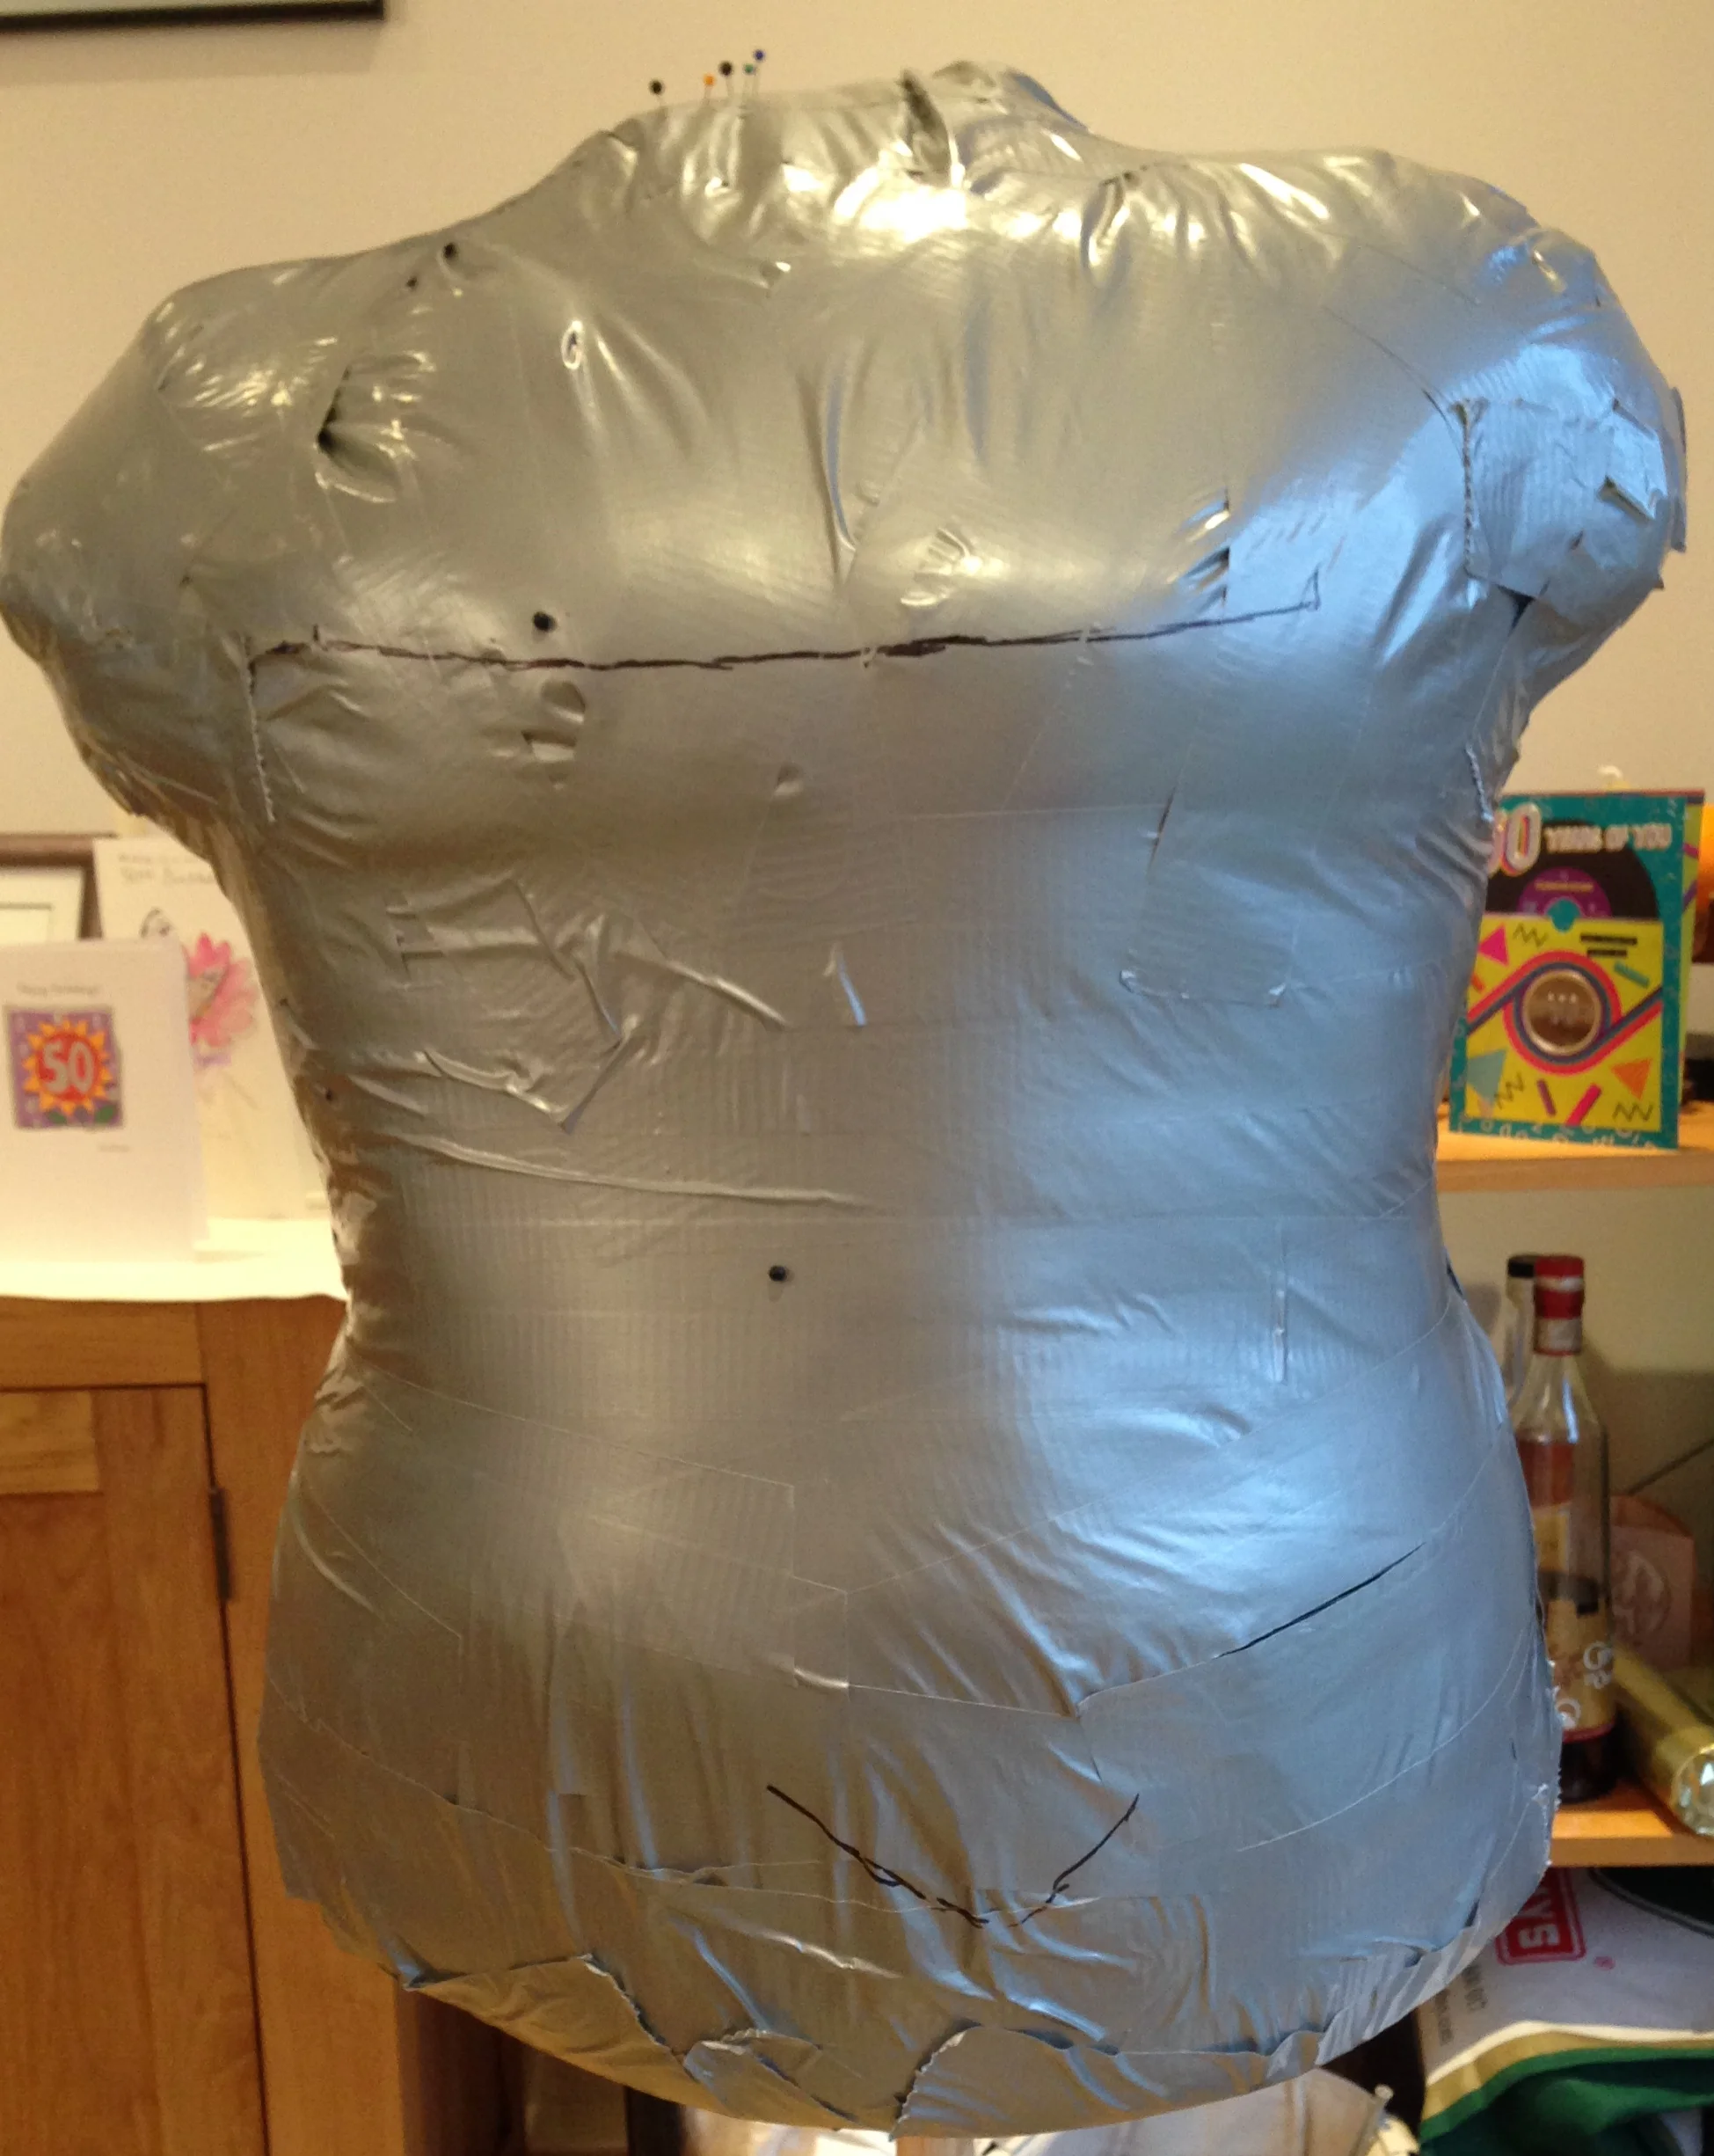
Have you ever tried to find a cheap tailor’s dummy that can take the shape of a woman in a seventeenth century corset? I did not bother to try as I knew it would be time-consuming. Instead, I followed some instructions that I found on the internet to make a dummy that is exactly the right shape - mine!
If you will be making some special and very fitted costume and don’t have a handy fried who has your shape to try things on, then take a look at one of the videos that you find when you put “Make your own dress form” into You Tube or look at the one at https://www.youtube.com/watch?v=7-5NkJPYS9U
To make this, I needed two friends, to wear my corset and a light skirt/trousers, a disposable tee-shirt (it gets ruined in the process), several rolls of Duct Tape, some cling film, a cardboard box, a broom pole and a base to put the pole into. Wearing my corset and with the tee-shirt over the top, I allowed my self to be embalmed in the Duct tape like on the videos. The straight black line on the photo represents the top edge of the corset. The V at the bottom is the point at the front of the corset.
This lady stood in the corner of our living room for several months in various states of undress and scared the daylights out of several visitors. My husband found it hard not to slip his arm around her waist occasionally!
Next Time
Next time, I will describe scaling up the pattern and forming the panels that make the bodice. The construction technique is almost back to front when compared to modern techniques. In the future I will talk about working out how to close the front, which was not obvious from the original garment, and also making the skirt, ribbons and accessories.