
A Labour of Love - Constructing a 1640's Doublet
/If you would like to listen to this post instead of reading it, select the link below. Do keep the photos handy though as they are not described in the audio file.
In the last post, I described how my husband and I started to make a doublet based on the crimson grosgrain silk doublet shown in the 17th Century Men’s Dress Patterns book by the V&A. In this post, I shall give a little more detail on how we have been constructing the doublet.
So far, all of the steps of the construction have been sewn by hand. Although that may not be true for absolutely every seam, all the early work is in the shaping and forming of the panels, so doing it by hand is the only option if the finished doublet is to look like the original.

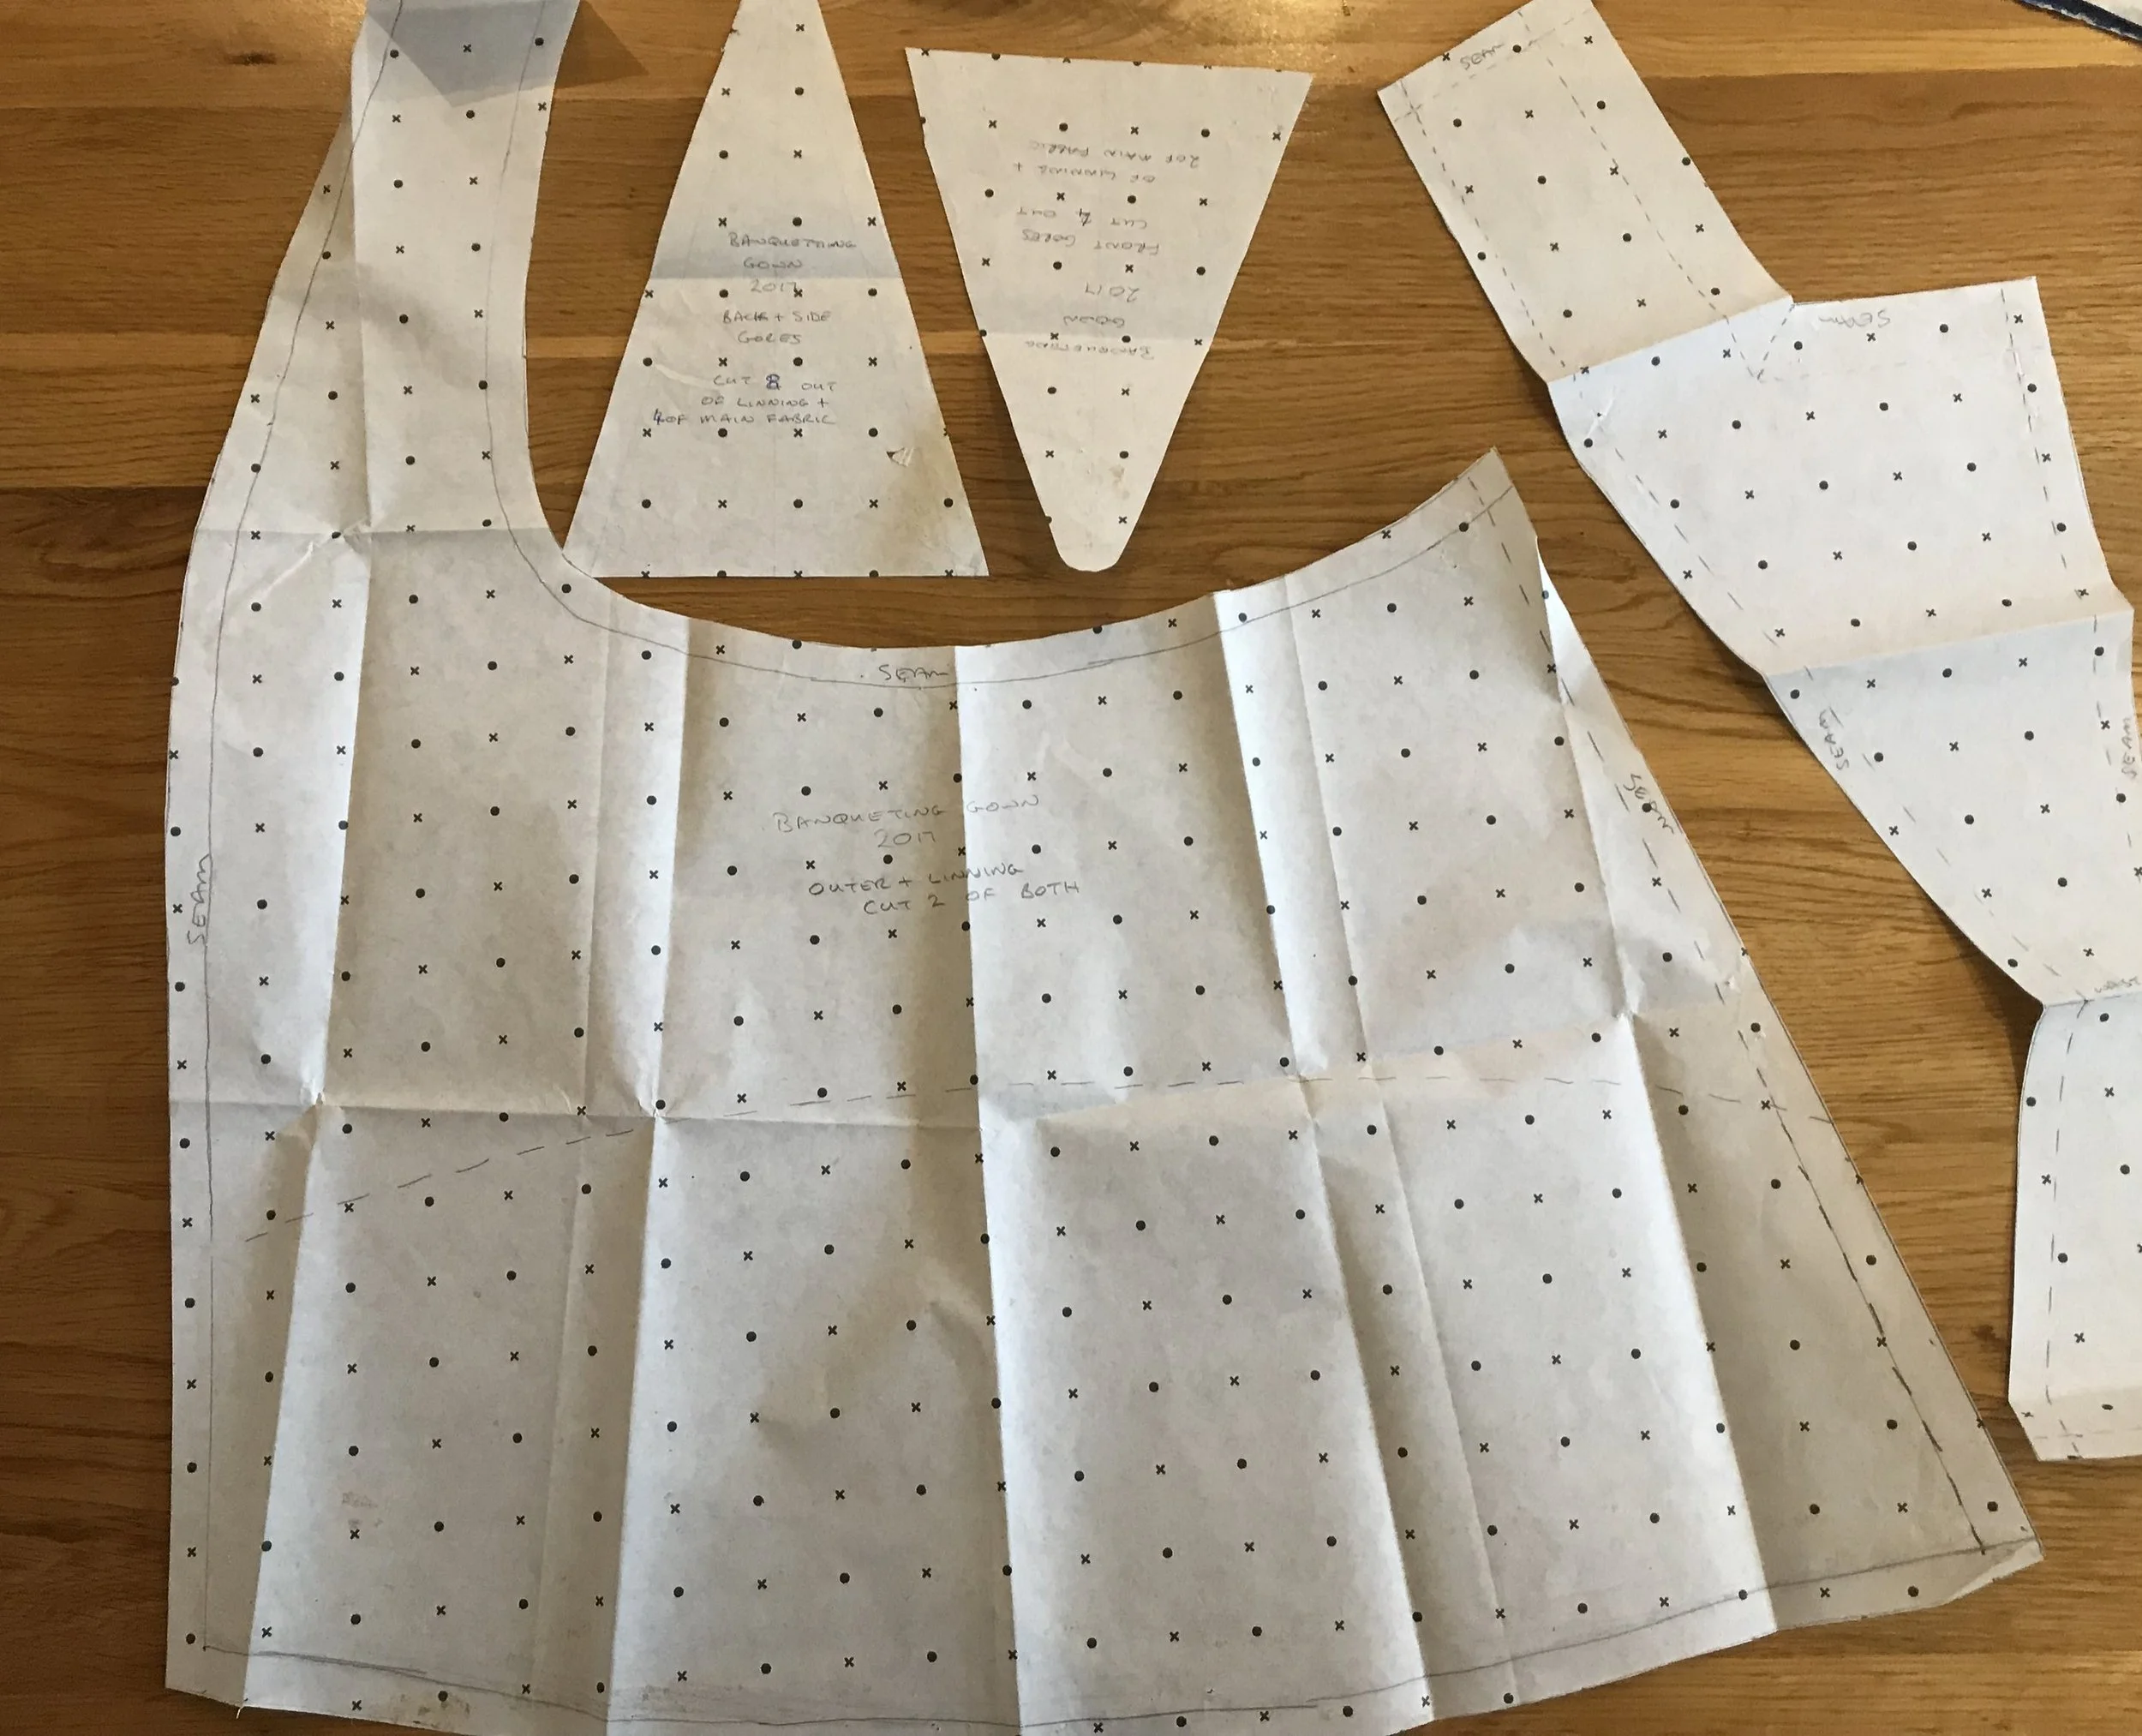
The pattern pieces laid out in piles of the same type
Following Instructions
In creating this re-construction, we made a decision not to simply just follow the pattern and instructions for the crimson silk doublet. The shape of the original wearer did not suit David’s shape, making the pattern harder to scale-up than necessary. However. we wanted to keep the basic details of the doublet of red silk, a separate collar, a high waistline and eight tabs or laps. For the pattern shape and making up instructions we decided to follow those in the Modern Maker 1 book by Matthew Gnagy, in which he describes the construction of a slightly different doublet in great detail, including some tailoring skills that we have never used before. The doublet in the Modern Maker has a lower waist line, the collar is part of the back panel and it has a single skirt at the waistline.
This double source of instructions means that we are jumping back and forward between sources, as each one becomes specific, either about a technique or about the specific doublet we want to re-create. I apologise if this confuses you, the reader. I will try to be clear and will use “The V&A book” and “The Modern Maker” as short hand references to the two sources.

Canvas interlining and wool padding on the front and back pieces
Shoulders
In the past, to me shoulders were simply the join at the top of the body and the place to hang sleeves. No more! The shoulders of the doublets in both the V&A and Modern Maker books are crafted from many layers of different fabrics, each with a specific property. There is the outer fabric, which is only there to look nice! There is the canvas layer or layers, which is there to provide strength and some stiffness. There is the wool layer, which is there to provide shaping and contour when pad stitched to the canvas. Finally, there is the lining, whose only function is to hide the construction layers and protect the raw edges, while making the inside look pretty. In modern mass-produced terms, most of this has been replaced by shoulder pads. Some tailors making bespoke suits for gentlemen might still be doing all of these things in modern fabrics, but the time taken to create all the layers, then stitch them in the contoured shapes is likely to be too expensive for all but the most high-class tailors’ shops.
In the photo below, you can see the rows of chevron stitching - called pad stitching - that is being used to off-set the layers of fabric. This is done slowly and evenly, a little like “easing”, when you ease a longer seam into a slightly shorter one over a long distance to avoid pleats or creases. In this case, the effect is for one fabric to curve over the top of the other, making both of them hold a curved shape, such as found in a shoulder. In the photo below, this is hard to see because the curving is slight and the fabric heavy, but it can be seen better in the following photos.
One other thing that you can see in the photo below that we have not done in the past is the opposite of a dart. To make the shoulder sit right at the front of the arm and top of the chest, a small triangular piece of cloth is inserted into the canvas interlining and the wool layer is stretched across that area. This approach fills in the hollow that most men have just under the clavicle and forms a neat curve over the top of the shoulder.
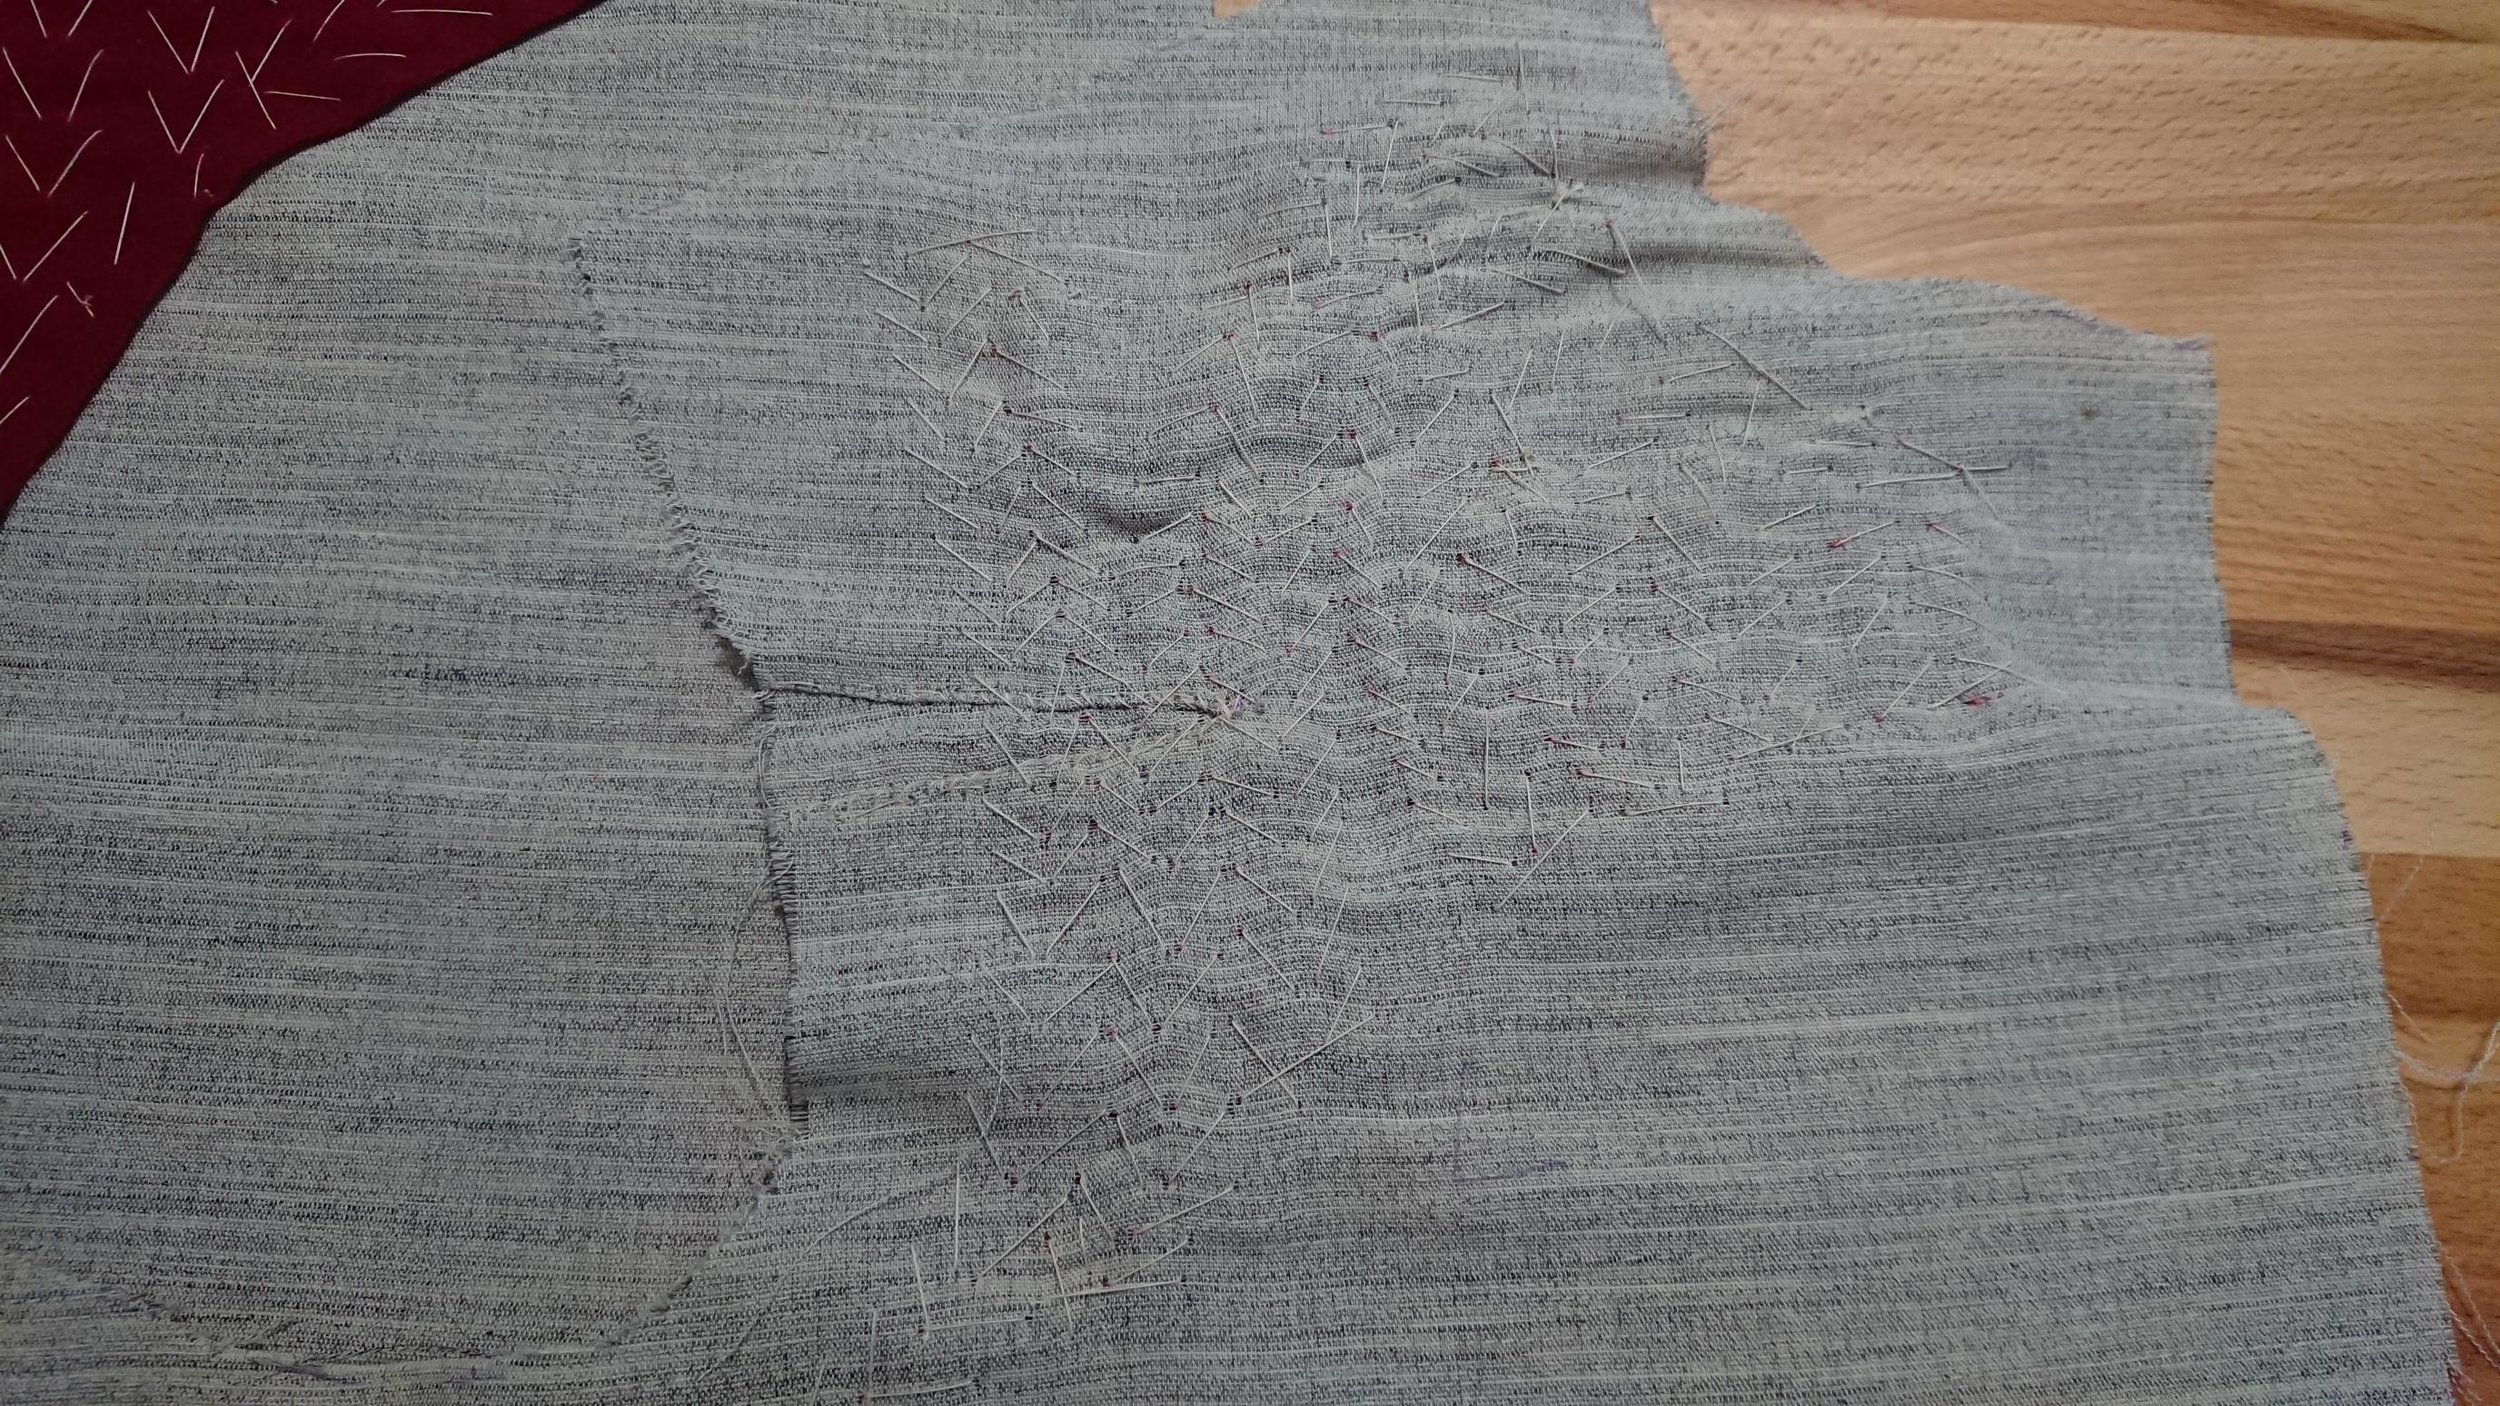
Pad stitching creating a curving shoulder shape
The Art of Pad Stitching
One of the other places that curved pad stitching is used in the V&A book is on the tabs or laps around the waist. These are flaps of fabric that hide the top of the breeches and flare out as though over the hips - in fact in this doublet the waist is a long way above the hips but the fashion in the 1600’s was to pretend that everyone had enormously long legs and a very short back, so here the laps flare out to fake hips. On most doublets worn by re-enactors, the laps stick out at odd angles. Now I know how to stop that wayward behaviour.
To form the laps, two layers of canvas are basted together. then rows of stitches are formed that make a fan shape. They are stitched from left to right of the lap, but the visual effect is of stitches radiating from top to bottom. Each stitch is a diagonal with the needle either pointing up or down. The first row goes across the lap in one direction and the next row comes back the other way making a chevron appearance on the reverse side and lines of stitches on the side you can see. The easiest way to do this is the hold the lap sideways, so one side is near you and the other side is far away and then stitch right to left but sew away from your body, like the photos below.

Sewing up the lap with it held sideways

Sewing down the lap with it held sideways
To make the lap curve, it is held over the fingers with a curve in it and the stitches pulled firmly but not too tight - if you pull it tight ridges will form in the straight stitch, if you don’t pull it firmly enough the curve is too weak. And yes, in the photo below the white marks on my thumb are where I have stabbed myself with the needle! No pain no gain as they say.

Curve the fabric over the hand and pull the stitches firmly but not tight
The photos below show the development of the curvature as more lines of stitching are added to the lap until, eventually, it can support its own weight.

Two lines of pad stitching

seven lines of pad stitching

Half of the stitching done

All of the pad stitching complete
Something New Every Day
I really do like trying new things - I guess you realised that by now. A whole lot of references came together to influence a new thing that I tried while doing the pad stitching. This stitch uses a vast quantity of thread. It is not good to cut long lengths because the thread tangles and catches on things. Having started using beeswax to wax thread, I love the way it helps with the thicker and stronger threads. It can be slow though; stopping to cut a length, wax it and thread the needle - you are supposed to iron the waxed thread too but who wants to switch on the iron for one thread! I once heard about quilt makers who thread up ten needles in advance, then use them all quickly and then stop to thread up another ten.
So, this time, I found ten needles, cut ten lengths of thread, waxed and ironed the thread and then threaded all the needles. It was a really good thing to do as I was able to keep the rhythm of the pad stitching and the evenness of the stitches before finally using up all the needles and then starting again. If I was going to do several hours of the same kind of stitching with the same thread in the future, I would definitely do this again.

Ten threaded needles

Ten empty needles and one happy seamstress
If you want more details on these techniques or videos of some of the techniques, you can look at the You Tube channel https://www.youtube.com/channel/UCrCLs5xbcxdfVJjE7aB8-1A
In the next post, I will look at the sleeve construction and buttonholes used for decoration up the underside of the sleeve.