
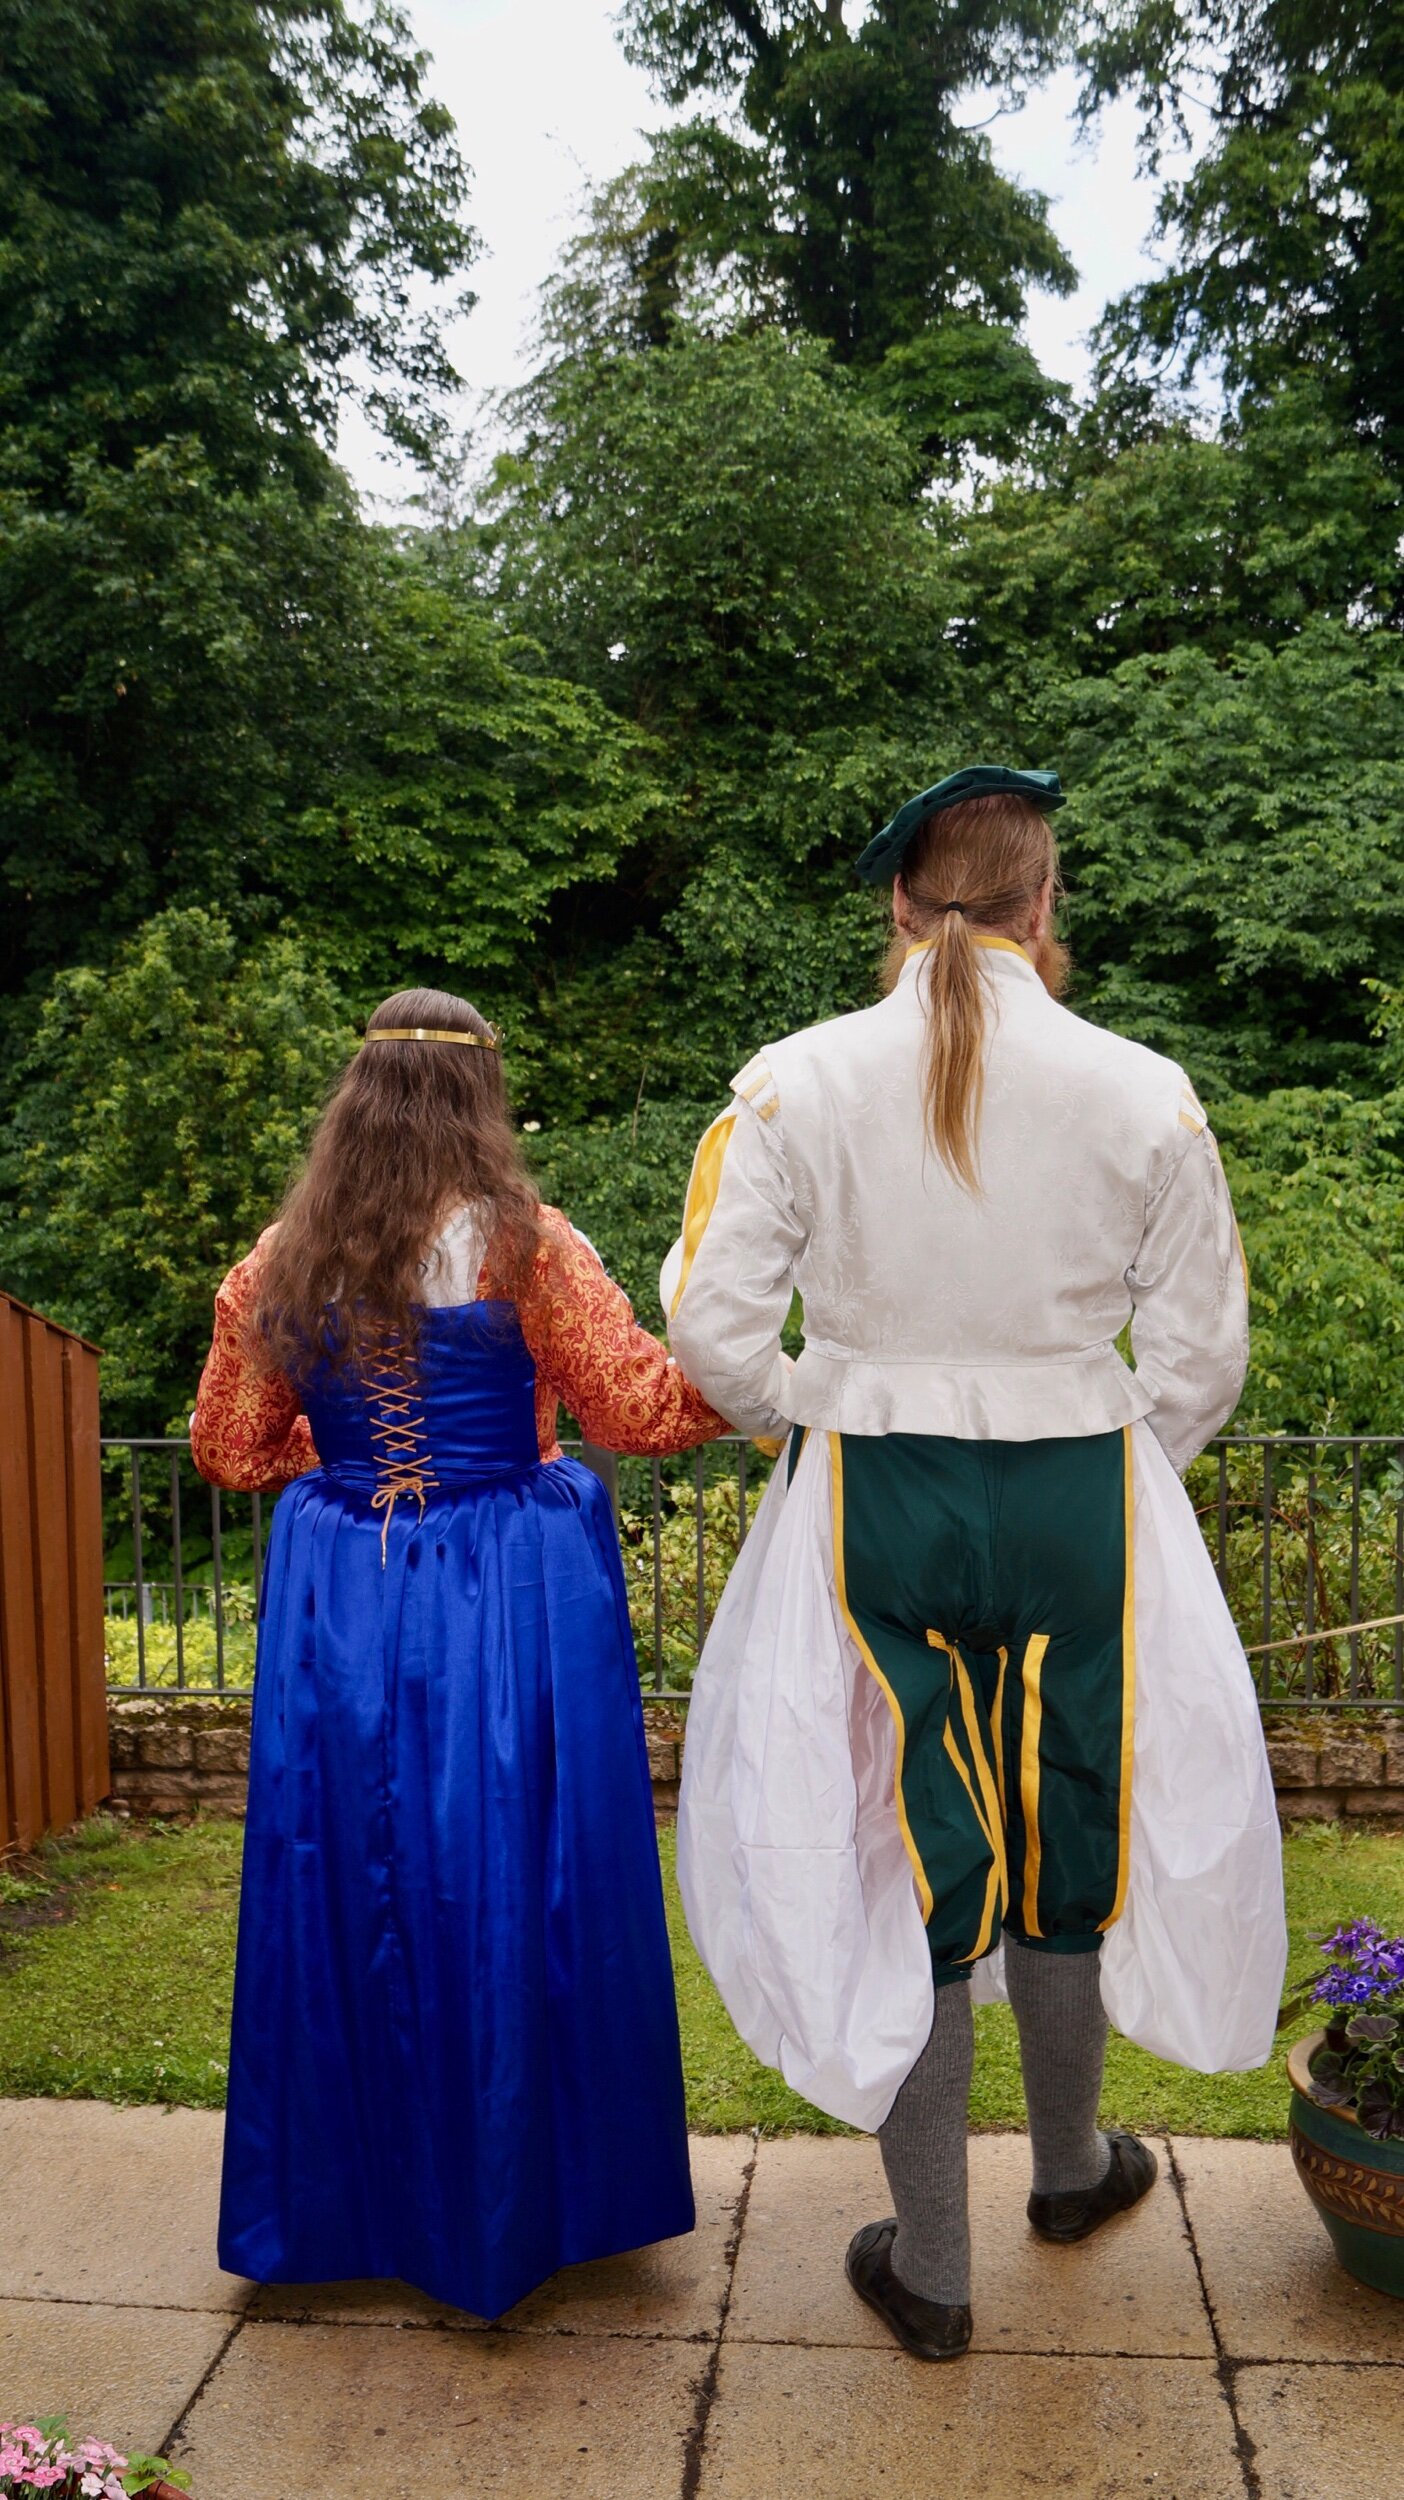
A Wedding Dress with a Difference
/Constructing a dream
In the last post, I described designing a dress to be worn by my future daughter-in-law for the evening celebration of her wedding to my oldest son. In this post I will describe more about turning that imagined dream into reality and the construction techniques that I used.
The order in which the items were constructed pretty much followed the order in which you dress. Hazel already had a suitable shift, so I started with the pair of bodies, also known as stays or corset. The bum roll, used to accentuate the waist and emphasise the hips, came next. Next came the upper part of the kirtle, which I will refer to as the bodice for simplicity. This was constructed separately from the skirt and then attached. Next was the skirt of the kirtle. Unfortunately I ran out of time at this point and did not complete the English Gown that will eventually go over the kirtle - sadly hiding the blue satin!
The Bodies
This pair of bodies is destined to be underwear, not outerwear. The choice of fabric and obvious machine stitched channels would therefore not be a problem. The fabric we chose was a diamond pattern coutil from Vena Cava Designs in a Champaign colour. I knew about this design of coutil because a customer had requested it and I thought it was such a lovely texture that I wanted to use it again. The simple elegance and understated colouring really suits this use. Coupled with cream cotton twill binding it makes a low key but attractive combination. The inner layer of the bodies is a twill coutil in nude colour - slightly darker than the diamond outer.

The materials of the “pair of bodies”

“Pair of bodies” with binding half finished
This pair is only boned in certain key locations. The front panel is fully boned but has no busk. Hazel has not been used to wearing even a short corset, such as this one, so a busk would feel unfamiliar - since she would have so much else to think about on the evening of the wedding, it was better to keep the underclothes as simple as possible. For the same reason, the only other bones are in the back opening to stop the lace from wrinkling the back panel.
I always use artificial whalebone, which is available from Sew Curvy in the U.K. It has several advantages: it gives suitable stiffness with flexibility to bend when needed; it resembles at least one of the stiffening materials used in the period and; it is easy to cut to shape from the 25 or 50m reel. An added advantage is that if you are careful you can sew through it, as you could do with warmed whalebone, to keep a few critical bones in place to lengthen the time till they wear through the fabric of the bodies.
The Bodice
In planning the bodice, I had to decide whether it would be stitched to the skirt or not. After much pondering, I decided that it would be better to have a soft bodice sewn to the skirt rather than a more structured one that could be worn separately. Much of that decision was based on keeping the warmth of the outfit down, since it would worn indoors in a hall that I know to be quite warm.
The bodice was made from two layers of tailors’ canvas, which has a natural stiffness caused by the goat hair in the weave. These were machine stitched together in a mimic of pad stitching (I was up against a tight deadline for the three costumes required). This added more stiffness to the fabric without adding bulk. The outer layer of brocade was laid against this and turned in around the top and bottom then hand stitched down. The two back panels were constructed in a similar way but using blue satin. Then the back panels were attached to the front section. Only at the last step were the shoulder straps added, so that the bodice could be tried on and the straps made to the right length. The straps were tubes, laid flat with the seam underneath - not an authentic technique but it produced the effect that was needed.

Bodice with shoulder straps on

Bodice front with outer fabric stretched on and tacked on
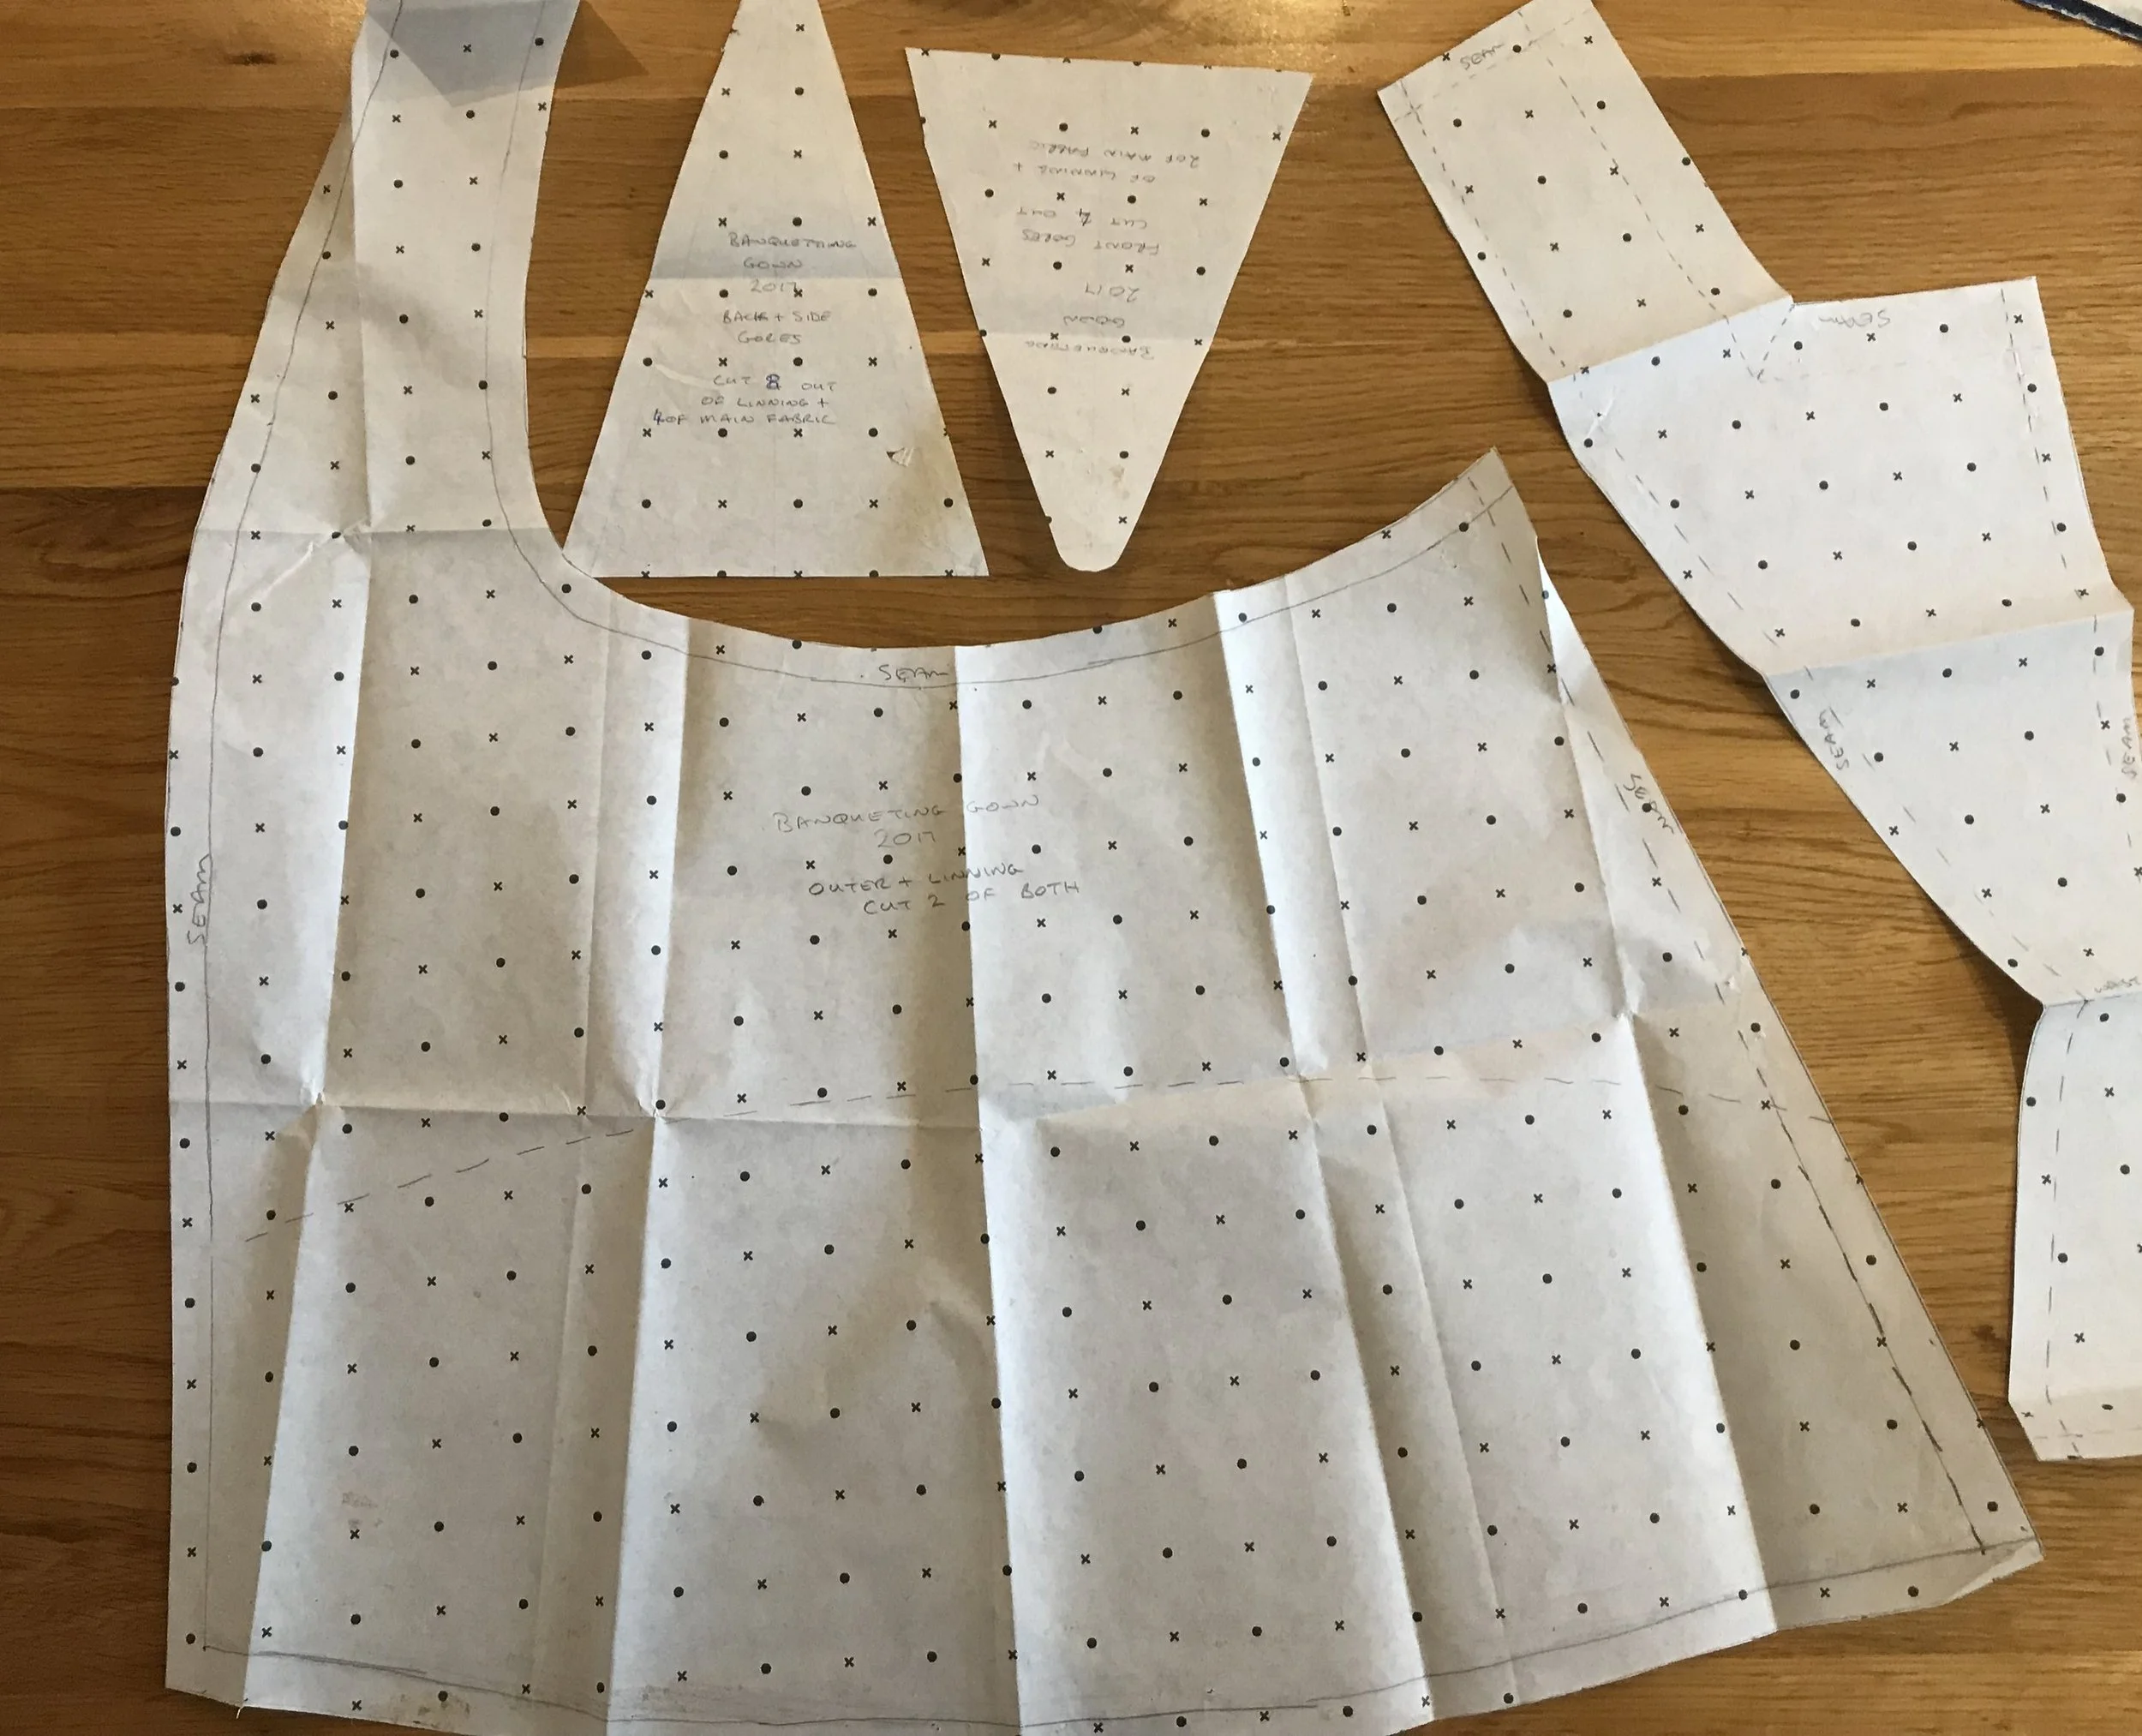
The Skirt

The skirt forepart laid ouT
With both fabrics now available, the shape and construction method started to be clear. The blue satin was a very soft, easily stretched fabric, so it needed to be attached to an interlining fabric of a similar colour to allow it to hang well. In this case, it was sold with a cotton fabric for exactly this use. Also, both the satin and brocade frayed easily, so they would need to have all the edges sealed. Which is more easily done with a double layer of fabric, if it done by machine instead of hand stitched.
For a pattern, I took inspiration from, but did not recreate, several skirts in both The Tudor Tailor and Janet Arnold’s Patterns of Fashion 3. The forepart is slightly sloped and has a curved lower edge. To help hold this area out from the feet, the hem was made by making a similar curved section about 5 inches deep, placing this right sides together with the bottom of the skirt and stitching a seam. Turned inside out, this gives an inner lining to the hem that is 4 layers thick instead of 2 and adds subtle weight to the hem to hold the skirt straight.
The back of the skirt is a plain rectangle of fabric with a seam up the back, which splits near the top to allow the skirt and bodice to be pulled on and laced up. The top edge, after finishing the raw edge, had a strip of woolen cloth attached, so that the cartridge pleating would have enough body to hold its shape. The bottom edge was turned up in a hem the same depth as the forepart. Finally, the back was attached to the front to make a whole skirt.

Sleeve puffs being added
The Sleeves
Originally, we had discussed making the sleeves from blue satin, however, there was enough of the brocade left to make them from that. Hazel’s preference was to use the brocade and it looks much better. The puffed lining is made from a small strip of the white fabric bought for Rowan’s pluderhose, which will be the subject of the next post in this series.
The sleeve is a standard 16th century pattern, curved at the elbow and with a seam down the inside of the arm and down the back of the arm. It is two layers thick and the outer fabric on the top of the arm was cut completely in two and hemmed along the cut. The puff fabric was stitched to the hemmed edges by hand. Hazel found some lovely blue beads as the decoration for where the sleeve edges were to be pulled together. When putting in the beads, I pleated the white fabric by making a running stitch through it and pulling it tight, using the same thread to sew on the button between the two hemmed edges.
Finally, the sleeve head was finished neatly and a binding strip of blue satin was used to finish the wrist end.
Bringing it all together
The final stage was to bring it all together. I had carefully ensured that the strong pattern in the brocade ran vertically up the middle of the bodice and the skirt. Now I had to match them as closely as possible. I spent quite some time lining these up and was very pleased with the effect - until I realised that it was so good a match the it looks like a full length dress!
The sleeves were only stitched on across the top of the sleeve, giving a full range of arm movement. The very last task was to create lacing holes for the back lacing on the bodice. Hazel had ordered a beautiful gold-yellow, hand made lace from Lucy The Tudor, which glows against the blue satin and this completes the outfit with a lovely highlight.

Lining up the bodice Pattern with the skirt pattern
The back of the kirtle
And for him
In the next post I will describe making the groom’s evening outfit. Since Rowan had a much clearer idea of what he wanted there was less design needed but more thought went into the colours and where the fabric came from. This led to the now family-famous phrase “He got married in his grandmother’s wedding dress”. More on that in the next post.