
Book Review with a Twist: Modern Maker 1
/For many years my husband David and I have been creating full size sewing patterns from small scale pattern sketches in books. We have never been trained in pattern making - a whole element of tailoring and dressmaking in its own right - but have picked up and developed various techniques over the years. This year, we have added a fantastic technique to our repertoire and I thought I would see how far it can be extended.
Matthew Gnagy has published two books on 16th and 17th century tailoring, Modern Maker 1 and Modern Maker 2. They cover many things including hand stitching techniques, padding and strengthening methods and how to make buttonholes, however, the main aspect that David and I picked up on was his interpretation of a system of defining pattern shapes and sizes based on the measurements of the client and the intended shape of the garment. Book 1 gives the details of making a specific doublet with lots of fantastic tailoring details, advice and tips and also outlines the system described below. Book 2 has a series of patterns taken form a range of original 16th and 17th century manuals written by tailors for tailors that Matthew has interpreted and drawn out in a way that is usable by modern makers of re-enactment or recreated period costume. This review has been jointly written by David and I.
David’s View - The Theory
Having trained as a mathematician I am fascinated by patterns, sequences and proportions. Consequently I have always been interested in methods of scaling up patterns from books like those in the Patterns of Fashion series. Many years ago working with ruler, pencil, tape measure, calculator and spare rolls of vinyl wall paper I helped Jacqualine scale patterns for breeches, doublets, coats and singlets from books so she could make English Civil War garments for me. The process required having lots of measurements taken from me, recording them and then working out how to scale each measurement on the pattern. Over the years we learned that many measurements must be made connecting anatomical points (breast bone, shoulder blade, clavicle, first rib, etc) to do this. It is a very time consuming (and not always accurate process). Once the pattern is developed, a toile has to be made so Jacqualine could check the fit of the scaled garment.
Recently we made a pair of Dungiven Trews, part of a haul of clothing found in a bog by a farmer in 1956 and described in detail in the Ulster Journal of Archeology. This was our most complex task to date. We used a painstaking method with almost a dozen cloth tapes being pinned to a pair of tight fitting running trousers I was wearing. We also used measurements from the crotch of some fitted underpants. All these measurements produced a pattern, and later one for our son, who is a very different build to me.
It has always seemed hard to believe that such comprehensive measurements were needed by period tailors, yet we know that all clothing was closely fitted to the anatomy of the wearer. Some times we noticed that the measurements we had taken were in proportion with each other, but thought this was probably just coincidence.
While looking for books of historical patterns I came across Mathew Gnagy, the Modern Maker. Reading Mathew’s first book was a revelation. In it he describes how Spanish Tailors used measurements tapes based on the Bara (or Vara) - a Spanish yard of around 32 inches. Rather than using a fixed tape, as we do today, tapes were made up based on the height, waist and chest measurements of the customer and then used to draft the pattern. Here are the tapes we created for me.

David’s Bara tapes
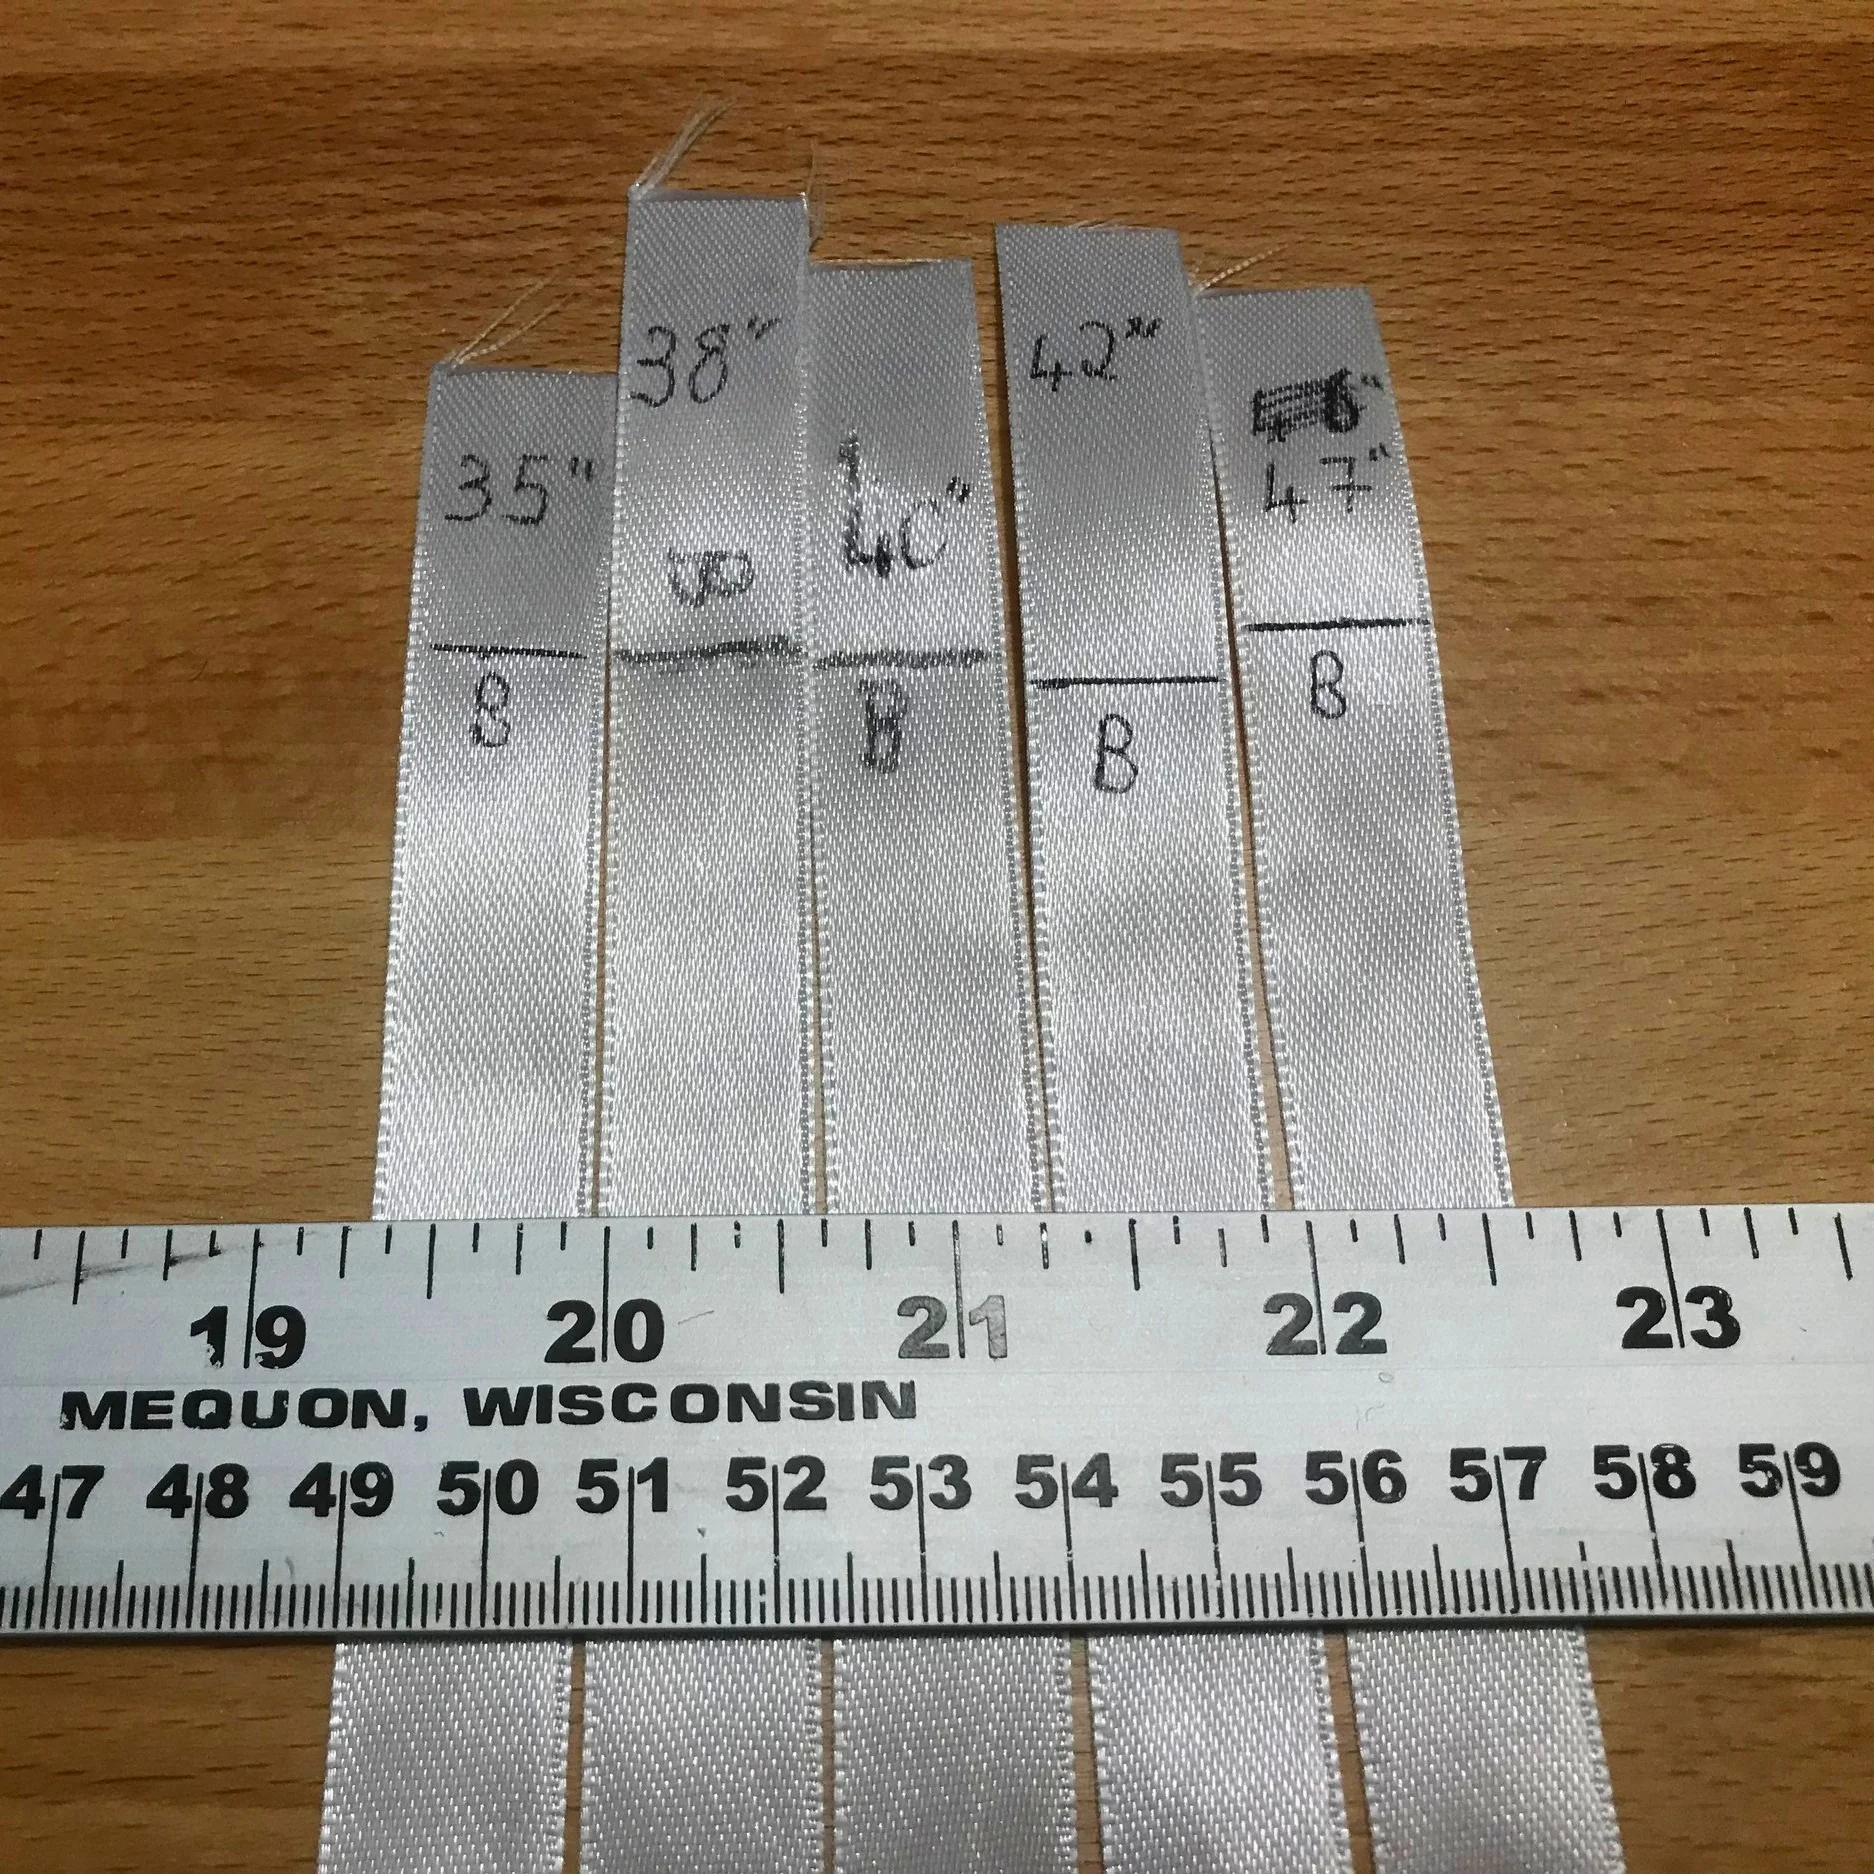
Top end of some tapes
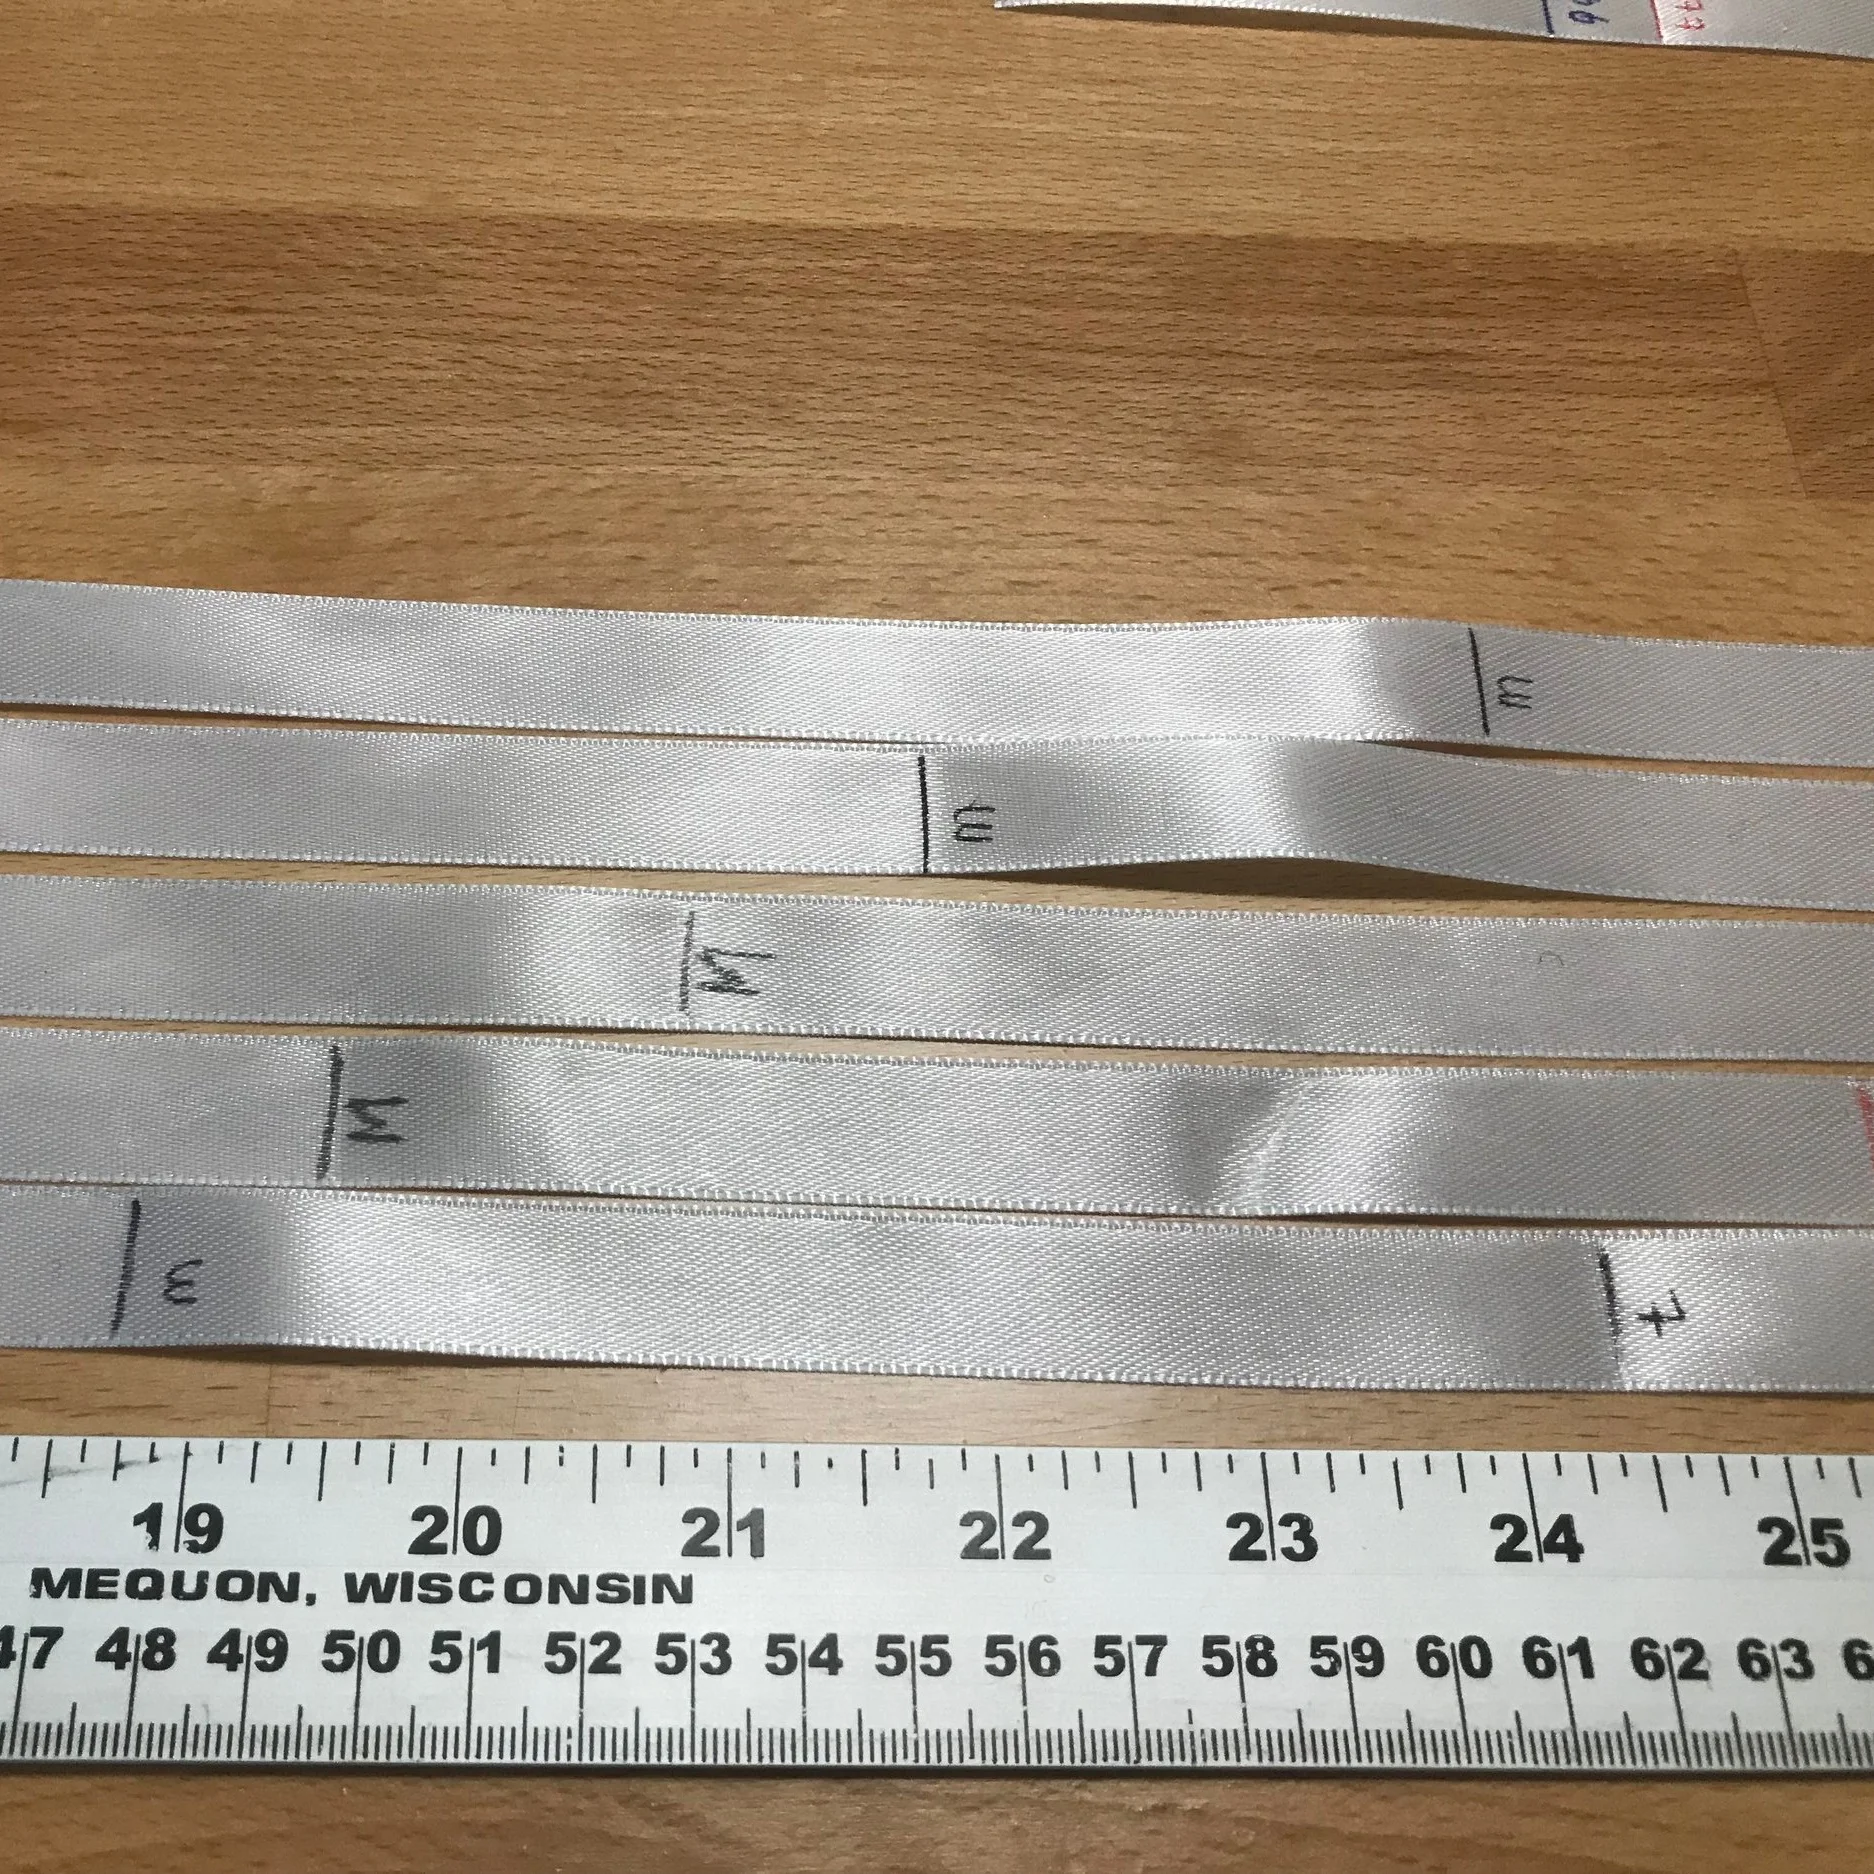
Middles of the tapes
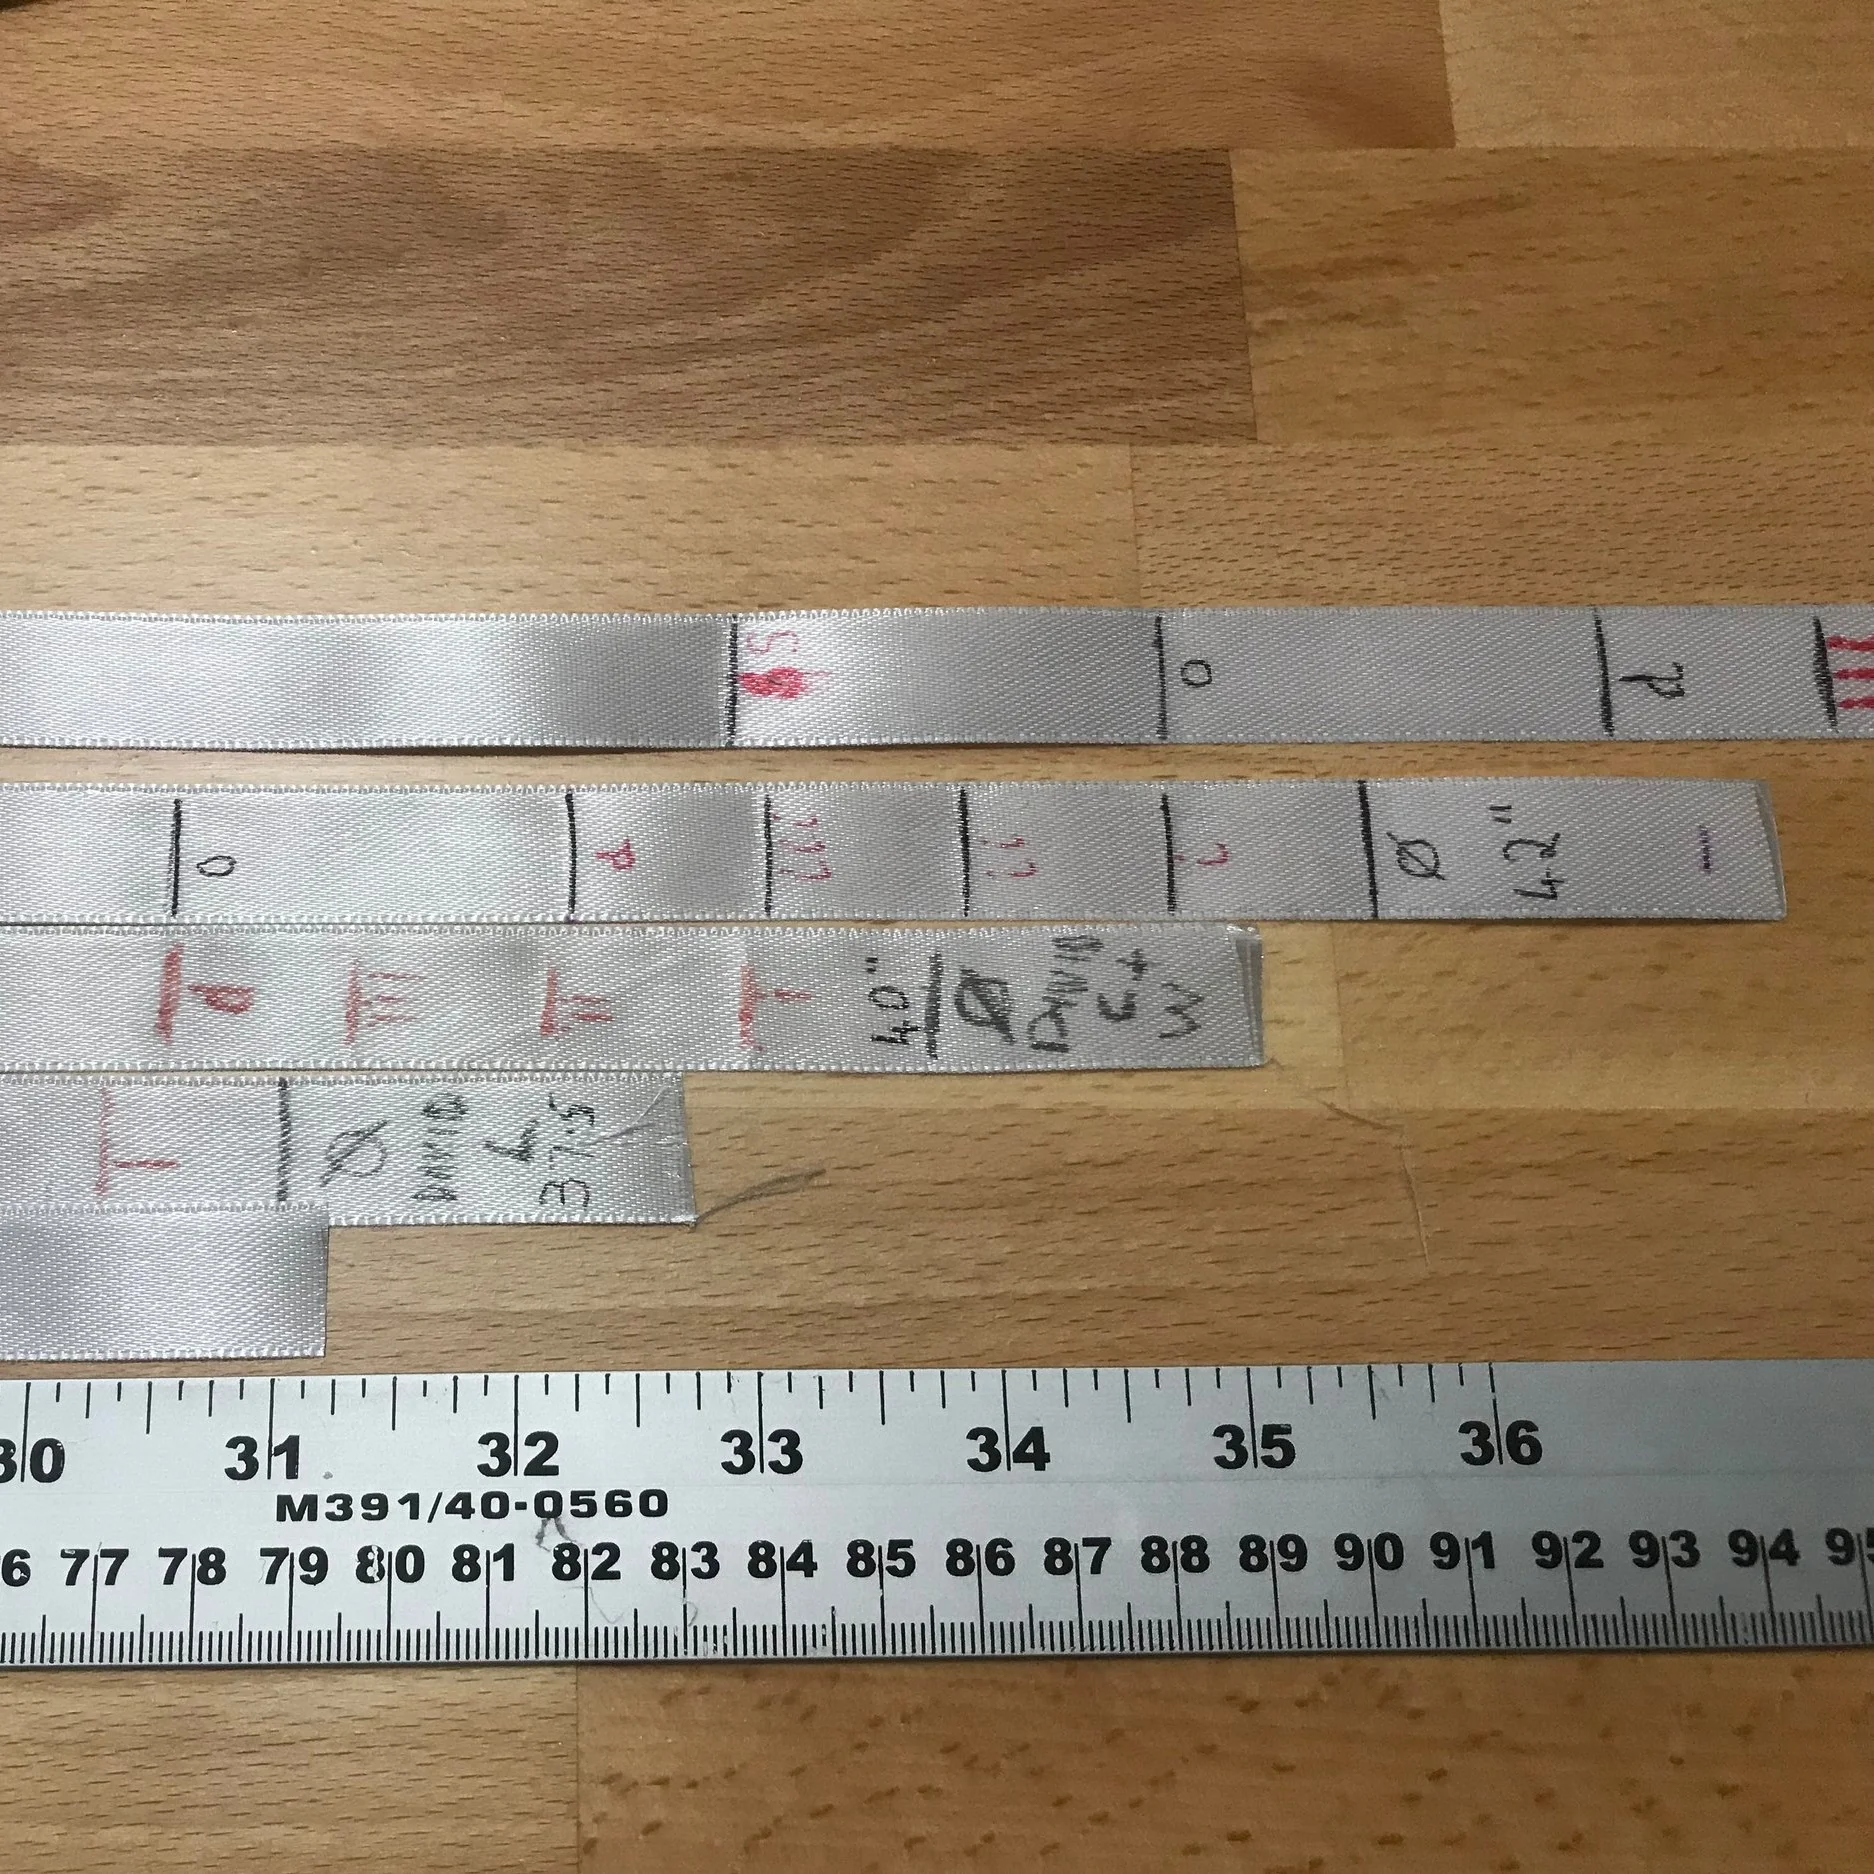
Bottoms of the tapes
Each tape is divided into the same proportions (Medio - Half, Quatro - quarter, octo - eigth, third, sixth, duodecimo - twelfth, and three quarter duodecima). Patterns are then drawn up using these measurement. There is no messing about with dozens of measurements and messy arithmetic. To draft the pattern you simply take the principal measurements from your client, and make the three tapes. Patterns are then scaled up from drawings using proportions marked on the pattern using a form of Roman numerals (C - tt, L - Mii, W - iit, etc.).
Why proportions were used in this way is best illustrated by looking at Leonardo Da Vinchi’s Vitruvian Man, shown below. It is far more than a sketch of a naked man inscribed in a square and a circle. Leonardo called his drawing "Le proporzioni del corpo umano secondo Vitruvio” - The proportions of the human body according to Vitruvius. His comments state the maximum width of the shoulders is a quarter of the height of a man; the distance from the elbow to the tip of the hand is a quarter of the height of a man; the distance from the elbow to the armpit is one-eighth of the height of a man; the length of the hand is one-tenth of the height of a man; etc. The points determining these proportions are marked with lines on the drawing.
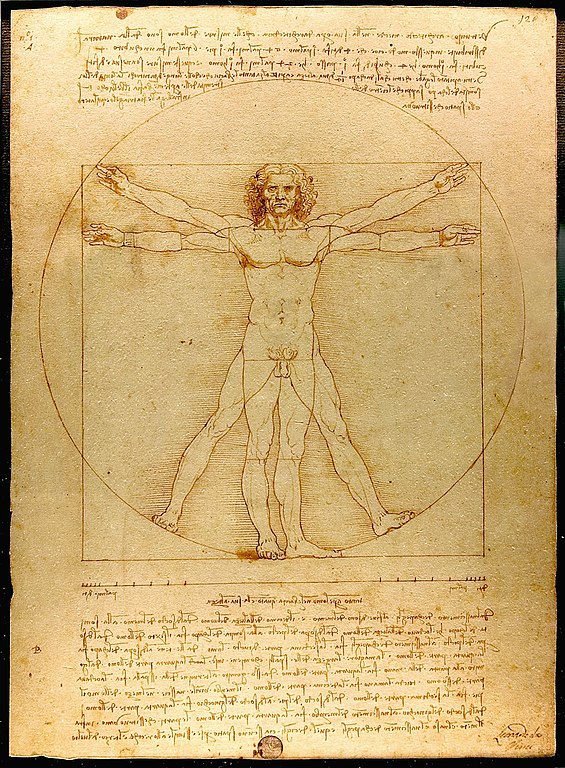
The vitruvian man
These proportions, and others, are faithfully marked out on the tapes by the Spanish Tailors. While the Vitruvian Man is an exercise in mathematical precision, and god like perfection, the tailors realised that customers may not quite achieve this, and used proportions based on the waist and chest, as well as height. If you are fortunate to only need one tape - I salute you.
I really like the system described by Mathew. Not only does it simplify pattern drafting (see Jacqualine’s discussion below), but it has a mathematical elegance and beauty to it.
Jacqualine’s View - Extending the Technique
Having used this system on some of the original garments from Matthew’s interpreted original patterns, I wondered if it would be possible to use it on a pattern that was not already marked up.
I have an order for a garment for which I can use a pattern from “Patterns of Fashion 5”. All of the patterns in the “Patterns of Fashion” series of books are exact measurements from a surviving garment made for a real person. That means the proportions of the garment are not from the modern size scales - “oh, that was a size 10 so I need to add 2 inches all round” does not work. Normally when I scale up a pattern like this I use two different scales at the same time: book scale to real life and original owner to customer scale. That is to say, the original owner may have been a tall, slim, flat chested woman and the customer may be a petite, curvy, well endowed woman, for example.
Patterns of fashion 5
In this case, the book scale is 1:4. Every measurement from the book, if multiplied by 4 in every direction, will replicate the pattern exactly at full size. But I don’t want a replica, I want it to fit the customer. So some key measurements have to be also multiplied by the scale waistO:waistC or bustO:bustC or lengthO:lengthC where O = original owner and C = customer. That’s a lot of arithmetic even for an engineer married to a mathematician!
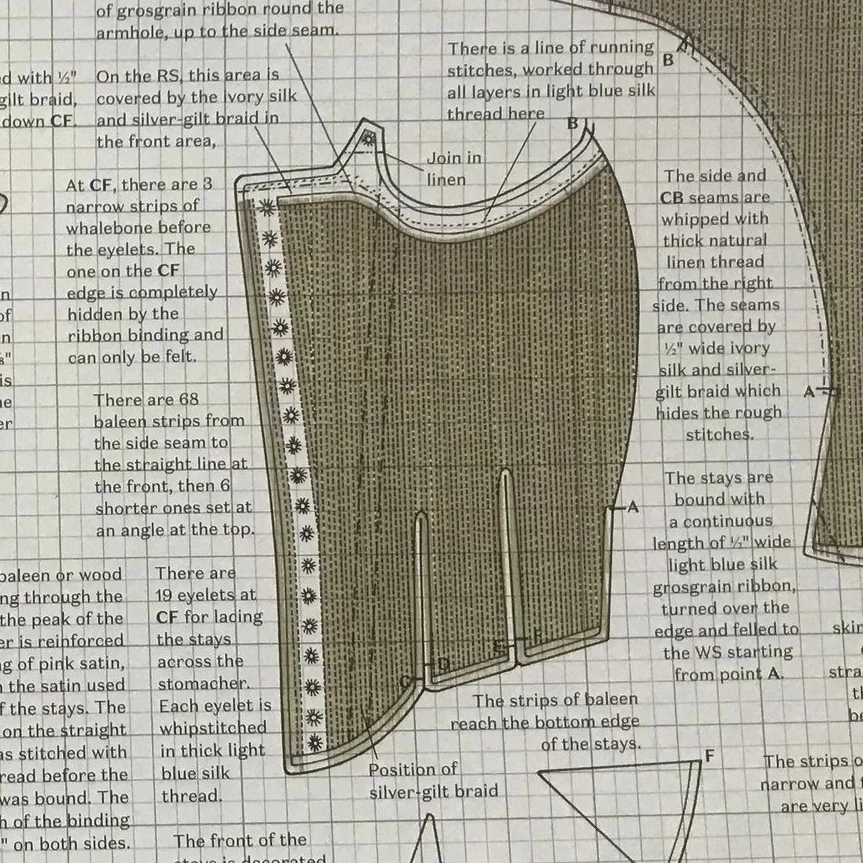
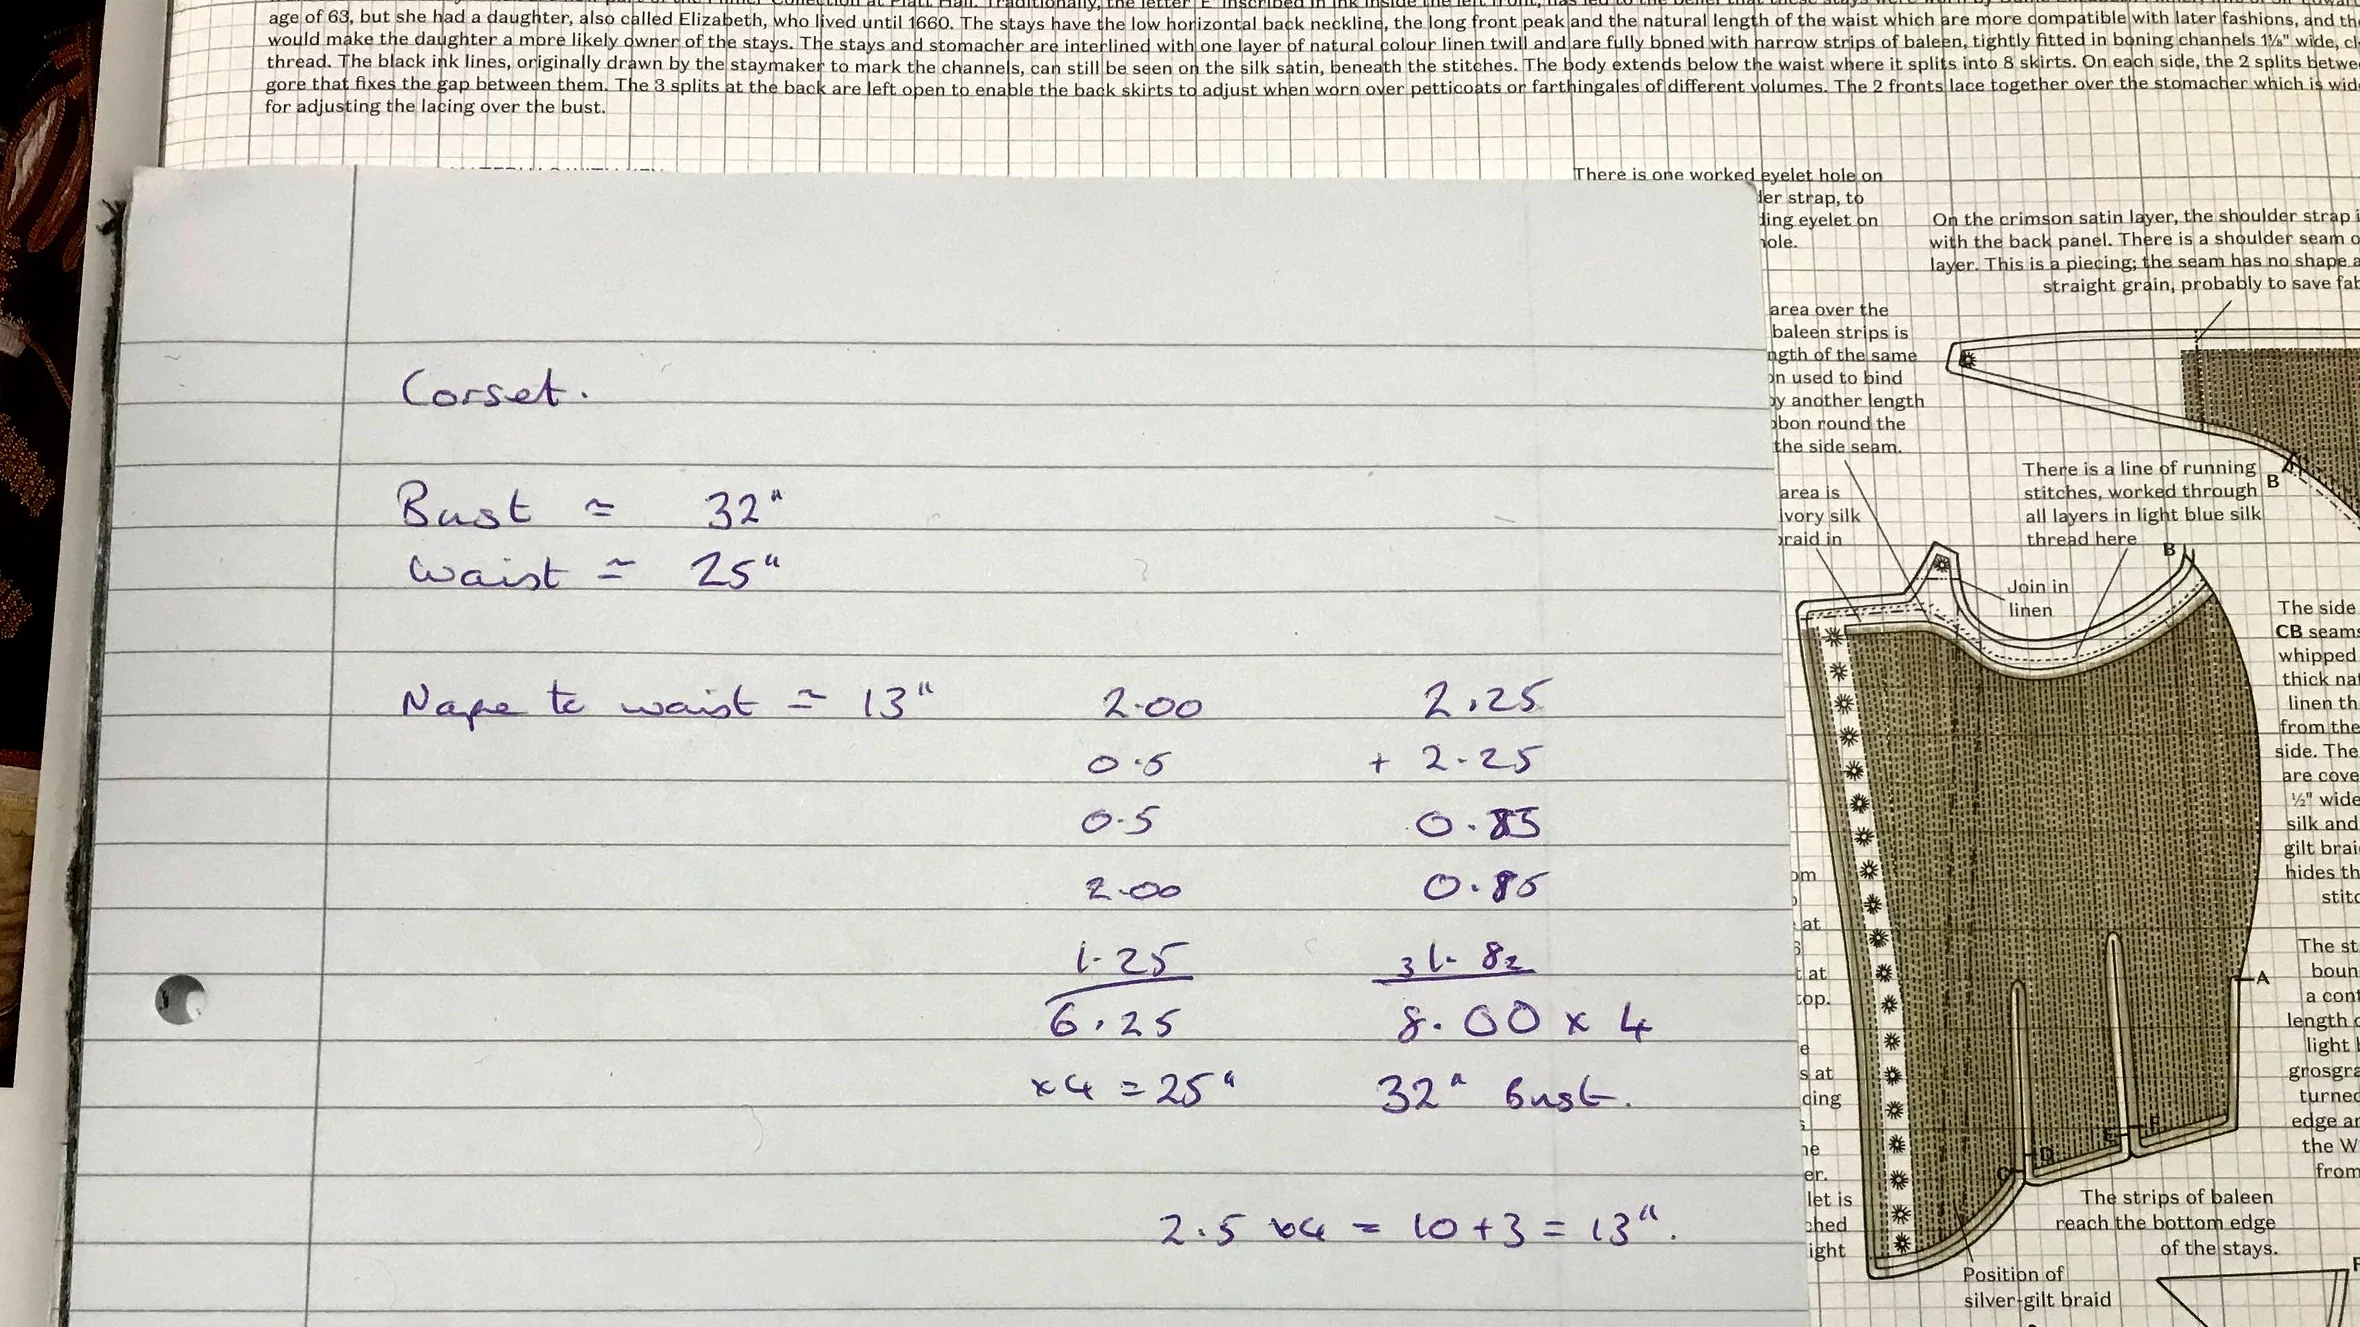
How do the Bara tapes come in? Well, I wondered if it would be possible to work out the key measurements of the original owner and then reverse engineer some Bara tape proportions for the garment. For tight fitting items like corsets, doublets and bodices this might be possible, but less so for loose fitting items as you don’t know how much room has been left for “ease”. For this set of stays, adding up all the measurements around the garment just under the armhole, without the seam allowance, gives the bust measurement. Identifying the waist on all pieces can be trickier but the same thing applies, adding up all the parts gives the original owners waist measurement. The length scale depends on the garment and what you are trying to do. In this case I went for nape of neck to waist as the length scale. One thing of note is that this set of stays includes a stomacher with overlap between the side and the stomacher, so there was a bit of guess work on how overlapped they were on the original! Here are my very rough calculations both at book scale and full scale to check they are realistic.
At this point I made two Bara tapes at book scale - one was 8 inches long and represented the original owner’s bust the other was 6 inches long and represented the waist - I decided that I could not be accurate enough to tell the difference between 6 and 6.25 inches!. The waist one was very fiddly but it worked. Now I used the book scale/owner scale tapes to take proportion measurements at key points for each piece of the pattern directly from the drawings, such as width of this part = di, width of that part = q, etc.
Next I made up (or selected from previously made) tapes at the customer’s full size measurements. The full scale pattern pieces are marked out on paper using width = di here and q there, etc. This does both of the scaling up elements at the same time.
When I come to scale another pattern, I will already have a 6 and 8 inch scale tape, so if the next pattern’s waist, chest or length is 6 or 8 I can jump straight into measuring! Eventually I see myself having a full set of scale tapes at 1/2 inch sizes as well as a full set of full size tapes at probably 2 inch intervals.
Calculating the original owNers size
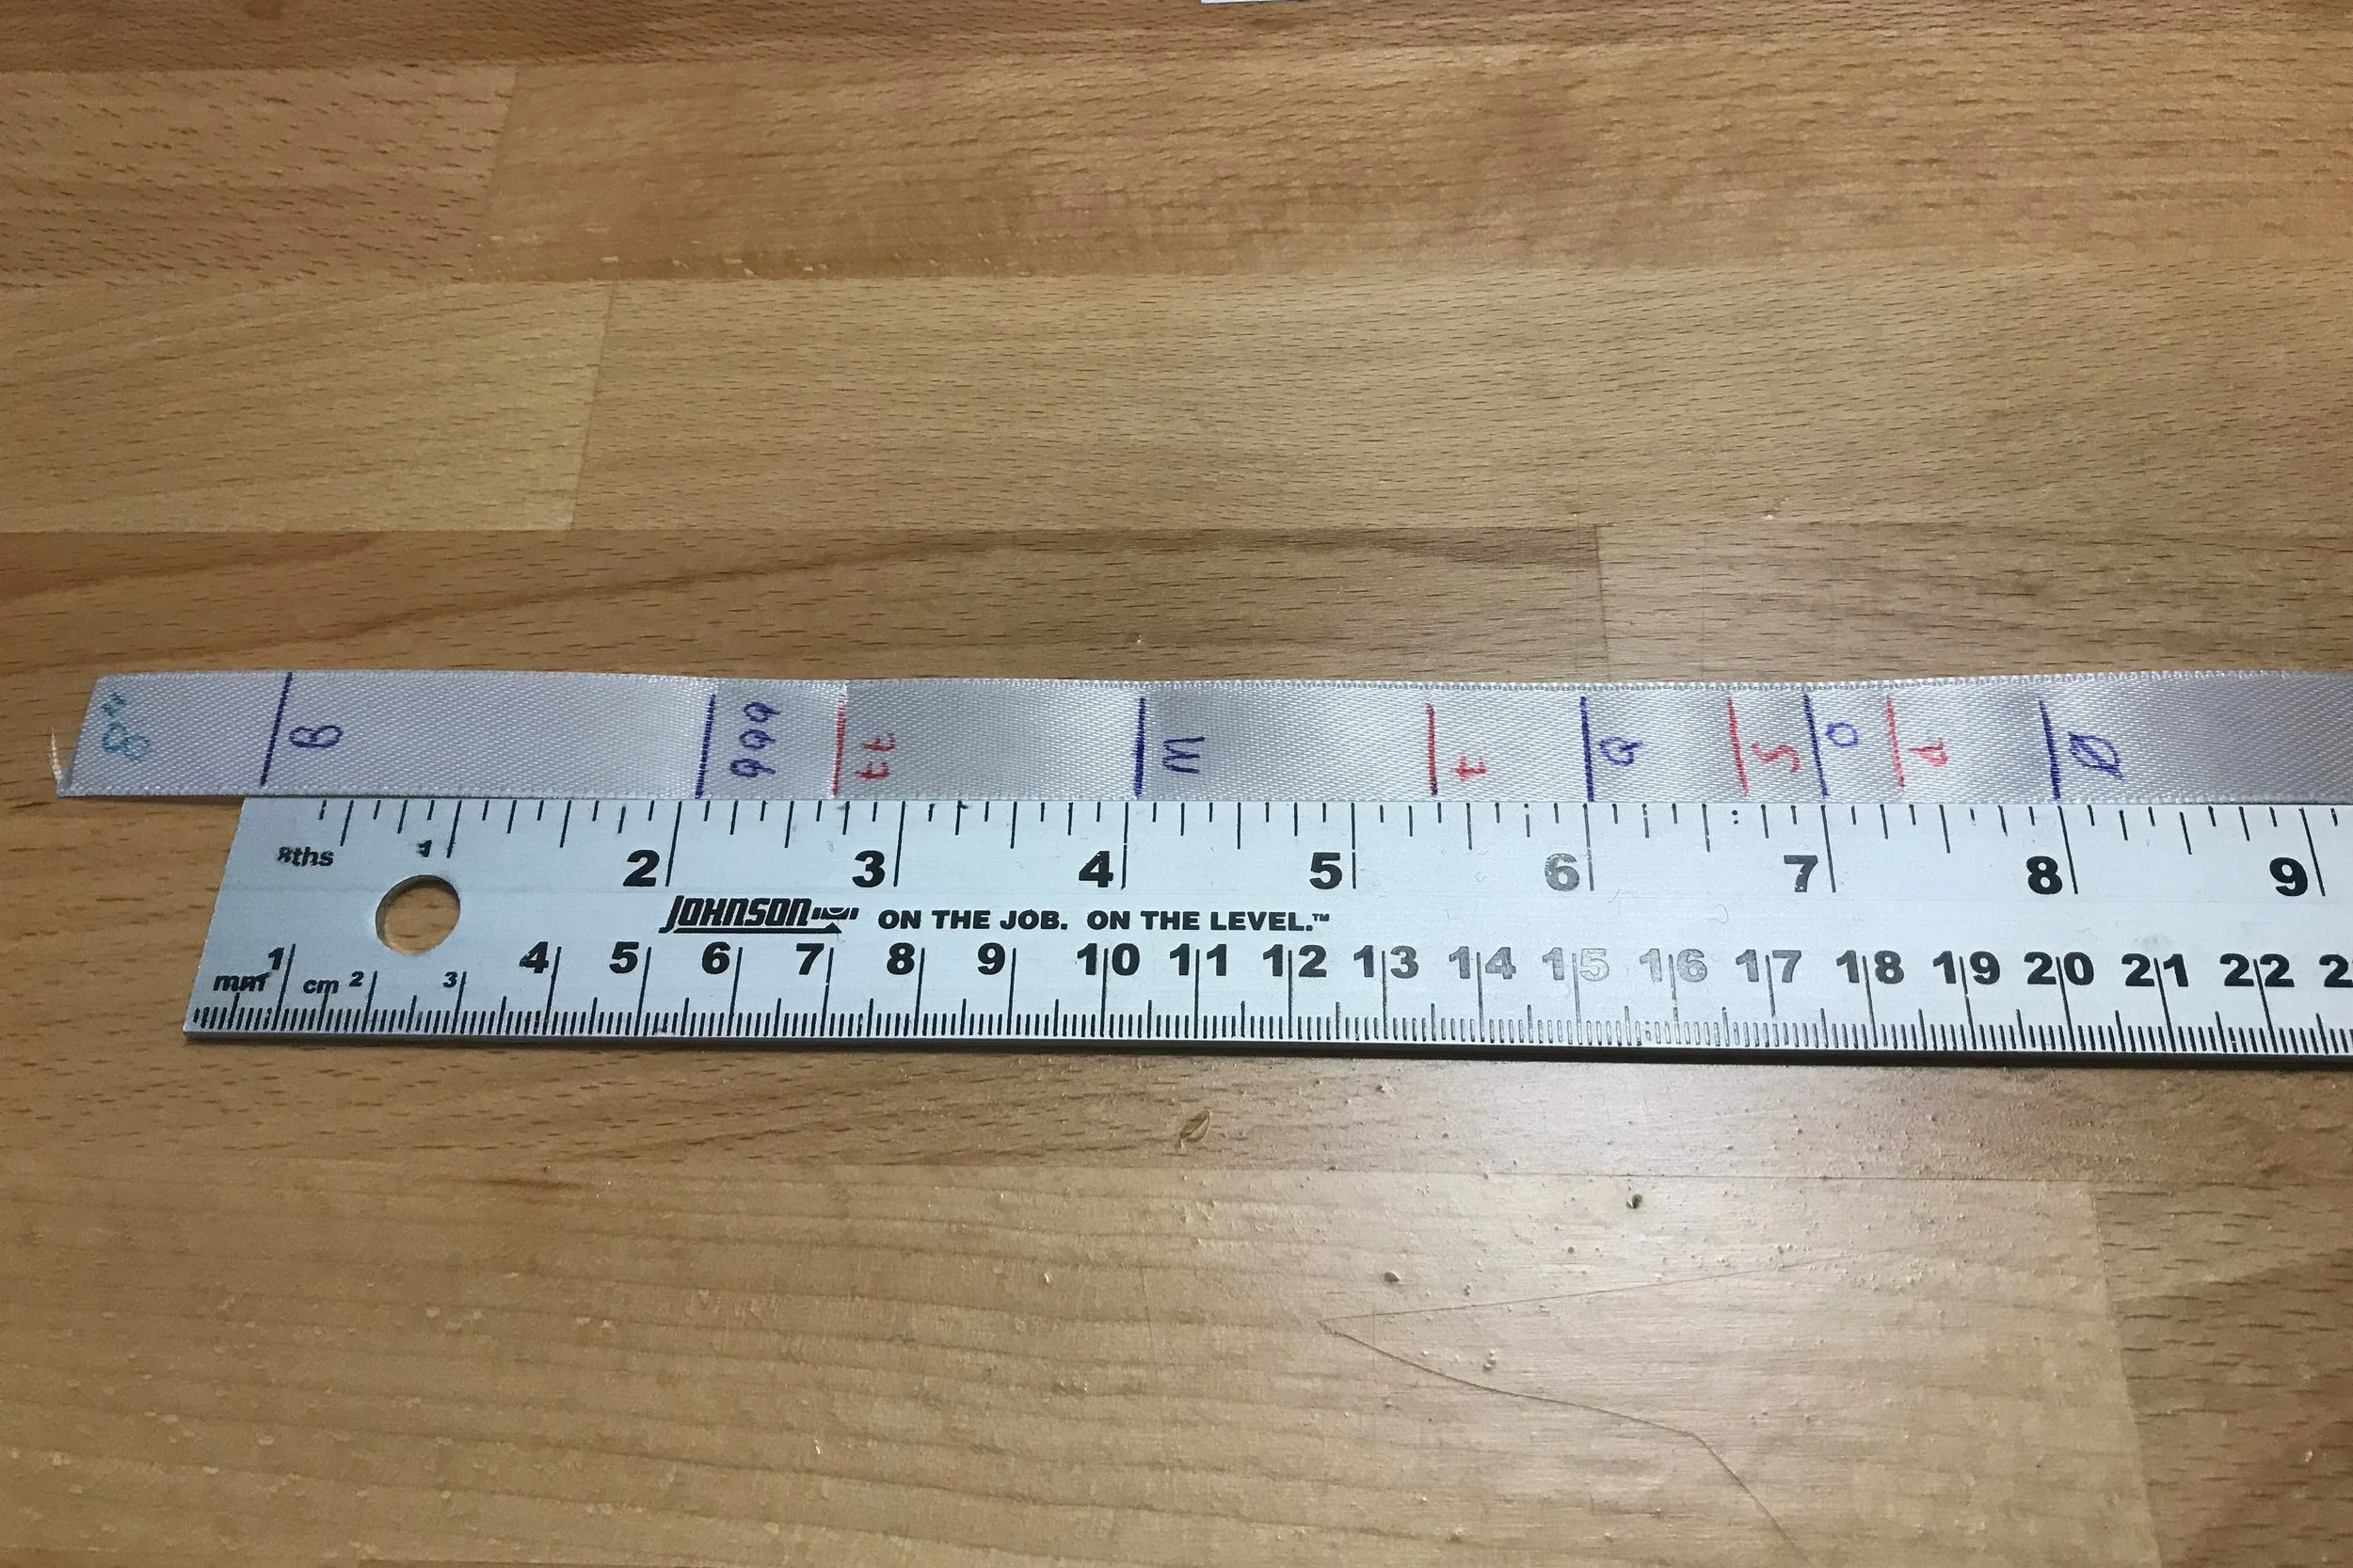
An 8 inch tape

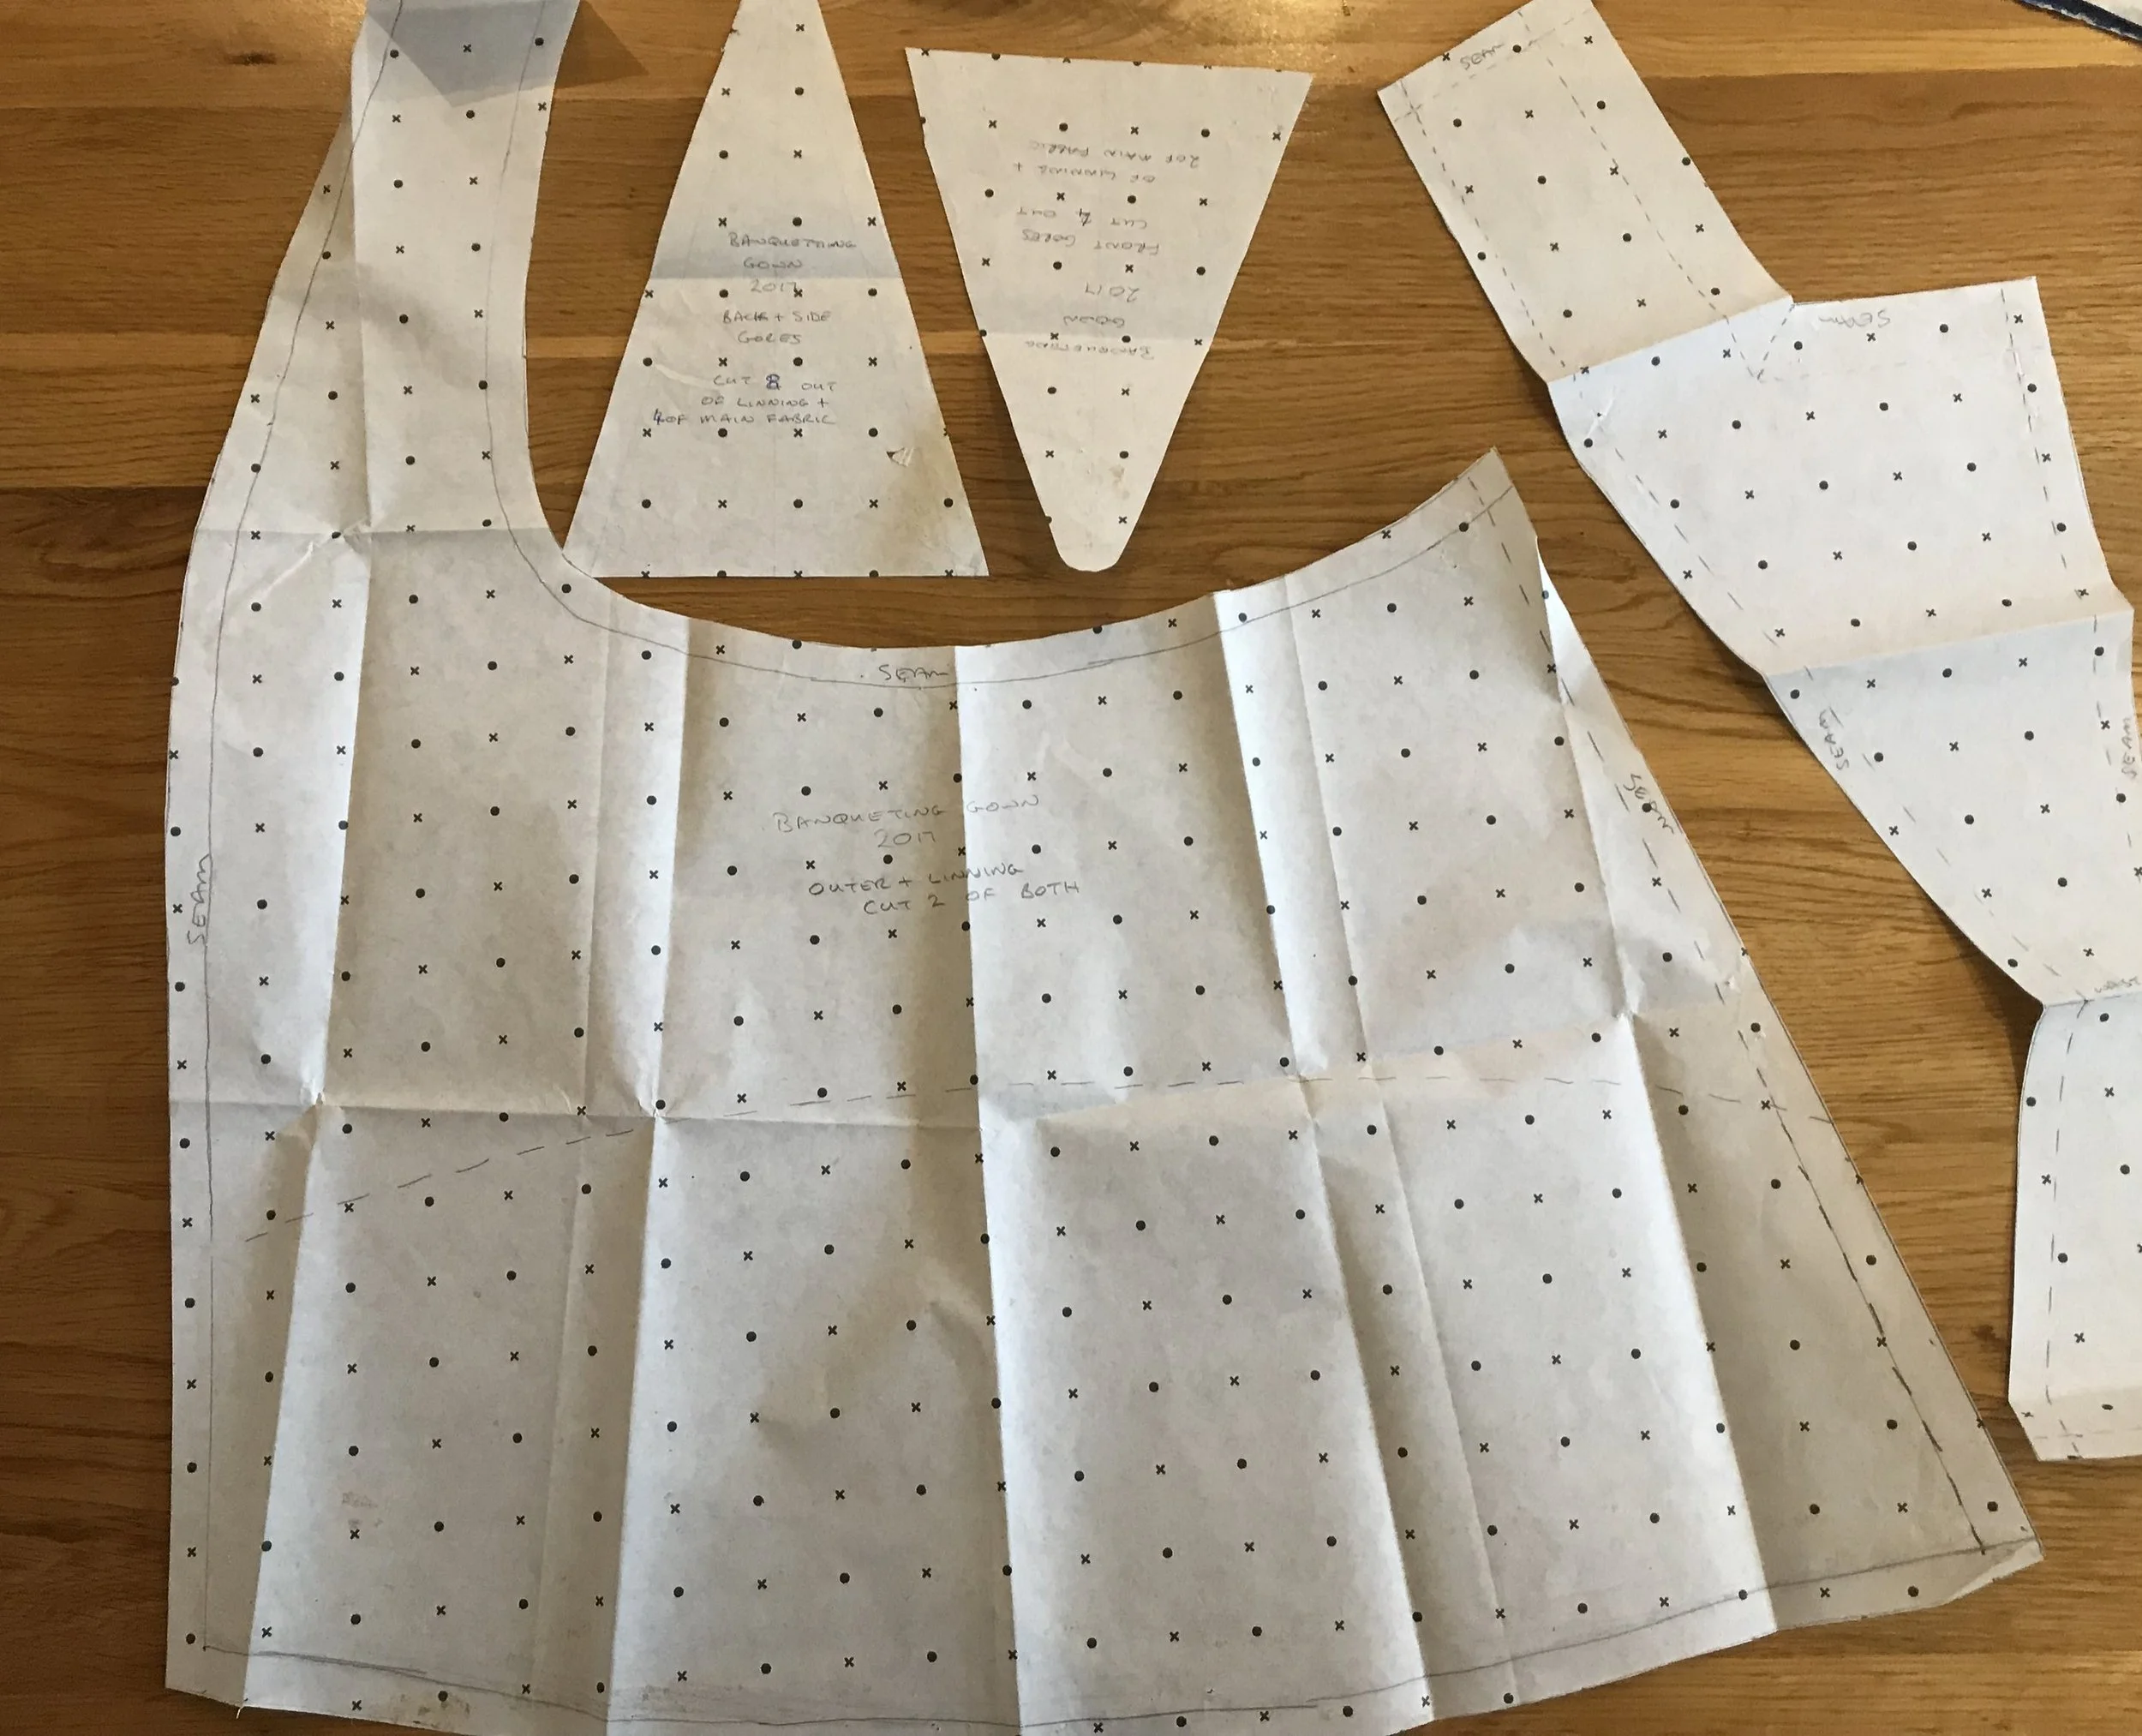
Pattern piece sketch with bara system notes
Recommendation
Overall, we both strongly recommend Matthew’s Modern Maker books. The combination of practical advice on sewing and tailoring techniques and the interpretation of this original pattern scaling technique are fantastic. And as I have shown here, it is not just limited to the patterns in Matthew’s books. However, you should start by investing in both books before setting out to use the techniques.